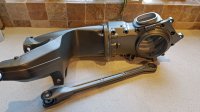
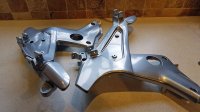
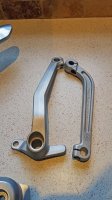
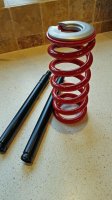
I've looked again at the picture of your crank shaft. The mains and journal would benefit from being polished. You can still use standard mains and connecting rod inserts after polishing. A good machine shop can to that for you. When polished they will have almost a mirror finish and will run very well.
Navigation
Install the app
How to install the app on iOS
Follow along with the video below to see how to install our site as a web app on your home screen.
Note: This feature may not be available in some browsers.
More options
-
Ciao Guest - You’ve landed at the ultimate Guzzi site. NEW FORUM REGISTRATIONS REQUIRE EMAIL ACTIVATION - CHECK YOUR SPAM FOLDER - Use the CONTACT above if you need help. New to the forum? For all new members, we require ONE post in the Introductions section at the bottom, in order to post in most of the other sections. ALWAYS TRY A SEARCH BEFORE STARTING A NEW TOPIC - Most questions you may have, have likely been already answered. DON'T BE A DRIVE-BY POSTER: As a common courtesy, check back in and reply within 24 hours, or your post will be deleted. Note there's decades of heavily experienced Guzzi professionals on this site, all whom happily give endless amounts of their VALUABLE time for free; BE COURTEOUS AND RESPECTFUL!
-
There is ZERO tolerance on personal attacks and ANY HYPERLINKS to PRODUCT(S) or other competing website(s), including personal pages, social media or other Forums. This ALSO INCLUDES ECU DIAGnostic software, questions and mapping. We work very hard to offer commercially supported products and to keep info relevant here. First offense is a note, second is a warning, third time will get you banned from the site. We don't have the time to chase repeat (and ignorant) offenders. This is NOT a social media platform; It's an ad-free, privately funded website, in small help with user donations. Be sure to see the GTM STORE link above; ALL product purchases help support the site, or you can upgrade your Forum profile or DONATE via the link above.
-
Be sure to see the GTM STORE link also above for our 700+ product inventory, including OEM parts and many of our 100% Made-in-SoCal-USA GTM products and engine kits. In SoCal? Click the SERVICE tab above for the best in service, tires, tuning and installation of our products or custom work, and don't miss our GT MotoCycles® (not) art on the BUILDS tab above. WE'RE HERE ONLINE ONLY - NO PHONE CALLS MADE OR RECEIVED - DO NOT EMAIL AND ASK QUESTIONS OR ASK TO CALL YOU.
-
Like the new V100, GuzziTech is full throttle into the future! We're now running on an all-new server and we've updated our Forum software. The visual differences are obvious, but hopefully you'll notice the super-fast speed. If you notice any glitches or have any issues, please post on the Site Support section at the bottom. If you haven't yet, please upgrade your account which is covered in the Site Support section or via the DONATE tab above, which gives you full site access including the DOWNLOADS section. We really appreciate every $ and your support to keep this site ad-free. Create an account, sign in, upgrade your account, and enjoy. See you on the road in 2024.
You are using an out of date browser. It may not display this or other websites correctly.
You should upgrade or use an alternative browser.
You should upgrade or use an alternative browser.
Breva 1100 Restoration Project
- Thread starter NPS
- Start date
Bigbear
Cruisin' Guzzisti
Excellent advice Scott!
I read the thread & was also saying No-no in my mind.
Similarly with wheel bearings - ALWAYS heat the wheel bearing carrier hub before drifting the bearings out as well as putting the bearings in the freezer (still sealed in their plastic bags) at least 15minutes prior to reinstalling.
Just Drifting them in & out without any such care just removes irreplaceable wheel material that will lead eventually to the wheel bearing turning in the wheel.
I have had a reputable bike shop do just this to my Mk5 & intervened much to his shock.
Bigbear
Cruisin' Guzzisti
To NPS - Keep up the good work.
Breva's are rear down under & they are a much underrated bike.
As you say that 1100 lump makes a difference.
Breva's are rear down under & they are a much underrated bike.
As you say that 1100 lump makes a difference.
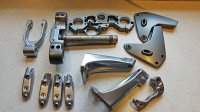
I have had some parts back. The fasteners have been zinc plated. At the last moment I opted for chromate treated to give better corrosion resistance. I'm not sure about the colour but I'm sure it will grow on me.
And yes I was prepared for the consequences of breaking down the throttle bodies.
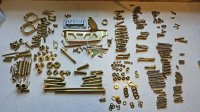
I then bagged group of items and put in order of size. I'm using the parts manual for identification and a little memory for the distinctive parts.
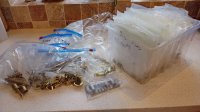
And yes I was prepared for the consequences of breaking down the throttle bodies.

I then bagged group of items and put in order of size. I'm using the parts manual for identification and a little memory for the distinctive parts.

Last edited:
It will be one gorgeous bike when you put her back together.
Thank you John, it is what drives me on. It will be considerably better than a new one (apart from the dash which is a big problem).It will be one gorgeous bike when you put her back together.
Can I ask you what you think of the Chromate Zinc. Is it going to look a bit odd having gold fasteners in silver or grey silver parts. I'm opting for the red paint scheme and that might be better than black or grey. If this forum has a poll option I might start one to gauge opinion as some of the visible fasteners might be better in plain shinny Zinc.
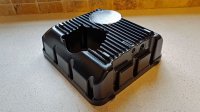
I have the sump casting to prep and paint then the front casting (in front of timing stuff). I have an order being delivered next week that has been on back order for a month that has the big end bolts and clutch plates. I already have the engine seals, shells cam followers and gaskets. The camshaft I was sent by reboot spares was a V11 and doesn't match ( front of shaft is different also cam timming different). They are swapping it for a used Grisso 11 cam next week. If it is acceptable then I will then be ready to start re-building the engine.
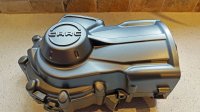
The gearbox, I don't intend to open as it was fine. It needs paint stripping and painting, which I am confident to do now after spray painting the engine block and getting a good result.
The gearbox, I don't intend to open as it was fine. It needs paint stripping and painting, which I am confident to do now after spray painting the engine block and getting a good result.
Thank you John, it is what drives me on. It will be considerably better than a new one (apart from the dash which is a big problem).
Can I ask you what you think of the Chromate Zinc. Is it going to look a bit odd having gold fasteners in silver or grey silver parts. I'm opting for the red paint scheme and that might be better than black or grey. If this forum has a poll option I might start one to gauge opinion as some of the visible fasteners might be better in plain shinny Zinc.
I think the "gold" look will be fine. Once it is together you can judge.
WOW!!! I cannot wait to see the pictures of this thing when it is done. The plating and powder coating pictures are unbelievable.
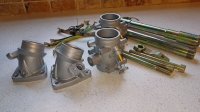
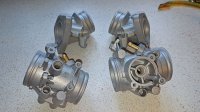
The throttle bodies and inlet manifolds were aqua blasted and look as good as new. I will get some ACF50 on them asap to stop oxidation. Also a few more parts back from plating. Yes there is a head bolt missing and they are sending it on. I had these plated as the one on the inside catches water when it rains and there is a lot of rusting in that pocket in the head adjacent to the inner spark plug.


Last edited:
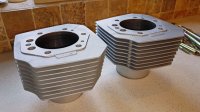
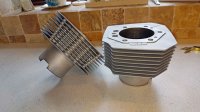
The cylinder barrels and heads have been shot and then aqua blasted. I had painted them previously with silver to cover up the corrosion. The paint was hard to remove but they came up nice. I plan to make sure each head gasket surface is flat with a technique my father showed me. I sheet of ground glass with fine grinding paste in a figure of 8 motion.
The anti-ringing rubbers need a clean before refitting.
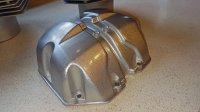
The head covers I have done by hand in 2 pack silver. I did not expect the effect I have as the silver particles are quite coarse. Nice though.
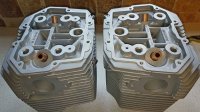
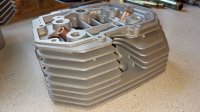
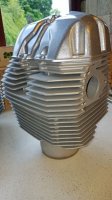
The anti-ringing rubbers need a clean before refitting.
The head covers I have done by hand in 2 pack silver. I did not expect the effect I have as the silver particles are quite coarse. Nice though.


That bike may end up too pretty to ride. I noticed your CARC rod just now. When you put it back together you may want to install the Stelvio silent block 883045. I've been told it makes the drive line smoother at low speeds.
Thank you John that is a really good tip. I was not aware of that change. Getting to know a bike, one adapts and makes adjustments when riding. I am aware of harshness but not through anything I have found to be amiss on my dismantling and investigation journey. Part of the design we love so much. If it helps, that if something to be researched.
I'm still not sure of the yellow Chrome passivate on the Zinc. It will help with corrosion prevention. I guess I committed now and see how it turns out.
I have to admit a mistake that I will learn from. On putting back the oil pump it did not go back square. There are two dowels that fix it in place. It is the old design that has two gears before engine number KP 015 something. Mine is KP 012522.
I torqued the pump into place and one of the dowels was stuck and did not pass into the hole correctly. The result was the pump deformed sufficiently that the idle gear of the two gears, is stiff to turn. I have a new pump ordered from Gusibits here in the UK.
I torqued the pump into place and one of the dowels was stuck and did not pass into the hole correctly. The result was the pump deformed sufficiently that the idle gear of the two gears, is stiff to turn. I have a new pump ordered from Gusibits here in the UK.
Something to remember. If it doesn't go easily, something is wrong. Which means take second look to see why it doesn't go together easily.

