• Ciao Guest - You’ve landed at the ultimate Guzzi site. NEW FORUM REGISTRATIONS REQUIRE EMAIL ACTIVATION - CHECK YOUR SPAM FOLDER - Use the CONTACT above if you need help. New to the forum? For all new members, we require ONE post in the Introductions section at the bottom, in order to post in most of the other sections. ALWAYS TRY A SEARCH BEFORE STARTING A NEW TOPIC - Most questions you may have, have likely been already answered. DON'T BE A DRIVE-BY POSTER: As a common courtesy, check back in and reply within 24 hours, or your post will be deleted. Note there's decades of heavily experienced Guzzi professionals on this site, all whom happily give endless amounts of their VALUABLE time for free; BE COURTEOUS AND RESPECTFUL!
  • There is ZERO tolerance on personal attacks and ANY HYPERLINKS to PRODUCT(S) or other competing website(s), including personal pages, social media or other Forums. This ALSO INCLUDES ECU DIAGnostic software, questions and mapping. We work very hard to offer commercially supported products and to keep info relevant here. First offense is a note, second is a warning, third time will get you banned from the site. We don't have the time to chase repeat (and ignorant) offenders. This is NOT a social media platform; It's an ad-free, privately funded website, in small help with user donations. Be sure to see the GTM STORE link above; ALL product purchases help support the site, or you can upgrade your Forum profile or DONATE via the link above.
  • Be sure to see the GTM STORE link also above for our 700+ product inventory, including OEM parts and many of our 100% Made-in-SoCal-USA GTM products and engine kits. In SoCal? Click the SERVICE tab above for the best in service, tires, tuning and installation of our products or custom work, and don't miss our GT MotoCycles® (not) art on the BUILDS tab above. WE'RE HERE ONLINE ONLY - NO PHONE CALLS MADE OR RECEIVED - DO NOT EMAIL AND ASK QUESTIONS OR ASK TO CALL YOU.
  • Like the new V100, GuzziTech is full throttle into the future! We're now running on an all-new server and we've updated our Forum software. The visual differences are obvious, but hopefully you'll notice the super-fast speed. If you notice any glitches or have any issues, please post on the Site Support section at the bottom. If you haven't yet, please upgrade your account which is covered in the Site Support section or via the DONATE tab above, which gives you full site access including the DOWNLOADS section. We really appreciate every $ and your support to keep this site ad-free. Create an account, sign in, upgrade your account, and enjoy. See you on the road in 2024.

dashboard interference

Roblatt

High Miler
Joined
Nov 18, 2008
Messages
603
Location
Nar Nar Goon, Victoria, Australia
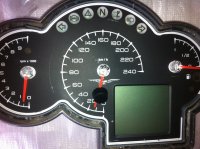
In the Ride Report thread, I wrote about a ride during searing heat. During that ride, my dash LCD began to lose parts of the numbers, show lines through it, go blank etc.

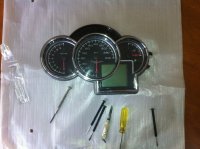
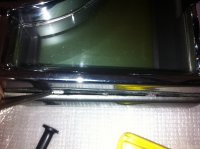
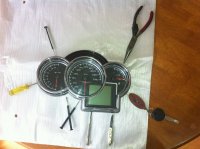
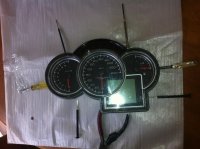
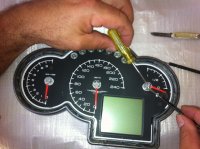
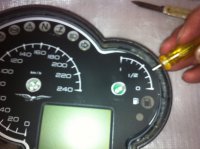
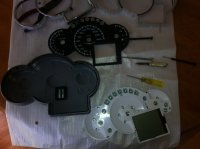
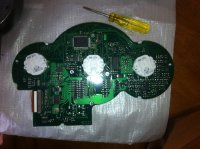
Since returning, I've ridden in cooler temps,, had the dash cover off and sprayed WD40 into the connections and tried to see what causes this. If I turned the engine off and restart, then all is fine, even the data is OK (time, distance traveled etc).

What I did realise, is that at 3000rpm the LCD part of the dash goes unreadable (as described above), but below 3000rpm it is fine and functions normally. As soon as I raise the revs, I loose the LCD again. I've tried in different gears to ensure it wasn't the speed. Speed is irrelevant as is load.

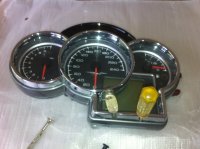
All the analogue gauges are fine. This leads me to think of an electrical interference like engine noise on the old car radios.

It's an 06 B11 with 78,000kms on the clock. Does any one have any experience or thoughts?

thanks

Robert
 
Check your high voltage leads. Make sure they are firmly in the coils and that the resistor caps are functioning correctly. If you know anyone with an oscilloscope they may be able to detect any spurious voltages or RF emission being generated from the system. As a test, shield your high voltage leads (wrap in foil or metal fine screen with a connection to ground) and see if the problem goes away.
 
Robert,

I don't want to be a bringer of doom, but I think there is more going on here than interference from HT leads. No, I haven't been in the dash but - traditionally LCDs use a conductive foam connector to connect the LCD to the printed circuit board. it sounds to me like this MAY be the issue, rather than interference.

Take it to someone who is competent on working on these type of items, as usually the downward spiral starts when you disturb these connections (as you have seen - disturbed by heat) and they usually need replacing.

Sorry, just telling it as I see it, Robert.
 
Tony,


Thanks for that. I suppose these things are never simple, but I'd rather know up front if it's major.
I will try the HT leads first obviously, but if it is the scenario you allude to, do I take the bike in or just the dash, and I presume you mean an electronics expert?

thanks

Robert
 
Folks,

the LCD part of my dash died completely. These things aren't cheap so I decided to pull it apart to see if it can be repaired. Now I looked all over and couldn't find instructions on a tear down.

So what does a good Guzzi owner do? Well I stripped mine down. See below for the photos and what I did. Maybe, some one will benefit from the post.

After achieving the tear down came the hard part. I convinced the good lady to invite a neighbor for dinner tonight. He is the local propeller head and has a good chance of finding the fault. Otherwise I'll send it off.

I'll keep you posted on what happens. In the meantime, if anyone has any ideas of what to do next, do tell.

cheers


.
 

Attachments

  • IMG_0523 (800x598).jpg
    IMG_0523 (800x598).jpg
    285.2 KB · Views: 573
  • IMG_0524 (800x598).jpg
    IMG_0524 (800x598).jpg
    263.9 KB · Views: 568
  • IMG_0525 (800x598).jpg
    IMG_0525 (800x598).jpg
    269.5 KB · Views: 564
  • IMG_0527 (800x598).jpg
    IMG_0527 (800x598).jpg
    294.3 KB · Views: 568
  • IMG_0528 (800x598).jpg
    IMG_0528 (800x598).jpg
    294.9 KB · Views: 566
  • IMG_0529 (800x598).jpg
    IMG_0529 (800x598).jpg
    264.1 KB · Views: 567
  • IMG_0530 (800x598).jpg
    IMG_0530 (800x598).jpg
    196.8 KB · Views: 561
  • IMG_0532 (800x598).jpg
    IMG_0532 (800x598).jpg
    302 KB · Views: 560
  • IMG_0533 (800x598).jpg
    IMG_0533 (800x598).jpg
    293.6 KB · Views: 558
  • IMG_0534 (800x598).jpg
    IMG_0534 (800x598).jpg
    240 KB · Views: 560
  • IMG_0536.JPG
    IMG_0536.JPG
    1.5 MB · Views: 563
  • IMG_0537 (800x598).jpg
    IMG_0537 (800x598).jpg
    235.4 KB · Views: 564
  • IMG_0538 (800x598).jpg
    IMG_0538 (800x598).jpg
    320.8 KB · Views: 574
update:

I connected the dash as it appears in the last photo and fired up the 'ol girl. The dash operated faultlessly, even when I revved the buggery out of the bike ( I don't know what revs because the gauge needles are off).

This must be a bad connection of sorts that has corrected itself when the casing was removed.

Any ideas where to look? I haven't jiggled the wires while running because I wasn't sure if that would short circuit anything. Can I give them a jiggle and maybe a tap to see what causes the blackout, or will that do more damage?

Robert
 
Robert,

Juggle away - it is unlikely to cause shorting. Check all connections, maybe some electrical cleaning spray on them (Jaycar and the like will have it) re-assemble and test before doing it all back again.

You obviously found the culprit you just now need to identify which one...

Thanks for doing all the disassembly experimentation for the rest of us.
 
Mackers said:
These jokers may be able to help - http://carmoelectronics.com.au/index.php?main_page=motoguzzi&zenid=1l306f2nedoqm6s4dqnunrmml7. I don't know anything about them, though.

This is where I sent my dash to get it repaired. I had 3 different BNS12 dashes fail on me with three different manners of failure.

I sent the last one to Carmo (still have the other 2). They found evidence of water damage and some faulty connections. Connections were repaired and whole unit was given a double coating of water proofing.

The main company is in the Netherlands, although there is a US address to send your dash to if you are in the US. The US location just ships the dash to the Netherlands. I got my dash back in about 2 weeks, not the cheapest thing I've ever done but the dash appears to actually be fixed now.
 
Thanks for the replies.

My dinner guest had a look and said the ribbon was crooked (last pic, bottom left, it's white). We hooked it up again. He jiggled, I looked. We managed to make it fail once.

The remedy for this is pull out the ribbon cable, and re-plug ensuring the black spacer strip is pushed in at the same time to make it nice and snug.

Before I do this I will get some contact cleaner. Do I just spray the connectors or the whole circuit board?

Also, does any one have any idea what type of adhesive I should use? I don't want to to use a strong glue in case I need to pull it apart again, but it needs to be water proof. Does anyone know of a waterproof filler that isn't a glue? With all the screws holding it together that may be all I need. This will fill the area between the grey casing and the white outline on the dash when assembled (see pics 7 & 8).

thanks for you help

Robert
 
Hi Robert,

Spray when disconnected and spray both the connector and socket. Reassembling so the ribbon mates inside the socket straight and firm should do the trick. I would not use any sealant here as most (but not all) sealants use some chemicals than are acidic as they cure - better to avoid. A good clean mechanical/electrical connection should be OK.

Just ensure the re-assembly makes everything waterproof again.

Good work - thanks for your efforts.
 
thanks Tony.

There is a type of silicone looking stuff in there which I presume is a water sealant. Since I'm an all weather rider, I don't fancy reassembling with a replacement.

I'll search around and report back before I use anything.

regards

Robert
 
Roblatt said:
thanks Tony.

There is a type of silicone looking stuff in there which I presume is a water sealant. Since I'm an all weather rider, I don't fancy reassembling with a replacement.

I'll search around and report back before I use anything.

regards

Robert
I would use a neutral cure silicone, these are usually the type recommended for Polycarbonate Roofing etc, to seal the housing. I probably wouldn't use any directly on the electronic components unless you use something specifically designed for this type of use i.e. clear or gray Dow Corning 3145; white General Electric RTV 162 or gray high strength RTV 167; and clear Loctite 5140 however these are usually expensive. You could always go to your nearest Radioshack or similar and see what they have.

Steve
 
I've found a product from Selleys called "auto fix instant gasket". It is silicone RTV silicone rubber that is Acetic (with accent over the "i") cure.

It says if adhesion is not required, wipe both surfaces with an oily cloth. It's waterproof heat/cold resistant and flexible. Sounds perfect.

2 questions, any reason not to use it, and should I wipe the surfaces with oil or let adhesion take place? maybe only wipe one surface with oil.

It will be used to form a waterproof seal when I replace the clear faceplate to the body of the dash as can be seen in photo 7 in the groove where the current gasket is poking out.

Steve, this appears to be similar to the product type you described.

cheers

Robert
 
Roblatt, I am a bit concerned that you propose to use an acetic cure silicon.
The acetic cure refers to acetic acid which is the major ingredient of vinegar.
I think you should avoid this.
Silicon used in bathrooms and other wet areas is neutral cure but I note that it is possible for mould to grow under the silicon.
I think that you possibly could use a Selleys product called 'All Clear'.
It is a prick of a substance to use as it is very sticky but, it has fairly low adhesion and will not allow mould to grow under it.
My 2 cents worth
Cheers
Brian. :D
 
For things like the ribbon connectors, I would just use an electrical contact lubricant and cleaner spray such as Servisol.
This will keep the wet out, but will not harm anything.
You should use the same stuff on the main multi pin plug on the back of the dash, and any other connectors you can find, including the two on the ECU.
 
Roblatt said:
I've found a product from Selleys called "auto fix instant gasket". It is silicone RTV silicone rubber that is Acetic (with accent over the "i") cure.

It says if adhesion is not required, wipe both surfaces with an oily cloth. It's waterproof heat/cold resistant and flexible. Sounds perfect.

2 questions, any reason not to use it, and should I wipe the surfaces with oil or let adhesion take place? maybe only wipe one surface with oil.

It will be used to form a waterproof seal when I replace the clear faceplate to the body of the dash as can be seen in photo 7 in the groove where the current gasket is poking out.

Steve, this appears to be similar to the product type you described.

cheers

Robert
Robert, this is actually the opposite of neutral cure - yes it uses acetic acid which will attack the PCB's and may also attack the plastic of the dash body. The grey plastic is ABS which can be damaged by acetic acid and if the clear lens is polycarbonate there is a chance it will also be susceptible.
I would look at the product Brian (UK) suggested on the PCB and a small amount of the silicone Brian (QLD?) suggests to seal the plastic housing

Steve
 
OK, I'm back on air.

Over the years, many people have complained about condensation inside the dash. Well, these photos show the air vents location identified by the toothpicks sticking out of them. I also have a close up of the air vents from inside the dash and outside so they can be identified with out dismantling for those of you who wish to drill them out for better airflow.

The vent at the LCD is sealed,the others are open. If you do drill them out be careful as the inside edge is close to the circuit board, study the photos for the best angle before drilling or be safe and pull the dash apart for security.
 

Attachments

  • IMG_0539 (800x598).jpg
    IMG_0539 (800x598).jpg
    306.7 KB · Views: 220
  • IMG_0544 (519x388).jpg
    IMG_0544 (519x388).jpg
    49.7 KB · Views: 210
  • IMG_0545 (388x519).jpg
    IMG_0545 (388x519).jpg
    115.1 KB · Views: 210
Back
Top