• Ciao Guest - You’ve landed at the ultimate Guzzi site. NEW FORUM REGISTRATIONS REQUIRE EMAIL ACTIVATION - CHECK YOUR SPAM FOLDER - Use the CONTACT above if you need help. New to the forum? For all new members, we require ONE post in the Introductions section at the bottom, in order to post in most of the other sections. ALWAYS TRY A SEARCH BEFORE STARTING A NEW TOPIC - Most questions you may have, have likely been already answered. DON'T BE A DRIVE-BY POSTER: As a common courtesy, check back in and reply within 24 hours, or your post will be deleted. Note there's decades of heavily experienced Guzzi professionals on this site, all whom happily give endless amounts of their VALUABLE time for free; BE COURTEOUS AND RESPECTFUL!
  • There is ZERO tolerance on personal attacks and ANY HYPERLINKS to PRODUCT(S) or other competing website(s), including personal pages, social media or other Forums. This ALSO INCLUDES ECU DIAGnostic software, questions and mapping. We work very hard to offer commercially supported products and to keep info relevant here. First offense is a note, second is a warning, third time will get you banned from the site. We don't have the time to chase repeat (and ignorant) offenders. This is NOT a social media platform; It's an ad-free, privately funded website, in small help with user donations. Be sure to see the GTM STORE link above; ALL product purchases help support the site, or you can upgrade your Forum profile or DONATE via the link above.
  • Be sure to see the GTM STORE link also above for our 700+ product inventory, including OEM parts and many of our 100% Made-in-SoCal-USA GTM products and engine kits. In SoCal? Click the SERVICE tab above for the best in service, tires, tuning and installation of our products or custom work, and don't miss our GT MotoCycles® (not) art on the BUILDS tab above. WE'RE HERE ONLINE ONLY - NO PHONE CALLS MADE OR RECEIVED - DO NOT EMAIL AND ASK QUESTIONS OR ASK TO CALL YOU.
  • Like the new V100, GuzziTech is full throttle into the future! We're now running on an all-new server and we've updated our Forum software. The visual differences are obvious, but hopefully you'll notice the super-fast speed. If you notice any glitches or have any issues, please post on the Site Support section at the bottom. If you haven't yet, please upgrade your account which is covered in the Site Support section or via the DONATE tab above, which gives you full site access including the DOWNLOADS section. We really appreciate every $ and your support to keep this site ad-free. Create an account, sign in, upgrade your account, and enjoy. See you on the road in 2024.

GT-Rx Airbox cover install

Bgarceau

Tuned and Synch'ed
GT Contributor
Joined
Jul 5, 2014
Messages
43
Location
Mont Vernon, NH USA
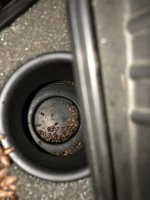
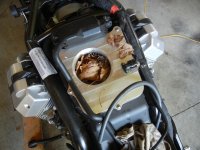
I installed the beautiful GT-Rx CNC cut aluminum airbox cover on my ‘08 1200S this past weekend. When I (finally) got the tank off and took the plastic plenum cover off, here’s what I saw:
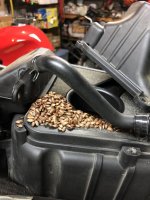
DC7862AA 2099 41A6 8CC7 608B39DD98C5

Say what?

B42B0312 8FC3 467D AEF5 05A8BB3717AE

Thoughts on how this happened? I have had mice load up a motorbike muffler with seeds and nuts over the winter before, which was impressive enough as the muffler was about 10”off the ground.

But is this rodent work, or some set of perfect conditions where this specific type of seed got caught up into the air scoop while I blissfully rode along and were deposited as seen here?

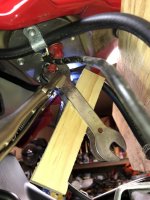
Here’s what I resorted to so that I could disconnect the fuel line and remove the tank. It’s the only thing that worked for me.
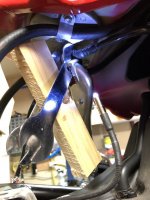
0D3BD888 6F71 4867 9478 D590139B1F32

The instructions that describe how to get this thing apart say that one pushes the hose end of the connector toward the tank outlet, while pulling back on the gray disk thing at the same time. I was not able to do it.
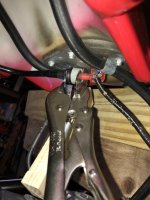
B0D3F5B9 C3A0 4108 9EE8 254D5321C113

The connector appears to be constructed to accept a tool. So I kind of constructed one, using two (Park) bicycle wrenches (11mm & 14mm), a scrap piece of 3/4” pine, and a small pair of Vice Grips. With this all in place I Could just wiggle the thing a bit while pulling back and off.
8031B41E 1660 44C1 9F2B 32D7EE0A1DCD

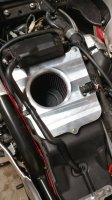
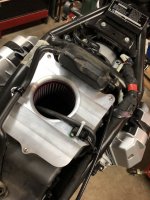
Lastly, here is the new airbox cover in place with hi-flow BNC air filter. I wanted to ask whether there is any problem with my routing of the crankcase vent tube, seen here zip tied to the top.
53420E44 7B75 4ACF AE60 571112E6E675
 
Last edited:
I think that tube is the gearbox breather, trace it's origin to prove me wrong. It doesn't need to "feed" the injectors, but should be located somewhere under the tank and be connected to nothing.

Before you refit the fuel line, try smearing a little petroleum jelly or dielectric grease over the male part. Should make it easier next time.
 
If you didn't remove fuel pressure that connector is a bugger to get disconnected and the "tools" made it possible. Next time disconnect teh fuel pump and attempt to start. The line comes off relatively easy if you do that. As to the seeds, mice will go everywhere. I found mouse nests in the valve chamber of my 1926 Ford Model T when I started the restoration.
 
Dave, thanks for your comments and I did use petro jelly last time and so was a bit surprised as the last (first) time I removed the tank the connector came off much easier.

You know John, I forgot all about relieving the fuel line pressure. Ugh.
 
Might be a bit blonde here but maybe an easier or cheaper solution here might be to put fair sized washers under the original screws to hold the middle airfilter plate on- negating the need to purchase the aluminium part. My airfilter box was full of the foam you can see on the middle plate- mine disintegrated. :( You would have to drill to suit the sensor though.
 
but maybe an easier or cheaper solution here
Sure. So noted as to why I won't be doing another run of these once my stock is depleted. Just make sure you fix the fueling if you do this mod.
 
Just back from our first two-up ride with Todd's full fueling package. Others here have described the results and so I will not list all of the same benefits that we're also seeing.

I am not sure I can do this justice, but what came to mind out on the road was...

"My will, incarnate"

I am now starting to send Autotune results (Trim screen shots) to Todd after extended rides for his review and adjustments. But the base map he provided (setup based on the add-ons in place now, and his experience) must be close because I can see post-ride that Autotune is only making minor adjustments. After doing some research into how PC and Autotune work, when I read the new maps I feel like I'm "reading the Mind of Todd". :cool:

I am very pleased with the results. My wife thought the change, "incredible" and that, "this is a totally different bike".

Thank you Todd.
 
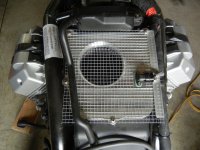
Airbox Airbox screen Yeah, here in the great Northeast it gets mighty cold and them poor mice seek shelter just like we do. My Sport (and my KTM) had a similar problem last spring, even worse than yours. I service my bikes in the fall, and they are usually ready to go with dropping the battery in and sometimes gas. The Guzzi started but ran like S***. Removed the tank and was horrified. With my KTM I figured to just remove the seat for the winter, and the airbox wouldn't provide "shelter", but not really easy with the Guzzi. I needed something more, and this is what I came up with, using materials at hand. I suppose if Iv'e pissed off the mice, they could always poop in the airbox but they can't get in.
 
Great post and nice pictures! I am looking forward to installing the airbox lid on my Norge soon. I recently added some auxiliary lights and wanted to remove the tank to run the wiring. Maybe I got lucky, but the fuel connector came off on my first try, with no tools and without relieving fuel pressure. The bike had been sitting for two days, so that may have had the effect of lowering the FP. I basically mimicked the motion to remove an air hose quick disconnect. It was a bit of a surprise, as I neither heard nor felt anything to let me know the line was free. I simply pushed the female connector toward the male elbow, then pulled the collar in the opposite direction, and then pulled on the line and it slid right off of the elbow. With the line separated, I tried to study the female connector to see how it worked but I couldn't figure it out. I'm guessing the flare on the male end causes the prongs in the connector to engage the flare, but the movement of the prongs can't be duplicated by just moving the collar when the male connector is not there.
 
Another thing that plugs up filter is the foam pad coming off of underside of tank, it deteriorates and goes in even w/stock snorkels. I replace the foam w/Aprilia's foil stuff that is under their tanks.
 
The foam underneath my tank is not deteriorating, but some of it has peeled away from the tank. I was tempted to rip it off but decided not to just yet. Does anyone know what the purpose of the foam is? If it's for sound deadening, I don't need it. If it's to insulate the tank from heat, I might try some tape of glue to stick the loose sections back on.
 
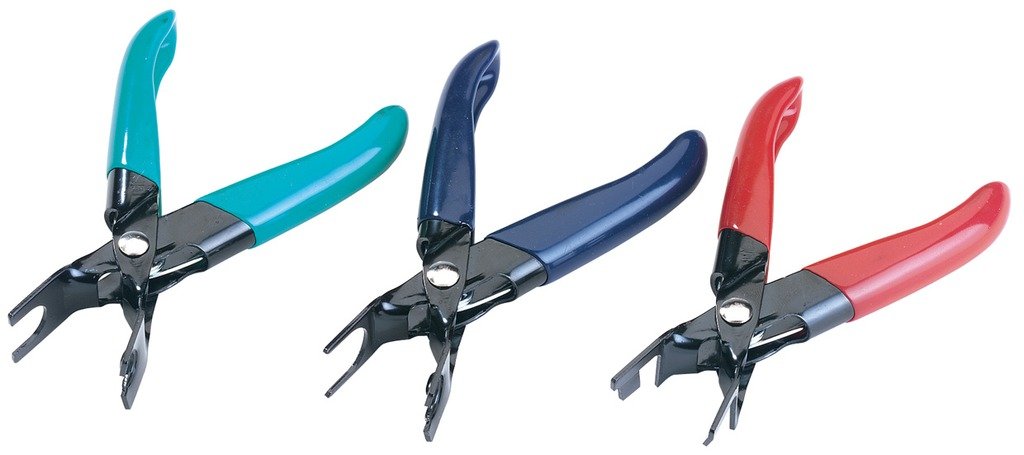
"Quick Connect" Fuel Line Disconnect Plier Tools, Set of 3 - $14 - at Amazon

amazon.com/gp/product/B00IY986JQ/

I've never used these, but they're on my Wish List. Maybe they'll work, maybe not, but for $14 worth a try?
FuelTool.jpg
 
"Quick Connect" Fuel Line Disconnect Plier Tools, Set of 3 - $14 - at Amazon

amazon.com/gp/product/B00IY986JQ/

I've never used these, but they're on my Wish List. Maybe they'll work, maybe not, but for $14 worth a try?
FuelTool.jpg

I've got these, used them once on a frozen connection. Not normally required.
 
Back
Top