• Ciao Guest - You’ve landed at the ultimate Guzzi site. NEW FORUM REGISTRATIONS REQUIRE EMAIL ACTIVATION - CHECK YOUR SPAM FOLDER - Use the CONTACT above if you need help. New to the forum? For all new members, we require ONE post in the Introductions section at the bottom, in order to post in most of the other sections. ALWAYS TRY A SEARCH BEFORE STARTING A NEW TOPIC - Most questions you may have, have likely been already answered. DON'T BE A DRIVE-BY POSTER: As a common courtesy, check back in and reply within 24 hours, or your post will be deleted. Note there's decades of heavily experienced Guzzi professionals on this site, all whom happily give endless amounts of their VALUABLE time for free; BE COURTEOUS AND RESPECTFUL!
  • There is ZERO tolerance on personal attacks and ANY HYPERLINKS to PRODUCT(S) or other competing website(s), including personal pages, social media or other Forums. This ALSO INCLUDES ECU DIAGnostic software, questions and mapping. We work very hard to offer commercially supported products and to keep info relevant here. First offense is a note, second is a warning, third time will get you banned from the site. We don't have the time to chase repeat (and ignorant) offenders. This is NOT a social media platform; It's an ad-free, privately funded website, in small help with user donations. Be sure to see the GTM STORE link above; ALL product purchases help support the site, or you can upgrade your Forum profile or DONATE via the link above.
  • Be sure to see the GTM STORE link also above for our 700+ product inventory, including OEM parts and many of our 100% Made-in-SoCal-USA GTM products and engine kits. In SoCal? Click the SERVICE tab above for the best in service, tires, tuning and installation of our products or custom work, and don't miss our GT MotoCycles® (not) art on the BUILDS tab above. WE'RE HERE ONLINE ONLY - NO PHONE CALLS MADE OR RECEIVED - DO NOT EMAIL AND ASK QUESTIONS OR ASK TO CALL YOU.
  • Like the new V100, GuzziTech is full throttle into the future! We're now running on an all-new server and we've updated our Forum software. The visual differences are obvious, but hopefully you'll notice the super-fast speed. If you notice any glitches or have any issues, please post on the Site Support section at the bottom. If you haven't yet, please upgrade your account which is covered in the Site Support section or via the DONATE tab above, which gives you full site access including the DOWNLOADS section. We really appreciate every $ and your support to keep this site ad-free. Create an account, sign in, upgrade your account, and enjoy. See you on the road in 2024.

6000 mile service - gaps, plugs, a tip, thoughts etc.

Touringman

Cruisin' Guzzisti
Joined
May 2, 2014
Messages
162
Location
Red Oak TX
This thread could be considered an extension of several others here...Todd if you want to merge this one into the related threads, please feel free to do so.

I am in the process of doing the 6000 mile service on my Cali14, while using the opportunity to install Todd's electronic engine management magic while I'm at it, oh and I killed the "moaning whale" while I had everything apart. Below are some thoughts on a hot Sunday in the garage.

OIL CHANGE : Pretty straight forward, the drain plug is a 17mm and located on the back of the pan near the center. The filter is another matter. If you are using the "guzzi parts counter" filter you WILL need the special tool to get the filter out of the hole it sits in. Look at it this way, whatever you spend on the tool, it's cheaper than the dealer's labor rate per hour...
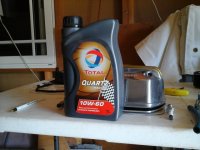
4 liters of Motul 7100 10w-60 4T now in the crankcase.

KILLING THE MOANING WHALE: There is already a thread here on how to do with pictures, just a note, the hose is just 1/4 inch fuel line available at any parts store. The port in the manifold would be a great place to install a vacuum gauge is you were so inclined. I wasn't, I plugged it.

VALVE ADJUSTMENT: Ummm...what valve adjustment? All I had to do was check the valves, ALL 8 of them were exactly in spec. I even loosened a couple of them on purpose just to make sure I wasn't screwing something up. Nope. All 8 dead on .006 intake & .008 exhaust.

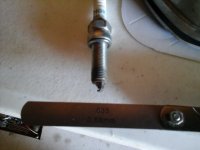
SPARK PLUGS: Here's where I got a bit concerned... The LMAR8F-9 plug fits nothing but the Cali14. NGK apparently built this for Guzzi. The plug is a 10mm/1.0 pitch thread. Just what the bike needs fine steel threads, screwing into an aluminum head. When I removed mine, there was some light resistance, squeaking and drag while unscrewing them. Needless to say I used some anti seize on the threads on the reinstall. Cross thread this thing and that new head ain't gonna be cheap. I gaped mine at .035. They came out of the box at .030 - .033. Remember, setting the plug gap is the responsibility of the installer, NOT the manufacturer.
SPARK PLUG TIP: DO NOT use your 14mm socket and wrench to try and install or unscrew the plug once you have it loose. This plug is TINY and you can't "feel" what you are doing. Get a piece of 3/8 fuel line about six inches long. Slip it over the insulator and use that to start the plug in the hole by hand. That way if it starts to cross thread you can stop BEFORE you have to install a new head. Once the plug is snugged in the hole use the wrench to torque it down.
THOUGHTS ON ENGINE KNOCK: When I pulled the upper plug out of the engine, I was surprised by how white the tip was. This engine gets HOT! The other thing that was curious was the "line" on the plug that showed how much of the plug actually sticks into the combustion chamber vs. how much is still in the head. There are 3-4 rows of threads exposed in the chamber. Pre ignition or "knock" is caused by combustion beginning spontaneously somewhere in the combustion chamber other than the spark plug. Say for example...a white hot exposed thread on the spark plug...or carbon buildup on one edge of the piston. This super heated "spot" ignites the incoming air fuel mix. A couple of milliseconds later, the spark plug fires and ignites another unburned part of the air fuel mix. The two different resulting flame fronts collide in the chamber causing the characteristic rattling noise we call spark knock. This issue is made worse by the super lean part throttle air fuel ratio. No doubt why Guzzi recommends super premium fuel. (super premium RESISTS the tendency to pre ignite as it burns slower and is more difficult to ignite.) Todd's fueling fix for the Cali1400 should eliminate the knock a lot of folks hear in these engines. Correcting the air fuel ratio to optimum will cool the cylinders and halt most all of the pre ignition. A nice by product of Todd's work on this setup.

Just some thoughts. YMMV.
Kirk

 
Touringman, thanks for the wright up. Did you find that the plugs needed replacing at 6000 miles? From the way you described them coming out it sounds like it would be a good idea to remove them and install anti-seize at the least but were they bad?
 
Perhaps I misunderstood, but are you saying that 3 to 4 threads of the 'upper' plug are actually exposed in the combustion chamber?
 
Perhaps I misunderstood, but are you saying that 3 to 4 threads of the 'upper' plug are actually exposed in the combustion chamber?

Yeah, I was finding this a little hard to believe too. The assumption that there is a line that indicates what amount was exposed to the combustion chamber, is a little shaky, IMHO.

Not that I'm any better at assumptions, but I believe that the electrodes of the spark plug, both the center and ground electrodes, would more likely get hotter than any exposed threads on the body, simply because of the thermal conduction to the head.

Careful measurement of a thin rod with the end bent at right angles could confirm whether the depth of the thread in the head is really less than the thread on the plug itself. Or to be sure, whip off the head itself and observe. I certainly would not be keen on running this motor if I thought this was the situation.
 
Touringman, thanks for the wright up. Did you find that the plugs needed replacing at 6000 miles? From the way you described them coming out it sounds like it would be a good idea to remove them and install anti-seize at the least but were they bad?

Clayton. The plugs were still serviceable, the gap had opened up slightly and the sharp edges of the electrodes were slightly worn as well. But there is nothing wrong that would indicate that they would not run another 6K miles easily.

As far as the threads...I will try and describe what I'm seeing. If you hold the plug, electrodes up, so that the ground electrode is on the right side as you are looking at it, there is a dark "carbon" line running diagonally from left to right across the threads. The threads ABOVE (toward the electrodes) the line are grey and look "burned"...the same exact color as the electrodes. The threads BELOW the line are still shiny, similar to what the new plugs looked like out of the package.
I can only surmise that these threads have been directly exposed to the flame front in the chamber. I WILL stipulate that there MAY be a relief cut back into the head that would (could) allow these threads to be exposed to the combustion heat without ACTUALLY sticking into the chamber...but why?

The way the line is angled it looks like the plug is screwed in at an angle, despite the vertical orientation of the plug...but who knows what the machining is like on the actual chamber shape, valve reliefs, squish area etc.??
I will try to get a pic posted up so we can put the collective here to work on this. Since this plug ONLY fits the Cali1400, I have to believe it is meant to be this way...
 
Last edited:
LMAR8F-9, I had a look on the NGK site and L=long reach, MA=19mm thread, Gasket, Hex 14mm, R= resistor, 8= heat range(towards cold), -9=0.9mm spark gap. Couldn't find what the F means
 
Something wrong here, Kev. If MA=19mm thread refers to the size of the diameter, it's wrong. The plugs are 10mm diameter, 25mm reach. What could the 19mm represent?

Edit: MA does refer to 19mm reach, unless it's preceded by L which it is.

Found the good oil here:-

ngkntk.co.uk/wp-content/uploads/2011/.../2015-Motorcycle-catalogue.pdf
 
Last edited:
I am Doing the 6000 mile maintenance. The spark plugs were between. 035 to .042 as I checked them a they came out. Has anyone tried reusing the rocker arm cover gaskets or should I just pick up new?. Plugs have been working, should I change the gap? To what?View attachment 9622 View attachment 9623

I am Doing the 6000 mile maintenance. The spark plugs were between. 035 to .042 as I checked them a they came out. Has anyone tried reusing the rocker arm cover gaskets or should I just pick up new?. Plugs have been working, should I change the gap? To what?View attachment 9622 View attachment 9623
Rocker co
This thread could be considered an extension of several others here...Todd if you want to merge this one into the related threads, please feel free to do so.

I am in the process of doing the 6000 mile service on my Cali14, while using the opportunity to install Todd's electronic engine management magic while I'm at it, oh and I killed the "moaning whale" while I had everything apart. Below are some thoughts on a hot Sunday in the garage.

OIL CHANGE : Pretty straight forward, the drain plug is a 17mm and located on the back of the pan near the center. The filter is another matter. If you are using the "guzzi parts counter" filter you WILL need the special tool to get the filter out of the hole it sits in. Look at it this way, whatever you spend on the tool, it's cheaper than the dealer's labor rate per hour...
4 liters of Motul 7100 10w-60 4T now in the crankcase.

KILLING THE MOANING WHALE: There is already a thread here on how to do with pictures, just a note, the hose is just 1/4 inch fuel line available at any parts store. The port in the manifold would be a great place to install a vacuum gauge is you were so inclined. I wasn't, I plugged it.

VALVE ADJUSTMENT: Ummm...what valve adjustment? All I had to do was check the valves, ALL 8 of them were exactly in spec. I even loosened a couple of them on purpose just to make sure I wasn't screwing something up. Nope. All 8 dead on .006 intake & .008 exhaust.

SPARK PLUGS: Here's where I got a bit concerned... The LMAR8F-9 plug fits nothing but the Cali14. NGK apparently built this for Guzzi. The plug is a 10mm/1.0 pitch thread. Just what the bike needs fine steel threads, screwing into an aluminum head. When I removed mine, there was some light resistance, squeaking and drag while unscrewing them. Needless to say I used some anti seize on the threads on the reinstall. Cross thread this thing and that new head ain't gonna be cheap. I gaped mine at .035. They came out of the box at .030 - .033. Remember, setting the plug gap is the responsibility of the installer, NOT the manufacturer.
SPARK PLUG TIP: DO NOT use your 14mm socket and wrench to try and install or unscrew the plug once you have it loose. This plug is TINY and you can't "feel" what you are doing. Get a piece of 3/8 fuel line about six inches long. Slip it over the insulator and use that to start the plug in the hole by hand. That way if it starts to cross thread you can stop BEFORE you have to install a new head. Once the plug is snugged in the hole use the wrench to torque
Has anyone changed the spark plug Wires as they do on the stelvio?. Has anyone tried this motoroil 14541013314781797043781
 
You can reuse the rocker over gaskets. I reused mine 3 times. Don't know if it was the reuse or if I got something wrong on the reassemble but the third time l got my leg oiled and I replaced them all. I now keep spares.
 
You can reuse the rocker over gaskets. I reused mine 3 times.
Thanks, I have original in &an extra set.I am now about to fix the alternator wire delete. Have you changed over your spark plug Wires (ngk) as they do on the stelvio.
 
Yesterday I did the alternator wire delete, I am glad I removed the gas tank because I found a plug wire touching the head, took some zip ties & made sure nothing is close to any hot parts
 
Plug wires are still original on mine with no problems so far. I haven't heard of the 1400 having any problem.
 
Thanks, for the info. After changing the motor oil, I was wondering why there is no drain for the oil radiator (cooler)
 
Thanks, for the info. After changing the motor oil, I was wondering why there is no drain for the oil radiator (cooler)

FWIW, I had that explained to me years ago...If you drain the cooler, it takes much longer (relatively speaking) for the engine to develop full oil pressure once the oil change is done. Low oil pressure is not good for engines, even for short periods of time. The trade off is, you still have .5 - .75 of a qt of used oil in the system. Perhaps this explains why the 1400 calls for 4.0L of oil in the specs, but in reality, the dipstick shows full after 3.x L...
 
This thread could be considered an extension of several others here...Todd if you want to merge this one into the related threads, please feel free to do so.

I am in the process of doing the 6000 mile service on my Cali14, while using the opportunity to install Todd's electronic engine management magic while I'm at it, oh and I killed the "moaning whale" while I had everything apart. Below are some thoughts on a hot Sunday in the garage.

OIL CHANGE : Pretty straight forward, the drain plug is a 17mm and located on the back of the pan near the center. The filter is another matter. If you are using the "guzzi parts counter" filter you WILL need the special tool to get the filter out of the hole it sits in. Look at it this way, whatever you spend on the tool, it's cheaper than the dealer's labor rate per hour...
4 liters of Motul 7100 10w-60 4T now in the crankcase.

KILLING THE MOANING WHALE: There is already a thread here on how to do with pictures, just a note, the hose is just 1/4 inch fuel line available at any parts store. The port in the manifold would be a great place to install a vacuum gauge is you were so inclined. I wasn't, I plugged it.

VALVE ADJUSTMENT: Ummm...what valve adjustment? All I had to do was check the valves, ALL 8 of them were exactly in spec. I even loosened a couple of them on purpose just to make sure I wasn't screwing something up. Nope. All 8 dead on .006 intake & .008 exhaust.

SPARK PLUGS: Here's where I got a bit concerned... The LMAR8F-9 plug fits nothing but the Cali14. NGK apparently built this for Guzzi. The plug is a 10mm/1.0 pitch thread. Just what the bike needs fine steel threads, screwing into an aluminum head. When I removed mine, there was some light resistance, squeaking and drag while unscrewing them. Needless to say I used some anti seize on the threads on the reinstall. Cross thread this thing and that new head ain't gonna be cheap. I gaped mine at .035. They came out of the box at .030 - .033. Remember, setting the plug gap is the responsibility of the installer, NOT the manufacturer.
SPARK PLUG TIP: DO NOT use your 14mm socket and wrench to try and install or unscrew the plug once you have it loose. This plug is TINY and you can't "feel" what you are doing. Get a piece of 3/8 fuel line about six inches long. Slip it over the insulator and use that to start the plug in the hole by hand. That way if it starts to cross thread you can stop BEFORE you have to install a new head. Once the plug is snugged in the hole use the wrench to torque it down.
THOUGHTS ON ENGINE KNOCK: When I pulled the upper plug out of the engine, I was surprised by how white the tip was. This engine gets HOT! The other thing that was curious was the "line" on the plug that showed how much of the plug actually sticks into the combustion chamber vs. how much is still in the head. There are 3-4 rows of threads exposed in the chamber. Pre ignition or "knock" is caused by combustion beginning spontaneously somewhere in the combustion chamber other than the spark plug. Say for example...a white hot exposed thread on the spark plug...or carbon buildup on one edge of the piston. This super heated "spot" ignites the incoming air fuel mix. A couple of milliseconds later, the spark plug fires and ignites another unburned part of the air fuel mix. The two different resulting flame fronts collide in the chamber causing the characteristic rattling noise we call spark knock. This issue is made worse by the super lean part throttle air fuel ratio. No doubt why Guzzi recommends super premium fuel. (super premium RESISTS the tendency to pre ignite as it burns slower and is more difficult to ignite.) Todd's fueling fix for the Cali1400 should eliminate the knock a lot of folks hear in these engines. Correcting the air fuel ratio to optimum will cool the cylinders and halt most all of the pre ignition. A nice by product of Todd's work on this setup.

Just some thoughts. YMMV.
Kirk
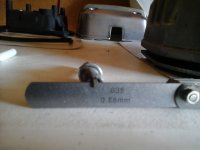
I realize this is an older thread but i have a 2017 Cali Touring and the manual states the gap is suppose to be between .024 - .028. So why is it being stated here to gap in .030 + range? Also does anyone know the exact torque specs for the plugs and where is clearly states that and in which manual ?

Thanks

Gerry
 
I make gap at .028 and it's normal 10mm plug so 11-12ftlbs on torque, and it doesn't say anywhere for plug torque until back in 09 8V motor and that gives an 18ftlbs carried over from other manuals AND is wrong. Looked in Aprillia's books at 10mm plug, it said 11ftlbs
 
Back
Top