Navigation
Install the app
How to install the app on iOS
Follow along with the video below to see how to install our site as a web app on your home screen.
Note: This feature may not be available in some browsers.
More options
-
Ciao Guest - You’ve landed at the ultimate Guzzi site. NEW FORUM REGISTRATIONS REQUIRE EMAIL ACTIVATION - CHECK YOUR SPAM FOLDER - Use the CONTACT above if you need help. New to the forum? For all new members, we require ONE post in the Introductions section at the bottom, in order to post in most of the other sections. ALWAYS TRY A SEARCH BEFORE STARTING A NEW TOPIC - Most questions you may have, have likely been already answered. DON'T BE A DRIVE-BY POSTER: As a common courtesy, check back in and reply within 24 hours, or your post will be deleted. Note there's decades of heavily experienced Guzzi professionals on this site, all whom happily give endless amounts of their VALUABLE time for free; BE COURTEOUS AND RESPECTFUL!
-
There is ZERO tolerance on personal attacks and ANY HYPERLINKS to PRODUCT(S) or other competing website(s), including personal pages, social media or other Forums. This ALSO INCLUDES ECU DIAGnostic software, questions and mapping. We work very hard to offer commercially supported products and to keep info relevant here. First offense is a note, second is a warning, third time will get you banned from the site. We don't have the time to chase repeat (and ignorant) offenders. This is NOT a social media platform; It's an ad-free, privately funded website, in small help with user donations. Be sure to see the GTM STORE link above; ALL product purchases help support the site, or you can upgrade your Forum profile or DONATE via the link above.
-
Be sure to see the GTM STORE link also above for our 700+ product inventory, including OEM parts and many of our 100% Made-in-SoCal-USA GTM products and engine kits. In SoCal? Click the SERVICE tab above for the best in service, tires, tuning and installation of our products or custom work, and don't miss our GT MotoCycles® (not) art on the BUILDS tab above. WE'RE HERE ONLINE ONLY - NO PHONE CALLS MADE OR RECEIVED - DO NOT EMAIL AND ASK QUESTIONS OR ASK TO CALL YOU.
-
Like the new V100, GuzziTech is full throttle into the future! We're now running on an all-new server and we've updated our Forum software. The visual differences are obvious, but hopefully you'll notice the super-fast speed. If you notice any glitches or have any issues, please post on the Site Support section at the bottom. If you haven't yet, please upgrade your account which is covered in the Site Support section or via the DONATE tab above, which gives you full site access including the DOWNLOADS section. We really appreciate every $ and your support to keep this site ad-free. Create an account, sign in, upgrade your account, and enjoy. See you on the road in 2024.
You are using an out of date browser. It may not display this or other websites correctly.
You should upgrade or use an alternative browser.
You should upgrade or use an alternative browser.
Now Ohlins for your Stelvio
- Thread starter GTM®
- Start date
WitchCityBallabio
Cruisin' Guzzisti
Hmmm.. I desperately need a new rear shock. So many choices. The Ohlins option interests me....
danketchpel
Tuned and Synch'ed
Here's my installation and initial ride impression.
First off, I was impressed at the build quality of this shock but that is pretty much expected with an Ohlins. I was really happy that Todd was able to get the shock length adjusted by Ohlins to be +5mm/-5mm instead of their standard +10mm/-0mm which makes no sense on this bike as you can't really drop the swingarm any without it hitting the lower bracketry. Being able to adjust the shock length is a real bonus on this bike. I installed it in the length it came adjusted to and it's about perfect. I "think" it might have been just a tiny bit shorter as I have "slightly" better footing than with the stock shock with both set to roughly equal preloads. I would have measured it by my long calipers are at work and I didn't want to wait.
Here are some photos of the shock itself before installation.
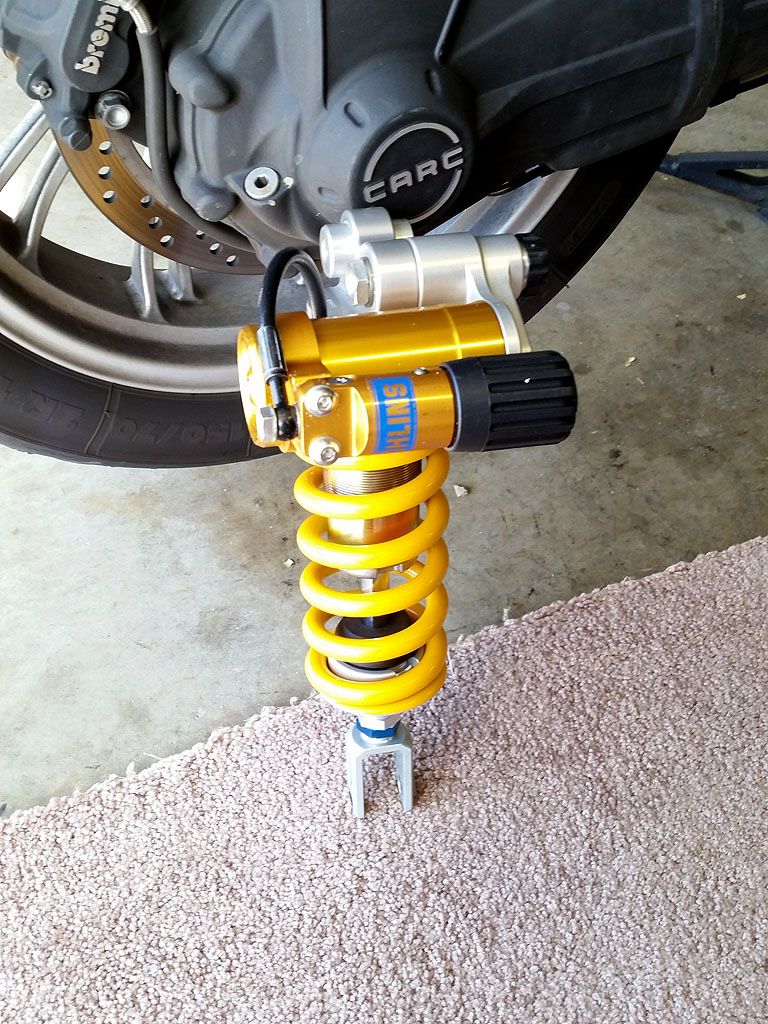
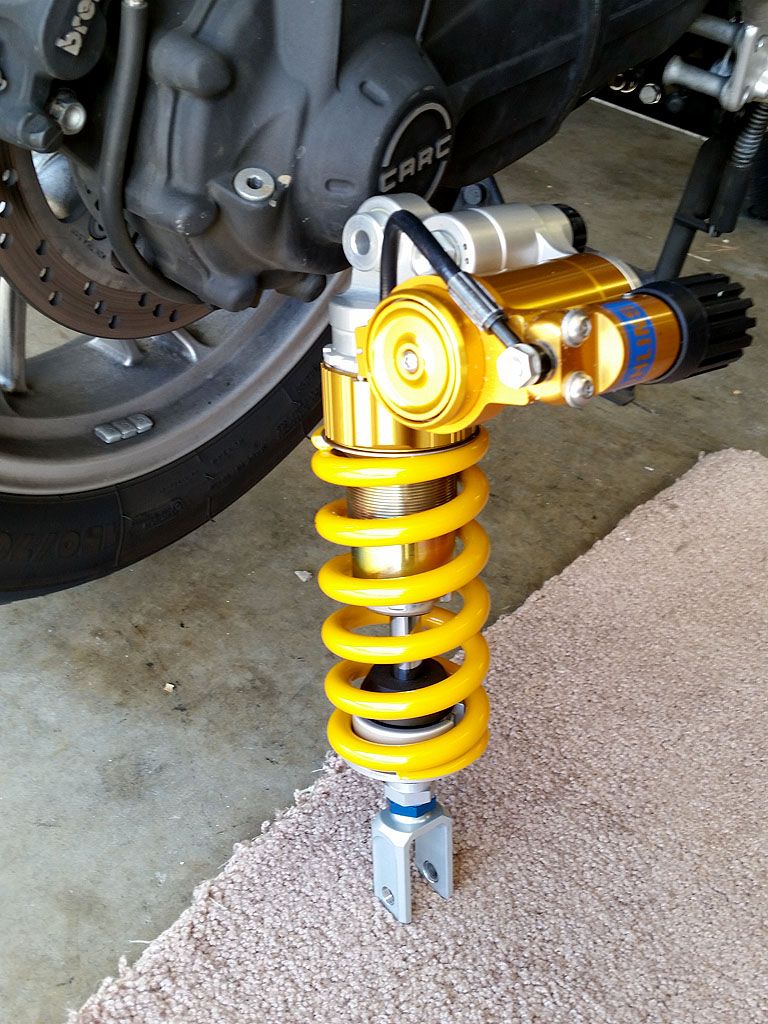
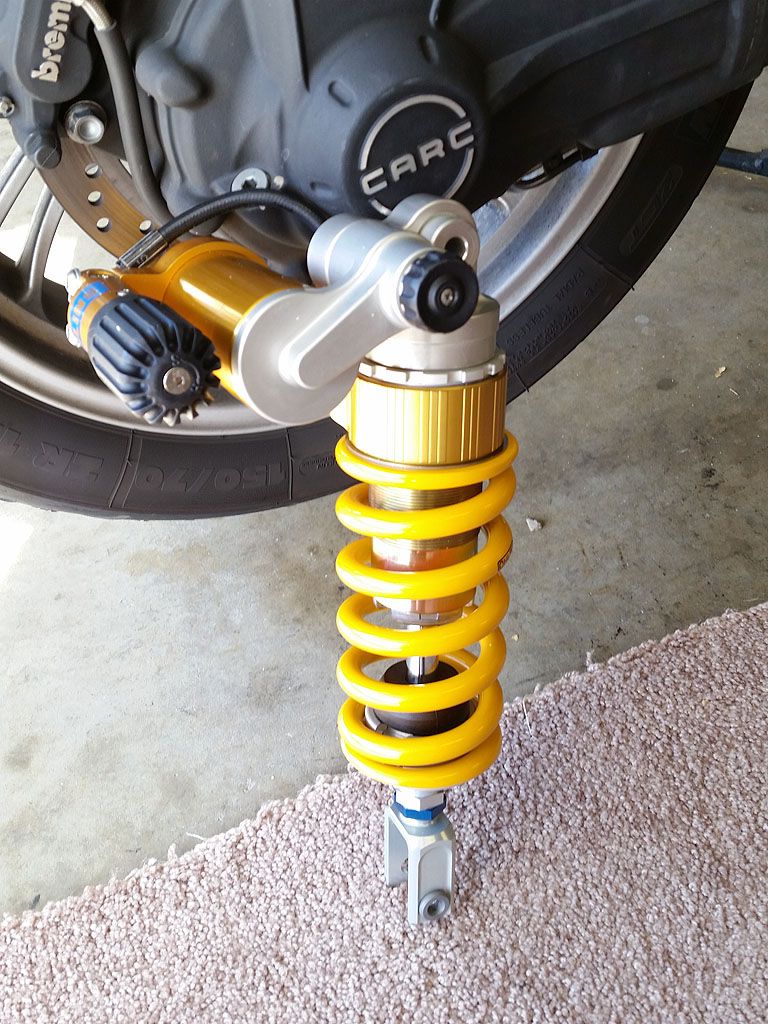
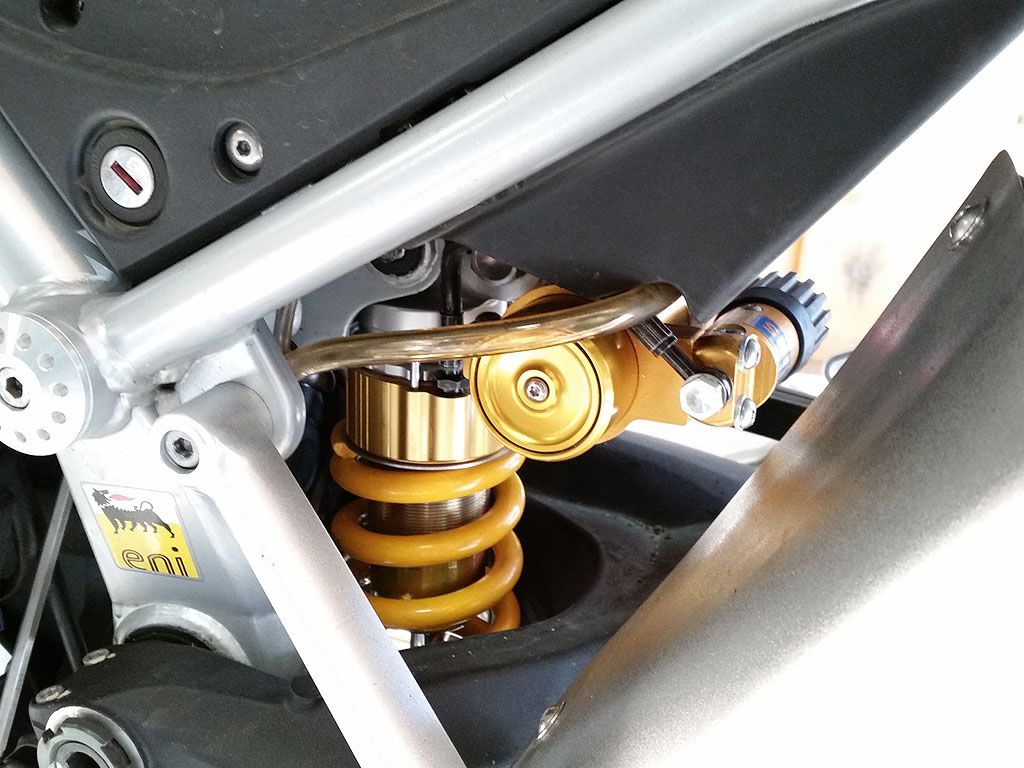
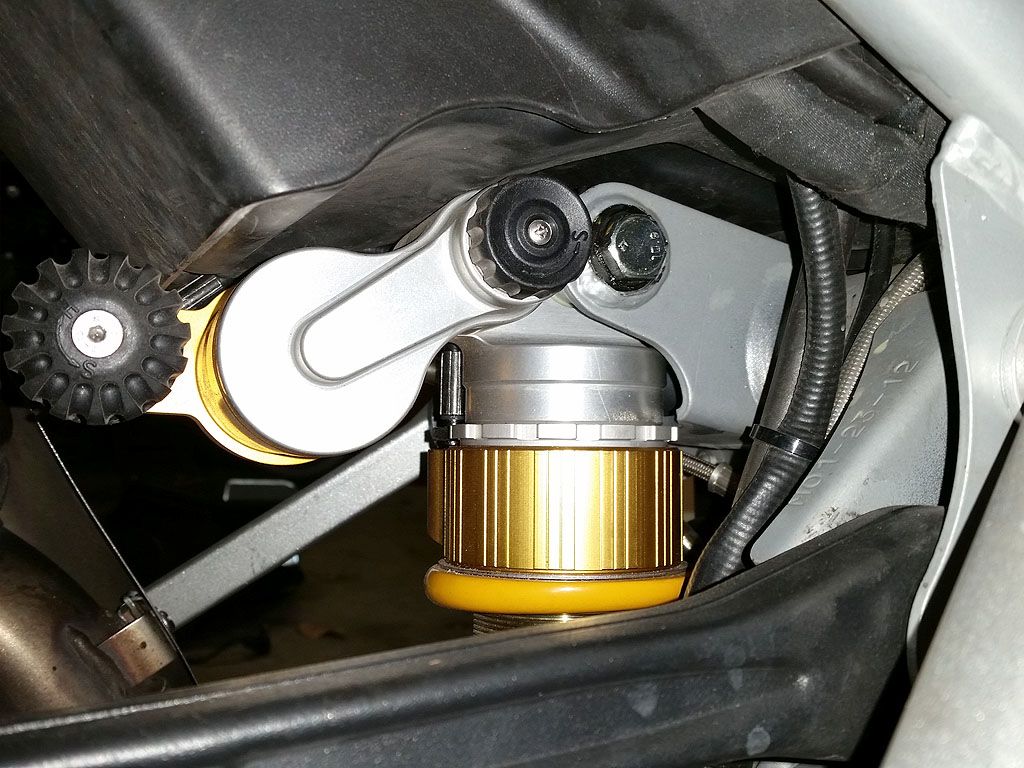
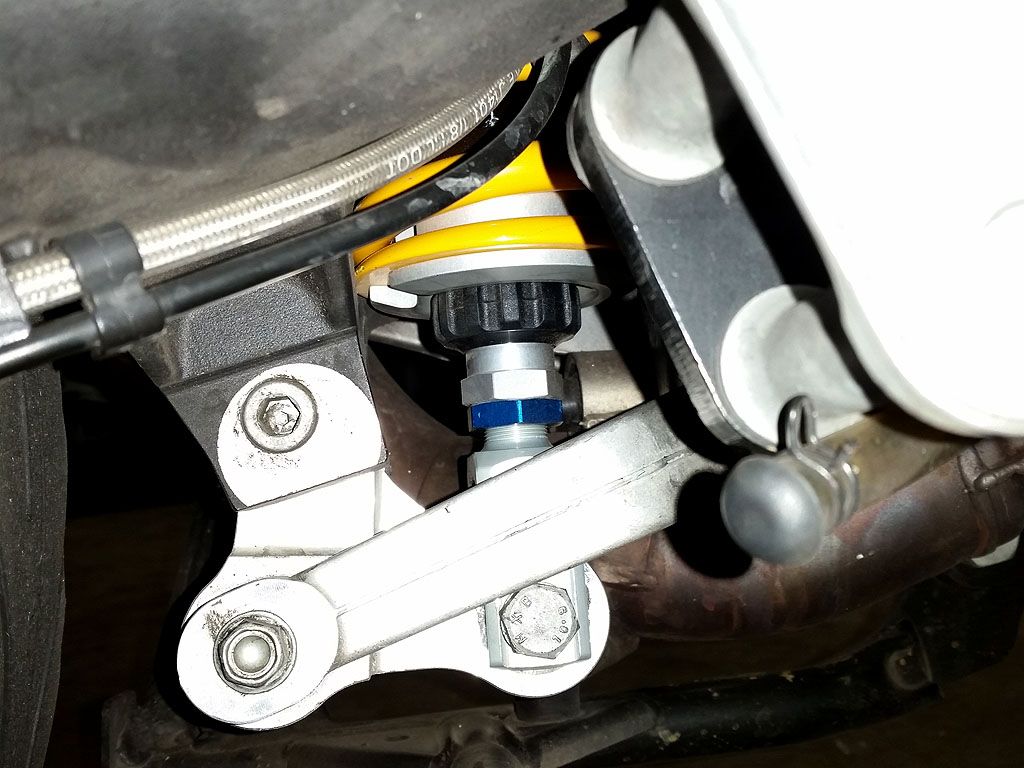
I found it IS possible to remove the stock shock (intact, no knob removal) and install the Ohlins without pulling the swingarm or removing the airbox. The trick is to remove the small heat shield on the muffler (if you have an aftermarket pipe then you're already ahead here) and the plastic underside protection piece that covers the airbox and gap behind it. Then lower the swingam all the way against the lower brackets and it's possible to work the stock shock out from the top left without removing the preload knob. You have to loosen and side the Ohlins preload knob assembly off the gold cylinder and it will slide back down in from the top left. After it's in position you can slip the preload knob assembly bracket back over the gold cylinder and then adjust it to the position that seems best. You can slide it left and right and rotate it some, then tighten the pinch bolt.
Here are some photos of the shock installed.
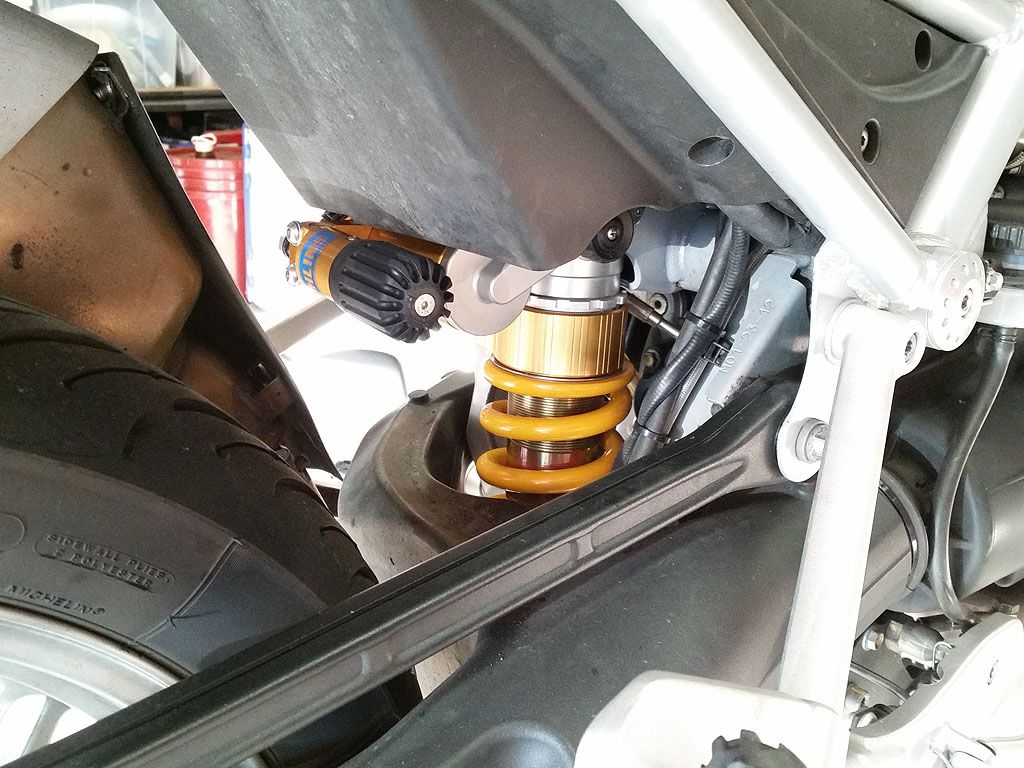
I tried to be as accurate with rider(s)/weight/riding type/style info as I could which included weighing dang near everything (camping gear included) then breaking it down by percentage of time I ride with each setup. I think my effort may have helped as the spring rate seems spot on and even the adjusters were very close. I ended up adjusting them a few clicks but it wasn't much. There is noticeable difference between clicks, it's sensitive.
So far I've only tried it on some fairly rough broken/mixed surface road, kinda bumpy paved mountain road, and limited freeway riding solo. It will take some time to cover more of the riding conditions but given the adjustability and how good it feels now I see no reason to not be able to adjust it to suit the riding conditions and load.
It's nice to be able to do all the adjustments with your hands only, no tools needed. It's REALLY nice to finally have compression dampening adjustment and be able to adjust the rebound with your hand.
I'm looking forward to seeing how it works riding 2 up and then 2 up loaded with luggage, which is where the stock shock really fell down.
I will post back after I've had a chance to get some miles on it and different riding conditions.
As of now I'm one happy camper, thanks Todd.
First off, I was impressed at the build quality of this shock but that is pretty much expected with an Ohlins. I was really happy that Todd was able to get the shock length adjusted by Ohlins to be +5mm/-5mm instead of their standard +10mm/-0mm which makes no sense on this bike as you can't really drop the swingarm any without it hitting the lower bracketry. Being able to adjust the shock length is a real bonus on this bike. I installed it in the length it came adjusted to and it's about perfect. I "think" it might have been just a tiny bit shorter as I have "slightly" better footing than with the stock shock with both set to roughly equal preloads. I would have measured it by my long calipers are at work and I didn't want to wait.
Here are some photos of the shock itself before installation.


I found it IS possible to remove the stock shock (intact, no knob removal) and install the Ohlins without pulling the swingarm or removing the airbox. The trick is to remove the small heat shield on the muffler (if you have an aftermarket pipe then you're already ahead here) and the plastic underside protection piece that covers the airbox and gap behind it. Then lower the swingam all the way against the lower brackets and it's possible to work the stock shock out from the top left without removing the preload knob. You have to loosen and side the Ohlins preload knob assembly off the gold cylinder and it will slide back down in from the top left. After it's in position you can slip the preload knob assembly bracket back over the gold cylinder and then adjust it to the position that seems best. You can slide it left and right and rotate it some, then tighten the pinch bolt.
Here are some photos of the shock installed.


I tried to be as accurate with rider(s)/weight/riding type/style info as I could which included weighing dang near everything (camping gear included) then breaking it down by percentage of time I ride with each setup. I think my effort may have helped as the spring rate seems spot on and even the adjusters were very close. I ended up adjusting them a few clicks but it wasn't much. There is noticeable difference between clicks, it's sensitive.
So far I've only tried it on some fairly rough broken/mixed surface road, kinda bumpy paved mountain road, and limited freeway riding solo. It will take some time to cover more of the riding conditions but given the adjustability and how good it feels now I see no reason to not be able to adjust it to suit the riding conditions and load.
It's nice to be able to do all the adjustments with your hands only, no tools needed. It's REALLY nice to finally have compression dampening adjustment and be able to adjust the rebound with your hand.
I'm looking forward to seeing how it works riding 2 up and then 2 up loaded with luggage, which is where the stock shock really fell down.
I will post back after I've had a chance to get some miles on it and different riding conditions.
As of now I'm one happy camper, thanks Todd.
danketchpel
Tuned and Synch'ed
I have not had a chance to do a lot of riding on the Stelvio since installing the Ohlins but finally got in a decent 2 up ride to add to the solo commuting and little bit of local hills I've done. I have not had a chance to ride the bike 2 up fully loaded with luggage yet.
My basic impression is the shock is much more "fluid" than the OEM shock. It seems smoother in action and more responsive to conditions. It's nice to finally be able to dial in what I want in terms of dampening.
The only thing I don't like about it so far is the preload "clicker" is very faint in feel and it's very hard to count the turns. I do wish it was much more distinct in feel, the OEM shock is better in this respect. But I really like that all adjustments can be made easily with only your hands, no screwdrivers etc. required, that's a huge improvement.
So far I'm still super happy with it and don't see any reason why I can't get it adjusted to work excellent for pretty much any riding condition. The main thing I really need to test is how the spring rate is when 2 up and fully loaded, hopefully it won't be near maxed out like the stocker was.

