My 2016 Eldorado has had an air leak from the spokes on the rear wheel and the air inlet.
This is mostly due to the fact that the wheel is made of bare aluminum,
Once water gets onto the spokes then water wicks down the nipples and corrosion starts,
then the O rings that seal the rim start leaking.
My suggestion before you get any leaks get some stuff called fluid film and on a warm day put the stuff on each nipple and let it soak into the nipple and go ride the bike.
If your lucky you wont have any air leaks.
The Fluid Film is an anti corrosive coating that safe for metals.
If you do get an air leak then this is what I did to fix it.
NOTE I did try the fluid film but I was too late.
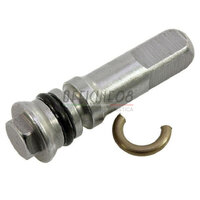
I removed the wheel then took the fill port off and put Dow Corning 111 on the O ring and put it back together. then used blue tape to mask it off.
Then I got some 3M bare metal seam sealer PN 08310 , a scotchbrite red pad and some acetone.
I abraded every spoke nipple seating area.
the rinsed with acetone and compressed air , then wiped down with a wet rag with acetone on it,
then I also abraded the center rib and cleaned it.
I got a small brush and cut off the bristles so it could be used for working the sealer into each cutout.
I got blue tape and masked off the sides of the rib and the air inlet.
First I took a 7mm socket and made sure each spoke nipple was as tight as the adjacent nipples .
Then got the caulk gun and the 3M bare metal seam sealer and worked the epoxy into each hole,
then ran beads above and below along the center rib and worked the sealer into the metal.
Then used a putty blade to smooth the layer ,
I also had assistance from my tire machine to hold the rim .
So far so good the epoxy cures in about 30 mins and you have about 15 mins to work it into the rim.
I used a 200ML container and have about 1/3 of a tube left.


This is mostly due to the fact that the wheel is made of bare aluminum,
Once water gets onto the spokes then water wicks down the nipples and corrosion starts,
then the O rings that seal the rim start leaking.
My suggestion before you get any leaks get some stuff called fluid film and on a warm day put the stuff on each nipple and let it soak into the nipple and go ride the bike.
If your lucky you wont have any air leaks.
The Fluid Film is an anti corrosive coating that safe for metals.
If you do get an air leak then this is what I did to fix it.
NOTE I did try the fluid film but I was too late.
I removed the wheel then took the fill port off and put Dow Corning 111 on the O ring and put it back together. then used blue tape to mask it off.
Then I got some 3M bare metal seam sealer PN 08310 , a scotchbrite red pad and some acetone.
I abraded every spoke nipple seating area.
the rinsed with acetone and compressed air , then wiped down with a wet rag with acetone on it,
then I also abraded the center rib and cleaned it.
I got a small brush and cut off the bristles so it could be used for working the sealer into each cutout.
I got blue tape and masked off the sides of the rib and the air inlet.
First I took a 7mm socket and made sure each spoke nipple was as tight as the adjacent nipples .
Then got the caulk gun and the 3M bare metal seam sealer and worked the epoxy into each hole,
then ran beads above and below along the center rib and worked the sealer into the metal.
Then used a putty blade to smooth the layer ,
I also had assistance from my tire machine to hold the rim .
So far so good the epoxy cures in about 30 mins and you have about 15 mins to work it into the rim.
I used a 200ML container and have about 1/3 of a tube left.
Last edited: