• Ciao Guest - You’ve landed at the ultimate Guzzi site. NEW FORUM REGISTRATIONS REQUIRE EMAIL ACTIVATION - CHECK YOUR SPAM FOLDER - Use the CONTACT above if you need help. New to the forum? For all new members, we require ONE post in the Introductions section at the bottom, in order to post in most of the other sections. ALWAYS TRY A SEARCH BEFORE STARTING A NEW TOPIC - Most questions you may have, have likely been already answered. DON'T BE A DRIVE-BY POSTER: As a common courtesy, check back in and reply within 24 hours, or your post will be deleted. Note there's decades of heavily experienced Guzzi professionals on this site, all whom happily give endless amounts of their VALUABLE time for free; BE COURTEOUS AND RESPECTFUL!
  • There is ZERO tolerance on personal attacks and ANY HYPERLINKS to PRODUCT(S) or other competing website(s), including personal pages, social media or other Forums. This ALSO INCLUDES ECU DIAGnostic software, questions and mapping. We work very hard to offer commercially supported products and to keep info relevant here. First offense is a note, second is a warning, third time will get you banned from the site. We don't have the time to chase repeat (and ignorant) offenders. This is NOT a social media platform; It's an ad-free, privately funded website, in small help with user donations. Be sure to see the GTM STORE link above; ALL product purchases help support the site, or you can upgrade your Forum profile or DONATE via the link above.
  • Be sure to see the GTM STORE link also above for our 700+ product inventory, including OEM parts and many of our 100% Made-in-SoCal-USA GTM products and engine kits. In SoCal? Click the SERVICE tab above for the best in service, tires, tuning and installation of our products or custom work, and don't miss our GT MotoCycles® (not) art on the BUILDS tab above. WE'RE HERE ONLINE ONLY - NO PHONE CALLS MADE OR RECEIVED - DO NOT EMAIL AND ASK QUESTIONS OR ASK TO CALL YOU.
  • Like the new V100, GuzziTech is full throttle into the future! We're now running on an all-new server and we've updated our Forum software. The visual differences are obvious, but hopefully you'll notice the super-fast speed. If you notice any glitches or have any issues, please post on the Site Support section at the bottom. If you haven't yet, please upgrade your account which is covered in the Site Support section or via the DONATE tab above, which gives you full site access including the DOWNLOADS section. We really appreciate every $ and your support to keep this site ad-free. Create an account, sign in, upgrade your account, and enjoy. See you on the road in 2024.

V85TT GTM SAS Delete

GTM®

Administrator
Staff member
GT di Razza Pura
Joined
Jul 1, 2009
Messages
15,119
Location
Malibu
Purchase and more info here;
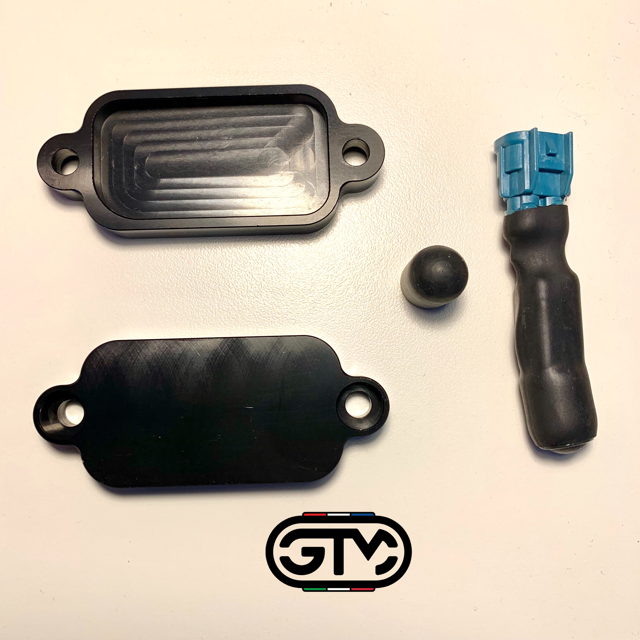
For our full fueling solution, we recommend the UpMap AND PC6/AT-300 -- see our dyno-proven results;


We recommend starting by completing the evap/tip system resolve, which includes tank removal instructions for below, here; https://www.guzzitech.com/forums/threads/v85tt-evap-and-tip-info.19893/ -- once done, and tank still removed:

Below is for the '19-20 E4 model ONLY. For the E5 models, we HIGHLY recommend leaving all valves plugged in to the factory harness, and leave them open ended to atmospheric air. Do NOT cap or seal them. So in short, replace the block-off plates, and remove the rubber lines from the plates to the valve, and remove the line from the valve to the air box, and cap ONLY there.

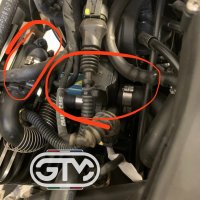
1. Locate and unhook SAS pump connections (electrical and rubber hoses), unplug oil pressure and head temp sensors (shown in step 2 below) and unbolt cylinder block off plates (one on each cylinder, left circled below):
0C312B2E EF0C 4A19 9AE5 4CBDC754F287
2. Remove SAS pump (slide left off of rubber mount studs, better seen in step 3 below), hoses and air supply plates, this includes the connection to the air box in step 6 below.
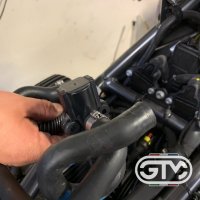
0334EC58 CC03 4A46 BDE0 9C47A8CD739F
3. Pump removed as shown, along with air supply plates. It's easiest to unplug the oil pressure sensor, and head temp sensors as shown below. Carefully note or photograph the connectors to insure proper reconnection.
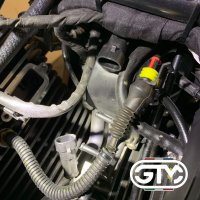
06EE7105 1946 4E11 B6B2 167570CECA8E
4. Each cylinder port should look like below, for step 5 below.
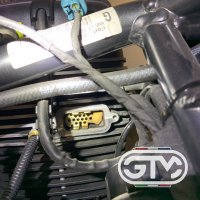
DBC304A3 39C1 4781 A1C1 E0428156BAE3
5. Transfer the valve plate to each GTM supplied CNC block-off plate, note orientation when removed and fit for larger radius, (inverted for pic) top right, as shown for each side.
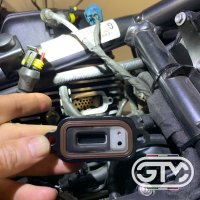
C548F5C4 CC1B 4A0A 973B 1C35FAA220A6
6. On the air box intake connection spigot to the SAS pump, cap per second pic below.
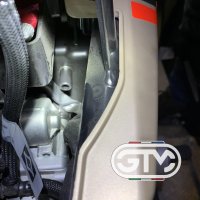
87C3B517 C164 4A10 AACC DF7E8BB5F636
5269E5EA 46C8 4661 A26D 0EB2D8D588B5
7. Plug in supplied pigtail connector to stock wiring harness connector, and secure as desired. Left block-off plate shown, the right is a little hard to get to, and tough to photograph. Be sure to reconnect the oil pressure and head temp sensors, and reinstall tank. End.
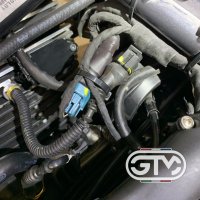
E1D09516 5863 4481 8FFD C85DF97777B7
 
Greetings......I apologize that this is probably a rather rudimentary question....but what *is* the SAS, and what are the advantages of deleting it?

You can also read the reviews here;

 
In addition to what Todd posted previously, the other thing SAS does is pre-burn exhaust gasses to improve the efficiency/lifespan of the catalytic converter. If you've replaced your exhaust with one that DOES NOT have a catalytic converter, then the SAS system provides zero useful benefit, as the SAS and cat are intended to work together. Leaving the SAS intact if you've deleted the cat is utterly pointless, and will only make your bike sound like crap due to excessive decel popping. Some people seem to like this popping because they imagine it makes it sound like they have a race motor or something. To me, the excessive popping sounds like trash... as if there is leak in y our exhaust headers (which, in effect, is exactly what the SAS is... a "controlled" exhaust leak).

Some of the car "tuners" around here seem to like putting new open exhausts on their "fast & furious" type cars, but leave the SAS in place. The result is every time they let off the gas, it sounds like a machine gun going off. Again, they think it's "cool"... I think it just makes it sound like they have no idea how to tune a car.

__Jason
 
Ah......now I understand. Good to know. I am interested to doing the "y-pipe" cat delete in the future, and it sounds like this SAS elimination kit should be part of that plan.

Thanks for helping me gain knowledge.

I never cared for that decel-popping effect either.
 
For anyone wondering, the right front bolt is definitely the hardest to get out, so much stuff in the way it's hard to get a straight shot.
View attachment 22457
Have to agree with that Matthew. I tried and tried to no avail so I took off valve cover, valve train and cylinder head and did it on the bench.
Everything is back together and the bike is running so good. I’m going for a long ride tomorrow. Ripper.
One thing I noticed was after install and three start ups the engine management light came on and the bike wouldn’t start. The battery was over 2 years old and never had trickle charge (slack me) so new battery in and problem solved. Beautiful.
I have to say I’m a yobbo and don’t recommend this method it just worked for me
 
Last edited:
Have to agree with that Matthew. I tried and tried to no avail so I took off valve cover, valve train and cylinder head and did it on the bench.
Everything is back together and the bike is running so good. I’m going for a long ride tomorrow. Ripper.
One thing I noticed was after install and three start ups the engine management light came on and the bike wouldn’t start. The battery was over 2 years old and never had trickle charge (slack me) so new battery in and problem solved. Beautiful.
I have to say I’m a yobbo and don’t recommend this method it just worked for me
Disassembling the engine is not in the cards for me.

I was able to get it out with a ball end Allen key and a homemade long arm/stubby Allen key - you can break the tension on the bolt by coming in from the valve cover side with the stubby Allen key.

Reverse process will hopefully not be too traumatic.
 
To all:
I received my SAS block-off kit yesterday and since I already had the fuel tank off of my 2021 E5 V85, I decided to jump right on in and install it. Along the way I would also remove the purge tank. Following all the great detailed examples / steps found above for both the purge tank removal and the SAS install in this thread, it appears that because my bike is a later model I've found that I should add to a few extra things that appear to be new on the E5 (2021) version of the V85. None of my findings are earth shattering nor difficult to deal with.

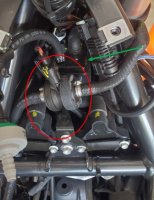
1)Tank removal is as described and once the tank is off you will notice this electronically controlled valve that I hadn't seen in any posts before. BYW this appears to open the passage (rubber tube) from the purge tank to a junction at the beginning of the Y split to each cylinder just aft of the throttle butterfly.
The red circle shows the valve. Ultimately I took the valve out, removing all tubes and the purge tank seen behind it with the green arrow touching the tank but I put the valve back in and connected to it's signal as the ECU might want to "see" this connection. Ironically, if you go to the right end of the green arrow you will notice that it ends on one of the purge hoses the valve controls. It is 100% kinked just above the end of the arrow. Any way, see more below.
Purge Valve

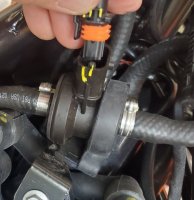
Removing the valve is easy. Disconnect the electrical connector (orange banded part below) and the permanent hose clamps. It is not necessary to cut the hose clamps but easy to do so if you choose that method. The ends of the clamp actually grab each other so once disturbed enough, the ends release. I'm so used to the permanent type that you have to cut off, I used my diagonal cutters to remove these ones as well.
Connectore Purge Valve


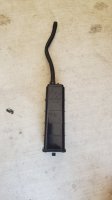
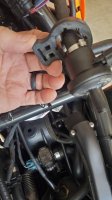
Below you can see the purge tank at the top of the left picture still in its refuge (the black square looking thing that is actually quite tall as seen below) which is only held in by a tie wrap which needs to be cut. I got to the tie wrap by removing all the electrical connectors and their enclosure on the left side of the bike. Note, there are two of these electrical connector junctions, one on each side of the bike at the "triangle" junction of the frame up by the front of the chassis kind of under the ignition key if that makes sense? I'm not at all sure you have to go the route I did but again, I was there already (getting access to the factory driving light connectors) I've included a small picture of the purge tank as it is longer than you might think!
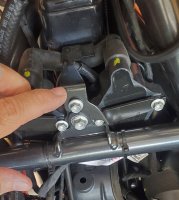
Purge Valve support bracket
20210930 143132

Above you will note that my finger is touching the bracket that held the Purge tank valve in place. To get the purge tank out I removed this bracket as well as the two coils seen in the picture (yellow dots) Each coil has two bolts that need to be loosened only. Once these bolts have been loosened, you can wiggle the coils out and over the chassis bar seen in this picture which gives you room to wiggle the purge tank out. I removed the electrical connectors from each coil but am not at all sure this is needed. There really does seem to be room to move the coils without removing any wires. You can see I left the high-tension leads on for example right?
20210930 143508

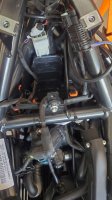
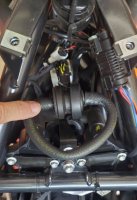
Since I don't know anywhere near enough about how the ECU "sees" things in the circuit I chose to reinstall the purge valve controller which meant installing the bracket it mounts to after replacing the coils. As a way to keep everything in the valve clean, I took a piece of the purge systems hose and connected each end back onto the valve itself. You can see this pointed to by my finger in the left hand picture below. Not terribly pretty to look at but would keep everything in the valve clean as a just in case. Don't forget that since the purge tank was out, this valve is not in the way at all. In the future as we all learn, perhaps we can pull the valve and leave its electrical connection disconnected once we know enough but today, I'm covering my backside by keeping it in the "system" even if the valve no longer does anything! You can see the rubber support on the right hand side of the valve. You can see this rubber support in the right hand picture below. This support had no problem keeping the valve in place but now that the two hoses that were there before kept the valve in its place in the rubber support and now since they are no longer there the loss of support won't keep the valve in place if there is a lot of off-road herky-jerky so I took some tie wraps to attach the valve to the rubber support so bumps can't dislodge the valve from the support. Make sense?

Purge Valve Loop
20210930 141342

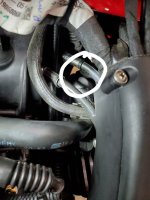
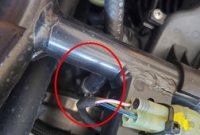
And finally you need to cap of the port found at the Y air intake just after the throttle butterfly as seen below. This is as a result of removing the long rubber hose that came from the Purge Valve when you removed it. If you look close, the rubber hose seen at the top middle of the picture goes to the Purge valve (prior to removal of course). Note the red circle shows where the hose attaches to the Y just after the throttle butterfly. Once the hose is off, there is a copper colored port there that must be capped off. I did not have a cap so made one out of a piece of the very hose I pulled off!
Purge valve hose connection behind butterfly

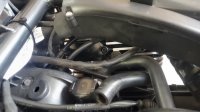
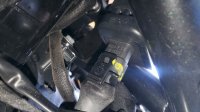
SAS KIT: At last we are done with the purge tank and valve. Well, I'M done with them! Lets move on to the SAS kit which follows the installation instructions you can find in this thread. The only thing I wanted to throw out is this: No question each and every bike is slightly different due to manufacturing tolerances so my experience may not be yours but I've heard of issues some of you have had getting access to the front most bolt on the right hand cylinder. For added ease I pulled the RH spark plug HT lead from the plug and flopped it out of the way since it goes over the SAS valve on that side. Is it a must? NOPE but just made access that much easier. I'd heard some stories about what a PITA this was on this side but for some goof ball reason it was a breeze for me. I have a 4" long 4m ball-end wrench that fit that forward bolt almost dead straight as can be seen below. I'm not sure that it had to be a ball-end since it was that close. Needless to say this made the entire process a 5 minute affair to swap both sides out. The installed RH side block of is in the last picture.
20210930 171546
20210930 174030

OK folks, that is it. The left hand block off plate is dead easy to get to. Good luck in your installation.

I'm grateful to GTM for the parts, the quality construction and for me, the ease of installation. Remember, I'd rather be lucky than good!
 

Attachments

  • 20210930_142336.jpg
    20210930_142336.jpg
    104.6 KB · Views: 23
I recently ordered a 2021 model (E5) and was reading about the SAS removal. Is it all the same on this new model?
Are there differences betweem US an EU models?

Blue Thunder, I've just completed an addendum above. My bike is a 2021 E5 model V85 too so this might be of some interest. Truth is the bikes are only slightly different (best I can tell) and the install was no problem at all along with the purge tank removal.

All the best.
 
Folks, in an attempt to CMA (Cover My A_ _) I've eliminated the fuel tank vent check-valve that I'm told goes bad. On the V85 this vent hose was pretty short as it only had to make it to the purge tank (evap tank) but now that the tank is gone I didn't want the potential of fuel coming out of the now short hose and splashing onto any of the exhaust system so I ran a fuel line to the very back of the motorcycle eliminating any chance of fuel leaking out onto anything hot. Just my .02c for what that is worth. :) YMMV of course!
 
Hello
2020 V85

Question is in pics for installing blank off plated this clip is removed
Is that what need to be done?
 

Attachments

  • CA96DCFA-95A1-40B0-8B0D-A3DDAE427130.jpeg
    CA96DCFA-95A1-40B0-8B0D-A3DDAE427130.jpeg
    115 KB · Views: 8
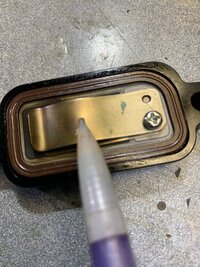
See above. Though it may show it as removed above, it does NOT need to be removed. Install as is from the OEM cap/plate.
 
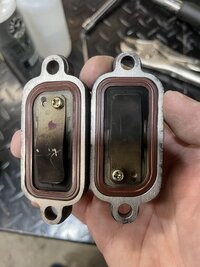
Hey Todd! I wanted to get ahead of things as I'm waiting for the SAS plates, so I removed the OEM plates today. It appears that there's a significant amount of carbon buildup on the inside of the plates. Does this look normal to you? I wanted to make sure you saw this before I put the new plates on; I didn't want to continue riding around if this was abnormal. (BTW, they're both equally carbon'd, the lighting makes the right one look darker.)
 

Attachments

  • sas_ports.jpeg
    sas_ports.jpeg
    82.1 KB · Views: 20
Completely. Swipe your finger in the exhaust headers you took off. ;)
They are a direct path to the exhaust port chamber, hence why rubber caps won't work as a fail-safe solution.
Makes total sense. I'm definitely going to wait to ride until I get the plates. I'm sure there are other, better ways to seal the OEM ones up, but it feels like a hack knowing you have professionally machined ones available.
 
Hi Guys

I installed the SAS on my 2021 V85TT (E5) (and yes I bought the right Kit) and the response was awesome... I ran it for less than 3-4 kms and upon reaching a few Higer rev´s.... "CHECK ENGINE LIGHT" came on.
That begs the obvious question- did you leave your SAS pump plugged in? It has to stay plugged in or it will trigger check engine light. Few of us here made that mistake already, I did that on purpose to confirm as well LOL
 
I have 2 questions in regards to my E5 V85TT,when installing the block off plates, I wasn’t paying attention to the orientation so how do you identify which way the original part is installed in the new plates? Do we remove the valve that had the hoses that went to the air injection plates, I noticed that E4 has a plug to cap the electrical connection.
 
Back
Top