afulldeck
Cruisin' Guzzisti
- Joined
- Jul 30, 2010
- Messages
- 114
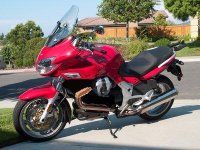
I'm toying with the idea of building a new fairing for my Norge. And I'm looking for ideas and input others might have about how I should or should not make this new beast. I'm intending this to be a winter project... so here is what I have been noodling for the last few days of what a new fairing should have:
a style closer to the look of the Stelvio---I don't like the lowers on the Norge.
a glove box
flog light switch
Power connectors
not to be the support for the head lights (lights need to be supported independent to the fairing.
angle the dashboard so that you can read the dash
Carbon fiber or fiberglass?
Thoughts?