• Ciao Guest - You’ve landed at the ultimate Guzzi site. NEW FORUM REGISTRATIONS REQUIRE EMAIL ACTIVATION - CHECK YOUR SPAM FOLDER - Use the CONTACT above if you need help. New to the forum? For all new members, we require ONE post in the Introductions section at the bottom, in order to post in most of the other sections. ALWAYS TRY A SEARCH BEFORE STARTING A NEW TOPIC - Most questions you may have, have likely been already answered. DON'T BE A DRIVE-BY POSTER: As a common courtesy, check back in and reply within 24 hours, or your post will be deleted. Note there's decades of heavily experienced Guzzi professionals on this site, all whom happily give endless amounts of their VALUABLE time for free; BE COURTEOUS AND RESPECTFUL!
  • There is ZERO tolerance on personal attacks and ANY HYPERLINKS to PRODUCT(S) or other competing website(s), including personal pages, social media or other Forums. This ALSO INCLUDES ECU DIAGnostic software, questions and mapping. We work very hard to offer commercially supported products and to keep info relevant here. First offense is a note, second is a warning, third time will get you banned from the site. We don't have the time to chase repeat (and ignorant) offenders. This is NOT a social media platform; It's an ad-free, privately funded website, in small help with user donations. Be sure to see the GTM STORE link above; ALL product purchases help support the site, or you can upgrade your Forum profile or DONATE via the link above.
  • Be sure to see the GTM STORE link also above for our 700+ product inventory, including OEM parts and many of our 100% Made-in-SoCal-USA GTM products and engine kits. In SoCal? Click the SERVICE tab above for the best in service, tires, tuning and installation of our products or custom work, and don't miss our GT MotoCycles® (not) art on the BUILDS tab above. WE'RE HERE ONLINE ONLY - NO PHONE CALLS MADE OR RECEIVED - DO NOT EMAIL AND ASK QUESTIONS OR ASK TO CALL YOU.
  • Like the new V100, GuzziTech is full throttle into the future! We're now running on an all-new server and we've updated our Forum software. The visual differences are obvious, but hopefully you'll notice the super-fast speed. If you notice any glitches or have any issues, please post on the Site Support section at the bottom. If you haven't yet, please upgrade your account which is covered in the Site Support section or via the DONATE tab above, which gives you full site access including the DOWNLOADS section. We really appreciate every $ and your support to keep this site ad-free. Create an account, sign in, upgrade your account, and enjoy. See you on the road in 2024.

Another new member...Le Mans IV Reconstruction..

lemans1000

Just got it firing!
Joined
Mar 18, 2012
Messages
19
Location
Jastrebarsko, Croatia
Hello,

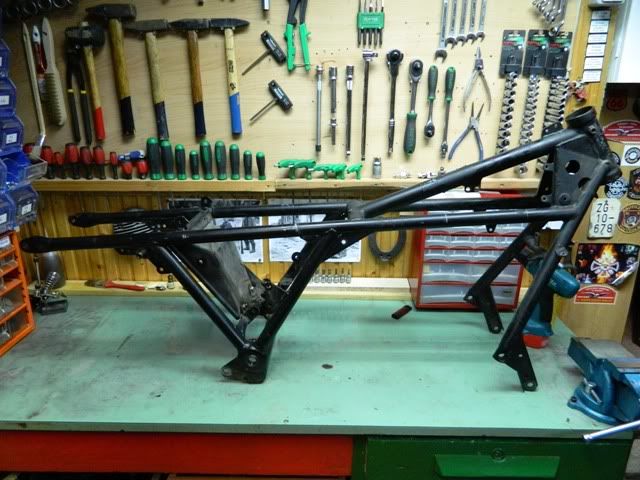
My name is Goran, I'm from Croatia, my ride is Le Mans IV, slightly changed. I've been riding this bike for 7 years, and now is the time to invest some of my time and money into the bike. Paint on the frame and fuel tank is damaged, starter need some new parts, so I decide to take everything down from the frame and start with the work.
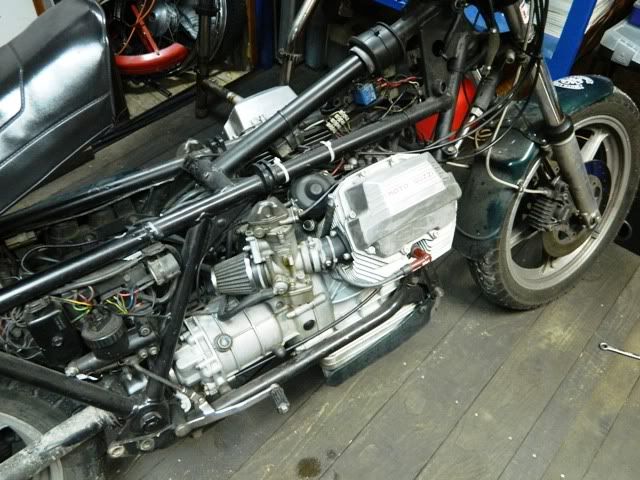
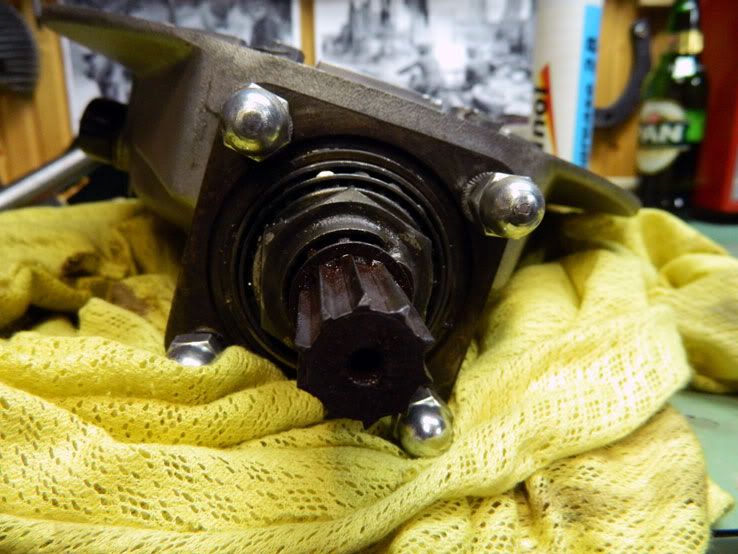
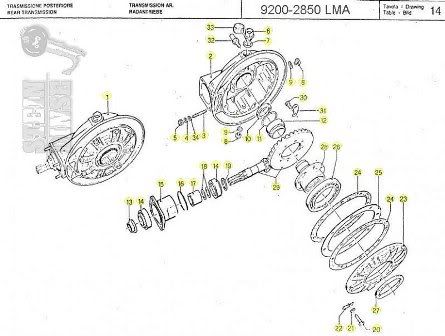
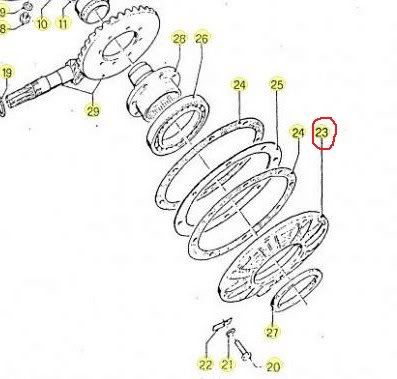
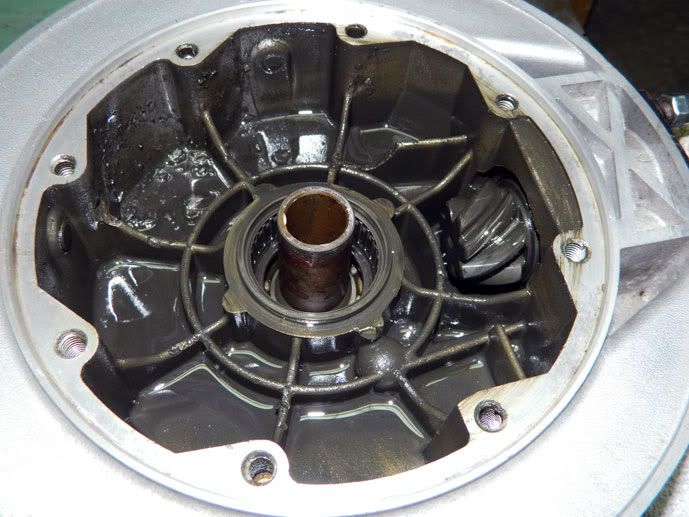
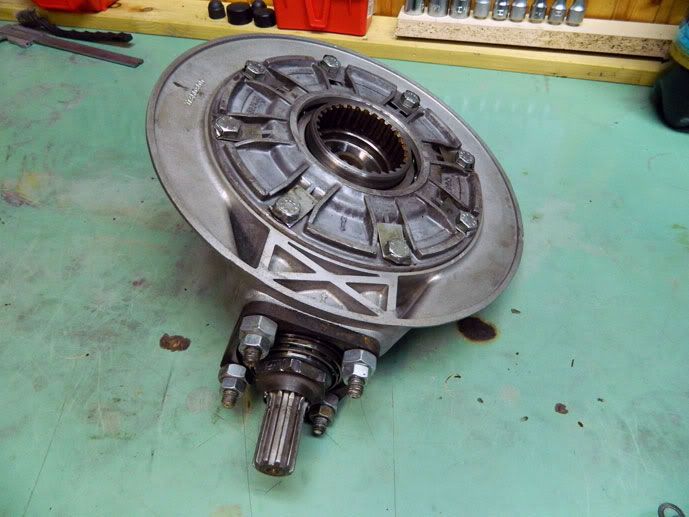
Engine, however, is in very good shape; it doesn't spend oil, there is no smoke or funny noise, I will just take the gearbox down to see in what condition the cluch is.

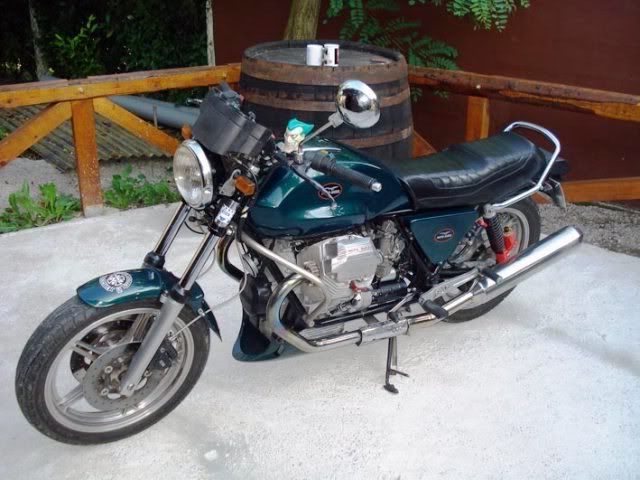
Here is my bike before I started to work:
009.jpg
 
Here are the reasons for reconstruction; when the fuel tank and seat is down, picture is much different:

003.jpg

004.jpg

007.jpg


Paint on the frame is scratch, I've had some leak from rear master cylinder, so the brake fluid ruins the paint...Also, there is some rust around the battery holder.

The plan is:
- take everything down
- sandblast the frame
- paint the frame
- paint the rest of the bike
- make a new seat - for only one, cafe race seat
- engine is running fine, no oil consumption, no smoke, no "noise", maybe just to change clutch
- new tires
- new electrical installation

So .. much work ...but I have time, desire to do this...and I got some money....
I will do everything alone, except the wires...I hate wires....this I will leave to my friend...he likes wires...

Everything is removed, frame is ready for sandblasting. In the meanwhile, I'm dealing with cleaning and refurbishing small parts, like, headlamp, coil holder...etc.
017.jpg


010.jpg

013.jpg


016.jpg

012.jpg

015.jpg

011.jpg


Now...my worry is drive shaft; it has some rust on surface...I will try to remove the rust, teeths are ok, just surface rust. If not, I will buy a new one.
021.jpg


So much for now...
 
double.d, thank you for the link of your project, but, unfortunately, that Motogadget parts are, in this time, a little over my budget. I have enough to do and good quality paint job, new wiring and handlebar controls and clutch, if necessary. But i put your link in my bookmarks...
 
Yes, it is due for repair or replacement. The teeth should be square in shape to match the female splined boss.

I had this happen years ago on my Cali MkII, replacement is a new matching pair crownwheel/pinion, the complete gear set.

Repair was have Guzzi dealer dismantle diff, and I took the pinion gear to an engineering shop. They stainless steel welded the end of the shaft (they said because stainless "work hardens"), then machined the splines to match the new sleeve that I provided.

I sold the bike shortly after, but have run into the next owner several times years later and there was never a problem.

Those 7/33 diff gears are made of tuff stuff, the same day I had mine fixed another MkIV had a cracked diff housing, from the inside. The internal bolts had come loose, some had heads chewed off, one was just total fragments floating in the oil, but the headless shank of another bolt had come totally out, got jammed between the crown wheel and outer casing and had cracked the housing. THE TWO GEARS WERE TOTALLY UNMARKED!
 
Thank you for your reply. For me, now, there is no alternative but to obtain a new crownwheel/pinion set.

I have taken the bolts on plate in wich is the oil seal, but now I don't know how to remove this plate. Is there some trick how to take this plate down (number 23 on picture), without braking something?

321c144a.jpg


diff-dio.jpg
 
It is probably stuck to the gaskets. Gently tap the plate to rotate it in the housing. That should break the adhesion. Once it rotates it should come off.
 
@ john zibell - yes, it was stuck to the gaskets, like glued...I managed to remove it today, easy, so I don't brake something. Thank you for your reply.

@ Series4 - thank you for the link of Reboot Guzzi. I know about Teo Lamers, one of my friend bought Guzzi from him, 5 or 6 years ago, his is my option also. I have one option to find all the parts I need in my country, if not, Teo Lamers is my joker in the sleeve.

But...fun and games never stops....

First; there was only one seal; there should be two seals and a distance....but no..
Second; screws that hold the crownwheel were completely free, I unscrew them with my hand..one has broken sometime, but not while I am the owner, so the case hase some damage.

Picture-004.jpg

Picture-002.jpg

Picture-008.jpg

Picture-005.jpg


Now I don't know...in the spare parts manual, on the figure below, part number 25 goes in thickness from 0.8 to 1.8....wich one to use? How to know or to measure it?

diff-dio.jpg
 
Many of your questions have been answered by Pete.

https://www.guzzitech.com/RearDriveTear2-Pete_R.html

Shimming a gearbox is not for the faint of heart. It can be done, it takes patience, time, and trial and error changes based on the patterns displayed. The American Workshop manual from Premier that covers the 700, 750 and 850 loop frames gives the best explanation I have seen, but I can't find a PDF. I only have the Hard Copy (and I've had it for years!!).
 
Finally....new crown wheel and pinion drive. All new bearings and gaskets. All tested, no errors. The only thing that's missing is new oil seal. :D

Picture-012.jpg

Picture-013.jpg


All clean:
Picture-015-novi-dif.jpg


Next; to clean wheels...
 
There is a second oil seal. It is below the outer race for the inner bearing. Sometimes you need the special tool to remove the race, sometimes not.
 
Sorry...Yes, I thought, the only one gasket. But, actually, there were two gaskets, but I didn't see right...One gasket was on plate, other was on housing.
 
A little help please...In this moment, I'm rebuilding brake sistem (brake calippers, new pistons inside...) and while I'm doing this, I was thinking to also rebuild rear brake master cylinder.

This is the model:
cilindar_zpsa56057c1.jpg


Now....how to take piston out of cylinder?
On Google I found this:

....Remove the master cylinder, dump out the brake fluid, take off the lever and check to see if there's a circlip holding the piston in place. (Some have them, some don't). Remove the circlip, if applicable, and insert a slender drift into the fluid's exit orifice (where the line connects), and smack out the piston. While Brembo offers a special drift for this, an old motorcycle spoke of the correct diameter will suffice.

Is this the way to do this?
My doesn't have circlip....or I don't see one....
 
lemans1000 said:
A little help please...In this moment, I'm rebuilding brake sistem (brake calippers, new pistons inside...) and while I'm doing this, I was thinking to also rebuild rear brake master cylinder.

<photo snipped>

Now....how to take piston out of cylinder?
On Google I found this:

....Remove the master cylinder, dump out the brake fluid, take off the lever and check to see if there's a circlip holding the piston in place. (Some have them, some don't). Remove the circlip, if applicable, and insert a slender drift into the fluid's exit orifice (where the line connects), and smack out the piston. While Brembo offers a special drift for this, an old motorcycle spoke of the correct diameter will suffice.

Is this the way to do this?
My doesn't have circlip....or I don't see one....

Yes - that is the correct way to remove the piston. It comes out fairly easily. The retaining ring is simply a press fit into the bore.
 
Back
Top