• Ciao Guest - You’ve landed at the ultimate Guzzi site. NEW FORUM REGISTRATIONS REQUIRE EMAIL ACTIVATION - CHECK YOUR SPAM FOLDER - Use the CONTACT above if you need help. New to the forum? For all new members, we require ONE post in the Introductions section at the bottom, in order to post in most of the other sections. ALWAYS TRY A SEARCH BEFORE STARTING A NEW TOPIC - Most questions you may have, have likely been already answered. DON'T BE A DRIVE-BY POSTER: As a common courtesy, check back in and reply within 24 hours, or your post will be deleted. Note there's decades of heavily experienced Guzzi professionals on this site, all whom happily give endless amounts of their VALUABLE time for free; BE COURTEOUS AND RESPECTFUL!
  • There is ZERO tolerance on personal attacks and ANY HYPERLINKS to PRODUCT(S) or other competing website(s), including personal pages, social media or other Forums. This ALSO INCLUDES ECU DIAGnostic software, questions and mapping. We work very hard to offer commercially supported products and to keep info relevant here. First offense is a note, second is a warning, third time will get you banned from the site. We don't have the time to chase repeat (and ignorant) offenders. This is NOT a social media platform; It's an ad-free, privately funded website, in small help with user donations. Be sure to see the GTM STORE link above; ALL product purchases help support the site, or you can upgrade your Forum profile or DONATE via the link above.
  • Be sure to see the GTM STORE link also above for our 700+ product inventory, including OEM parts and many of our 100% Made-in-SoCal-USA GTM products and engine kits. In SoCal? Click the SERVICE tab above for the best in service, tires, tuning and installation of our products or custom work, and don't miss our GT MotoCycles® (not) art on the BUILDS tab above. WE'RE HERE ONLINE ONLY - NO PHONE CALLS MADE OR RECEIVED - DO NOT EMAIL AND ASK QUESTIONS OR ASK TO CALL YOU.
  • Like the new V100, GuzziTech is full throttle into the future! We're now running on an all-new server and we've updated our Forum software. The visual differences are obvious, but hopefully you'll notice the super-fast speed. If you notice any glitches or have any issues, please post on the Site Support section at the bottom. If you haven't yet, please upgrade your account which is covered in the Site Support section or via the DONATE tab above, which gives you full site access including the DOWNLOADS section. We really appreciate every $ and your support to keep this site ad-free. Create an account, sign in, upgrade your account, and enjoy. See you on the road in 2024.

Stelvio Swingarm Service

Completed a swingarm service today at 10800km. I can endorse that it is worthwhile doing it around this time. Thanks to Leafman for the info - it is not difficult thanks to some straightforward and chunky Guzzi technology - takes around 2 hours.
 
Did mine this weekend, glad I did

30k miles - some grease present in the needle bearings of the linkage as to be expected from the recall replacement

Pivot bearings were fairly dry - didn't look like any grit made it past the seals but some evidence of minor water ingress

Re-packed all with Belray waterproof grease

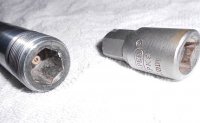
The suprise was the from drive shaft spline - totally dry - some powdery oxide present, which blew off.Used Honda Moly 60 on each spline

Added a TRAXX sock to the shock -

IMG_0274-L.jpg
 
I can give the same comments too,I did the same service on mine a couple of months ago with 22,000kms on the clock,and yes very easy to do,
The lack of gease on the bearings was about the same especially the suspension needle rollers.while I was in there I also replaced the swingarm boot as it had been cracked but not split since the day I bought the bike..
Having use of Todds tool also helped. :D
I purchased the the nice shiny stainless steel socket for the swingarm pivot(see the Guzzi tech store) prior to starting the job,it made the job very easy. It is well made and fitted perfectly.

A job well worth doing.
Next job is the steering head bearings and fork oil.
Brett
 
Holy Cow, I was trying to take the second "pork chop" foot rest plate off the right side of my '07 Breva, when the bike shifted back slightly! I realised only then that the center stand is secured to the frame by those same 4 bolts at the bottom of the footrest carrier plates. Maybe the center stand is an optional extra on these early V1100 Brevas??
 
Holy Cow, I was trying to take the second "pork chop" foot rest plate off the right side of my '07 Breva, when the bike shifted back slightly! I realised only then that the center stand is secured to the frame by those same 4 bolts at the bottom of the footrest carrier plates. Maybe the center stand is an optional extra on these early V1100 Brevas??


They were stock on the 06, and an option for the 07. Best to do this service on a Breva or Norge with the bike on a lift and using a jack to hold the bike up.
 
I think I'll put another couple bolts in the left side and sandwich it all together that way, so that when I remove the right side footrest carrier, it'll all hold together...
 
Spot-on write-up, and useful pics.

Did mine a while back, I love the way it all comes apart so easily and neatly, very good design.

One thing I'd suggest though, is never use a Steel Drift on the UJ like that to knock the Shaft off the Splines.
It would be all too easy to deform the housing and create a tight-spot on the Bearing.
Always use Wood or Plastic.

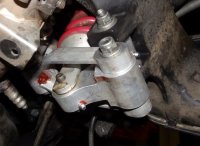
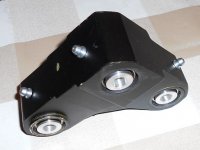
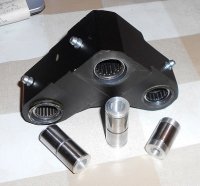
I fitted Grease Nipples to the Links while it was all apart.
Would like to have done the Swing-Arm bearings too, but the design of the Frame around the Pivot areas makes it nigh-on impossible.
Still, it only takes about half-an-hour to strip it, not a great chore once a year or so.
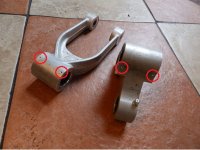
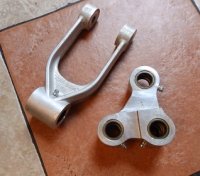
Linkage1 Linkage3 Linkage
 
I couldn't "knock" my driveshaft off the rear of the tranny's splines. I spritzed penetrant up through the splines, used a copper drift with a dead-blow hammer as well as a ballpein hammer, still no joy. I even put a big pry bar against the pretty machined bit where the boot stretches over the tranny, and just buggered/molested it nicely. I'll have to file that out. BASTA! ("ENOUGH!") I'll just squirt some Wurth aerosol grease into those splines.
 
Very useful write-up. Just did mine the other day and this was invaluable. Mine was in exactly the same state after 23000km - no grease on the shock linkage, swingarm pin hand tight, rather than 60Nm, no grease on the splines. Glad I got it sorted.
 
My swing arm bearings had some nice clean grease, but the pivot was nearly hand tight.
 
My Stelvio also suffered from Loose pinion and loose adjustor, Also, the mickey mouse built in seal was loose in the frame (housing). The whole design appears to be grease-free and designed to let water in but not out. So, while it was all in bits I thought I would put new bearings in. No-one in the UK has them - well, not that I can find anyway. I didn't want to do all that work and put the old bearings back in so I thought I'd buy a pair of OE style bearings from a Bearing supplier. Nope - no-one has them or can get them...Thanks to Google I found a Taper Roller with a "proper" built-in seal. I have ordered them and the other good news is they are cheaper than the OE bearings. Not by much, but it pays for the postage. FYI the part number is IKOS025. Let you know how I get on!
 

Attachments

  • nke-integral-taper-roller-bearings.pdf
    688.4 KB · Views: 36
A friend got a set from Gutsibits and sent to NZ at a good price. I see the seal design is different in the NKE bearing but looks possible better than OE.
I tried to find a set of after market bearing myself but had trouble finding one with the correct measurement at C.
The NKE looks correct in this respect.
 
I've since done a bit more to mine.
Fitted a BM* S1000 Shock.
I actually bought it for another (long term) Project, but when it arrived, I looked at it, then at the Stelvio Shock . . . it was damn close.
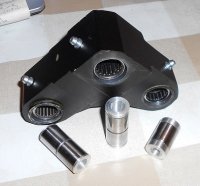
It went in, but is a touch longer (15mm or so), so I made a new Linkage for it.
ShockLinkII ShockLinkI
Had to make a couple of Spacers for the top end too.
Original Bearings and Bushes were shot (corroded), despite only being cleaned and re-greased less than 3000 miles ago.

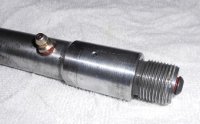
While it was apart, I also added Grease Nipples to the Swing-Arm Pivot . . .
SwingArmAxleI SwingArmAxleIII
Grease feeds out into the void next to each Bearing.
 
Well, I got the new IKOS025 bearings in. A perfect fit. Getting the old outer races out was a real chore. I modified my blind hole bearing puller but that would not shift either of the races, so I ground them away with a Dremel to the bore of the frame then they came out very easily. The original bearings by the way are 32005 sealed taper rollers - very easy to find! They're on eBay for less than a tenner each. But the IKOS025 have a much better seal, hopefully will last as long as I keep the bike. I did the suspension rocker bearings a year ago - they were bone dry and when I took it all apart the individual needle rollers just fell out. I pointed out to the dealer from where I purchased it that it should never have passed the MOT he did on it when I purchased it so he paid for the parts. Fair. Overall, I'm really happy with the Guzzi.
 
You need to be very careful when buying an after market bearing as a lot of 32005RS sealed bearings I have found only have a 15mm wide inner bore. Stock bearing brand is CCVI 32005 RS, 25 x 47 x 17mm. And with cup and cone together height is still about 17mm.
Like I said the NKE IKOS025 looks correct in this respect.
 
Another thing to watch for is the linkage bearings.
The factory bearing at least fitted to an 2008 Sport is a SL NK1816 - 18 x 24 x 16 but they are full complement meaning it is completely full of needles with no cage. This code is a bit confusing as other manufactures like SKF, INA etc use HN1816 for a full complement bearing. And to really confuse things the last factory set I purchased in a factory bag with the right part # were made by Torrington and were only 12 or 13mm wide !
 
I'm not convinced that 'Full complement' Needle Rollers are a good idea for Linkages.
Yes, they'll carry more load, but I think the lubrication may be 'compromised' by the lack of clearance.
Also, the Rollers are rubbing against each other in use.

I used more conventional Caged Rollers when I made the new Link for mine, I don't mind being the 'Guinea-Pig' . . . ;)

ShockLinkII ShockLinkI
 
Thanks, I'll keep an eye on it.
Will whip it all apart soon, just coming up to 1000 miles since fitted, so I'd like to see how they're doing.

My Thermostat sprung a slight Oil-weep last week, I made another Gasket for it from slightly thicker Paper than the original one, seems OK now.
 
This is enough to make me go back to a chain drive bike. LoL just kidding. This only need be done once far as I can tell, so not bad. Good write-up. Looks like a handful for an amateur repairman like myself, hopefully I can find a shop reasonably close to accomplish this when the time comes.

Although I can see where grease is sweating out all around the pivots on mine, so maybe the factory greased it properly.
 
Last edited:
Back
Top