• Ciao Guest - You’ve landed at the ultimate Guzzi site. NEW FORUM REGISTRATIONS REQUIRE EMAIL ACTIVATION - CHECK YOUR SPAM FOLDER - Use the CONTACT above if you need help. New to the forum? For all new members, we require ONE post in the Introductions section at the bottom, in order to post in most of the other sections. ALWAYS TRY A SEARCH BEFORE STARTING A NEW TOPIC - Most questions you may have, have likely been already answered. DON'T BE A DRIVE-BY POSTER: As a common courtesy, check back in and reply within 24 hours, or your post will be deleted. Note there's decades of heavily experienced Guzzi professionals on this site, all whom happily give endless amounts of their VALUABLE time for free; BE COURTEOUS AND RESPECTFUL!
  • There is ZERO tolerance on personal attacks and ANY HYPERLINKS to PRODUCT(S) or other competing website(s), including personal pages, social media or other Forums. This ALSO INCLUDES ECU DIAGnostic software, questions and mapping. We work very hard to offer commercially supported products and to keep info relevant here. First offense is a note, second is a warning, third time will get you banned from the site. We don't have the time to chase repeat (and ignorant) offenders. This is NOT a social media platform; It's an ad-free, privately funded website, in small help with user donations. Be sure to see the GTM STORE link above; ALL product purchases help support the site, or you can upgrade your Forum profile or DONATE via the link above.
  • Be sure to see the GTM STORE link also above for our 700+ product inventory, including OEM parts and many of our 100% Made-in-SoCal-USA GTM products and engine kits. In SoCal? Click the SERVICE tab above for the best in service, tires, tuning and installation of our products or custom work, and don't miss our GT MotoCycles® (not) art on the BUILDS tab above. WE'RE HERE ONLINE ONLY - NO PHONE CALLS MADE OR RECEIVED - DO NOT EMAIL AND ASK QUESTIONS OR ASK TO CALL YOU.
  • Like the new V100, GuzziTech is full throttle into the future! We're now running on an all-new server and we've updated our Forum software. The visual differences are obvious, but hopefully you'll notice the super-fast speed. If you notice any glitches or have any issues, please post on the Site Support section at the bottom. If you haven't yet, please upgrade your account which is covered in the Site Support section or via the DONATE tab above, which gives you full site access including the DOWNLOADS section. We really appreciate every $ and your support to keep this site ad-free. Create an account, sign in, upgrade your account, and enjoy. See you on the road in 2024.

Griso 8V: Change alternator belt in chassis ?

ett

Cruisin' Guzzisti
GT Contributor
Joined
Dec 31, 2011
Messages
161
Location
Allentown, PA
My Griso 8V is 2-1/2 years old and has 76k miles on it.
So I thought I'd do some preventive maintenance and change the alternator belt.

I removed the left and right body panels (air ducts ?; wings ?). And removed the ECU cover.
BUT
after spending about 10 min looking at the screws for the alternator belt cover.
The bottom four at clearly accessible. However; I don't see how to access the upper most screw.
It's buried deep behind the horn, ECU, frame, etc ..., and has a 2" spacer on it.
So I could not access it with my T-handle Allen wrenches or even a typical hex key.

Has anyone changed the alternator belt on their Griso 8V while the motor is still in the frame ?
If so; what all did you have to remove in the process ?
And what size is that upper most allen screw on the cover ?
(It's definitely smaller than the other screws which are 5mm.)

Thanks;
--ET

PS. I searched the forums. But was unable to find this topic already being covered.
If a thread already exists; please direct me towards it.
 
It can be done in frame, but requires tank removal and a few other various parts. I don't remember what the allen size was, but my Snap-On stubby socket allens always come in handy. Hope that helps some. You have the Service Manual I take it?
 
Thank you !

Yes I have the manual. But it only shows replacing the alternator belt with the motor entirely removed from the frame.
I thought I had read some where online; the process for changing the belt with motor still in frame.
But I couldn't find it.

Oh well; (first time) tank removal it is. ;)

Thanks !
 
My Griso 8V is 2-1/2 years old and has 76k miles on it.
That has got to be a Griso record, I'm impressed. Any unexpected big mechanical/electrical/hydraulic letdowns along the way you wish to share?
 
That has got to be a Griso record, I'm impressed. Any unexpected big mechanical/electrical/hydraulic letdowns along the way you wish to share?

I've posted on previous threads on this board and STN about my experiences over the miles.
I've had issues. BUT all of them were self induced. And no fault of Guzzi.

I'll try to find those posts and add links to them for you.
But the general gist is; I LOVE THIS BIKE ! :h:


Back to the topic of this thread.
I encountered issues removing the fuel tank. Mostly due to me and my tools. Not so much as with the design of the bike it's self.
And I mistakenly posted them in the thread I in which I asked about how to remove the fuel tank:
https://www.guzzitech.com/forums/threads/griso-8v-how-to-remove-fuel-tank.13589/
 
Resurrecting an old thread.

1. I pulled the front wheel for new tires and discs, my disks were very rattley
2. Remove fuel tank. it takes the right Zen a 2x4 under the tail and patience for me
3. Unbolt ECU cover then ECU & move to the side.
4. Remove alternator belt cover.
5. Unbolt right side horn and move to the side.
6. Unbolt breather box (bolt located below ignition switch).
7. Unsnap straps that hold right side beather hose to frame & remove breather tube from airbox on right side. Move breather box so that you can get a straight shot kid-of at the alternator clamp bolt.
8. Remove tension on belt tensioner.
9. WD 40 Bolt head.

10. Screw up the 6mm allen holding on the tension side of the alternator that Luigi must have used a meter long breaker bar on to tighten.

11. Walk away from the bike, talk to the youngest son about the prejudice against bikes & scooters. reacquire the right Zen.

12. Take a fresh look at the offending bolt. The sides are shrouded by the belt cover but the front is "proud" and somewhat accessible from the front -through the frame.

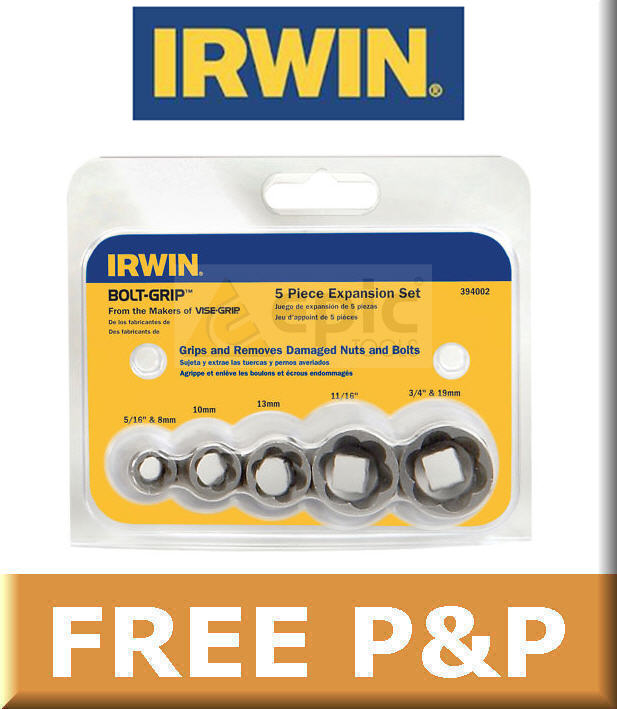
13. Break out the Irwin bolt extractors, extension, 3/8's socket wrench and "it's a miracle" the bolt comes out. Now I see why my WD40 didn't work. Applying WD40 on the head never made it to the threads. Note to self: when you can see the threads of the bolt on the back of the alternator use the WD40 there - where it will do some good.

irwin_bolt_grip_expansion_set_5pce.jpg


14. Push alternator down to relieve tension, take off old belt and carefully, using thumbs put new belt on. Like putting on a bike tire with just your hands.

Now I can sleep tonight. Tomorrow I'll get an M10x45 allen bolt with a proud head. Tension the belt and button her up.

She'll be good for this season with only an oil change and valve adjustment.
 
Last edited:
Just a note, WD 40 is a terrible penetrating oil. Next time try a 50/50 mix of acetone and ATF. As you said though, application in the correct spot makes a bid difference. BTW, those extractors look like they can come in handy. Looks like a future purchase for me.
 
Back
Top