• Ciao Guest - You’ve landed at the ultimate Guzzi site. NEW FORUM REGISTRATIONS REQUIRE EMAIL ACTIVATION - CHECK YOUR SPAM FOLDER - Use the CONTACT above if you need help. New to the forum? For all new members, we require ONE post in the Introductions section at the bottom, in order to post in most of the other sections. ALWAYS TRY A SEARCH BEFORE STARTING A NEW TOPIC - Most questions you may have, have likely been already answered. DON'T BE A DRIVE-BY POSTER: As a common courtesy, check back in and reply within 24 hours, or your post will be deleted. Note there's decades of heavily experienced Guzzi professionals on this site, all whom happily give endless amounts of their VALUABLE time for free; BE COURTEOUS AND RESPECTFUL!
  • There is ZERO tolerance on personal attacks and ANY HYPERLINKS to PRODUCT(S) or other competing website(s), including personal pages, social media or other Forums. This ALSO INCLUDES ECU DIAGnostic software, questions and mapping. We work very hard to offer commercially supported products and to keep info relevant here. First offense is a note, second is a warning, third time will get you banned from the site. We don't have the time to chase repeat (and ignorant) offenders. This is NOT a social media platform; It's an ad-free, privately funded website, in small help with user donations. Be sure to see the GTM STORE link above; ALL product purchases help support the site, or you can upgrade your Forum profile or DONATE via the link above.
  • Be sure to see the GTM STORE link also above for our 700+ product inventory, including OEM parts and many of our 100% Made-in-SoCal-USA GTM products and engine kits. In SoCal? Click the SERVICE tab above for the best in service, tires, tuning and installation of our products or custom work, and don't miss our GT MotoCycles® (not) art on the BUILDS tab above. WE'RE HERE ONLINE ONLY - NO PHONE CALLS MADE OR RECEIVED - DO NOT EMAIL AND ASK QUESTIONS OR ASK TO CALL YOU.
  • Like the new V100, GuzziTech is full throttle into the future! We're now running on an all-new server and we've updated our Forum software. The visual differences are obvious, but hopefully you'll notice the super-fast speed. If you notice any glitches or have any issues, please post on the Site Support section at the bottom. If you haven't yet, please upgrade your account which is covered in the Site Support section or via the DONATE tab above, which gives you full site access including the DOWNLOADS section. We really appreciate every $ and your support to keep this site ad-free. Create an account, sign in, upgrade your account, and enjoy. See you on the road in 2024.

2008 1200 Sport 2V slipping clutch

Mark_Sassafras

Tuned and Synch'ed
Joined
May 10, 2011
Messages
40
Location
Sassafras, Victoria AUS
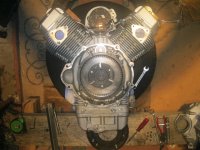
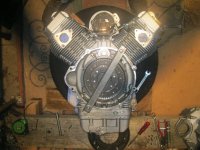
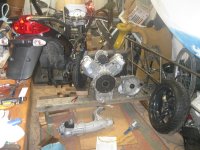
Hi, I have just bought my 1st Guzzi, a second hand 2008 1200 Sport 2V, done 9000kms. I am very pleased with the bike, it is a joy to ride. However the clutch slips under hard accelleration. Which is the best method to replace the clutch, remove the engine, or remove the gearbox and swing arm ?

Regaqrds,
Mark.
 
The previous owner would have ruined the clutch in only 9000km?

I've heard reports here of clutch slipping due to old clutch fluid. I'd purge and/or renew the fluid first, before you dive into the machine. BTW, I do think it's possible to have a peek at the disks without opening the bike, but others will have to confirm.
 
Renee may have something. If the slave/MC combination doesn't fully release pressure on the pressure plate, you could suffer slippage. Usual fluid failure is not being to disengage, but changing out to fresh DOT 4 is worth a try. BTW, with the clutch plates cannot be seen without complete disassembly. Another possible slippage cause is oil contamination from the transmission input seal or clutch push rod seals, but if you aren't leaking oil, it is less likely.
 
Thanks guys,

judging by the blistered paint around the clutch lever reservoir, I think the fluid may have been changed, but I will give it a try, but I'm not hopeful. Also, the clutch thrust bearing is noisy when the lever is operated, so I think the bike may have spent its short life idleing at traffic lights with the clutch lever operated.
I'm keen to get the problem fixed so that I can fully enjoy the bike. It is such a pleasure to ride.

I'm working on my wife to let me repair the bike in the dining room, it is so cold down in the garage during winter.
It has been snowing in the Dandenongs this morning.

Regards,
Mark
 
If you mean that there is a high pitched ringing, 'Chinky Chinky' type noise when the lever is pulled in that is perfectly normal. It's the intermediate plate rattling in the splines of the flywheel. The thrust bearing is at the back of the gearbox and if they fail they tend to do so silently as they are very small!

Getting to the clutch on a Breva/Sport is a pain in the arse. You have to drop the swingarm, remove the airbox and TB's and then lift the frame after un-bolting it at the front to get the box out so you can have-at the clutch. Don't be tempted to try and reassemble it without a clutch compressing tool or you will most likely be repeating the excercise next week.

pete
 
Hi guys,

I'm back on the road again. The problem was gearbox oil leaking along the clutch activating rod onto the clutch. I replaced the 2 bushes on the clutch activating rod and the clutch plates.

The hardest part was separating the engine/gearbox from the frame. The front of the frame would not clear the alternator mount/housing when lifting the front of the frame as described in the workshop manual. The clutch activating cylinder at the rear of the gearbox had to be removed, as well as the alternator belt adjusting bolt, to give a bit more clearance. I then swung the rear of the frame to the left to clear the gearbox and then lifted the frame clear.


I don't know what caused the problem. On completion, when refilling the gearbox with oil, I was very careful not to overfill, exactly 500ml. I've learnt a lot and enjoyed the experience, and appreciate the Moto Guzzi engineering, but I don't want to repeat this exercise anytime soon.

Thanks to everyone for their advice, especially Steven at Guzzi Spares Australia on how to align the clutch parts without any specialist tools. A piece of cake.

Regards,
Mark.
 

Attachments

  • Bike2.jpg
    Bike2.jpg
    598.4 KB · Views: 627
The process I used is the following.

1. Lay the engine on its front, so that the clutch is horizontal. On a car tyre is ideal.

2. Place the 1st clutch plate in position, roughly centre but not critical.

3. Place the intermediate plate in position. Centre this with respect to the 1st clutch plate by placing 3 spacers, approx. 21mm in length, at 120 degrees with each other, ie. at 12, 4 and 8 o'clock, between the outside of the clutch plate gear and the inside of the intermediate plate. The exact length of the spacers can be determined by placing each one individually in position, and then directly opposite, filing them to length so that they are a neat fit in both positions.


4. Place an old clutch plate on top and visually centre with the first clutch plate. The next step puts lateral pressure on the centre gear of the plate and may distort the plate, so use an old plate, better safe than sorry.

5. Cut and drill a piece of angle iron so that it fits diagonally across the clutch and over 2 opposing bell housing studs. While gradually and evenly tightening the nuts on the 2 studs so the plates are compressed towards the clutch housing, align the teeth on the intermediate plate so that they will cleanly engage with the clutch housing.


6. Evenly undo the stud nuts, and without disturbing the 1st clutch plate and the intermediate plate, remove the angle iron, the old clutch plate and the 3 spacers.

7. Place the 2nd new clutch plate in position and align its teeth with the 1st clutch plate. I done this ok visually, easy, but the clutch gear off the gearbox could be used.

8. Place the flywheel in position and partially tighten, leaving a 3mm gap, so that the clutch plates are not fully pressured. It is easier to use longer bolts to do this.

9. Test fit the gearbox, gently jiggling if required so that the gearbox clutch gear engages the clutch plates. Remove the gearbox.

10. Tighten the flywheel and mount the gearbox.

Regards,
Mark
 

Attachments

  • Bike1 001.jpg
    Bike1 001.jpg
    507.1 KB · Views: 629
  • Bike1 002.jpg
    Bike1 002.jpg
    507.9 KB · Views: 629
Back
Top