Didier
Cruisin' Guzzisti
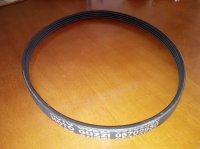
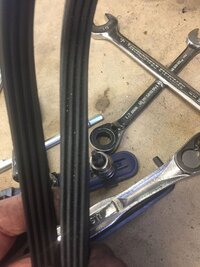
Like you said not a big job 20 minutes for the BMW....and I bet it was a lot easier, cheaper and quicker to replace than the Guzzi. My wife had a 15 year old mini when she was a student 30 years ago and her alternator belt broke shortly after she moved into student digs. I replaced it for her and that was the start of a beautiful relationship that is still ongoing today (the wife, not the mini).
Usually a broken alternator belt doesn't cause any damage, but leaves you running on battery for a while. If you're lucky you can make it home or somewhere safe, but in the middle of nowhere, don't count on it.

") . Peter
. Peter . Peter