I have had a PM request to post this up again, third time lucky!
The following is Courtesy of Graham In NZ from the old/old/old board - IMO worth repeating. The Norge is for most purposes the same but there are sure to be some differences because of your extra plastic bits.
Breva fuel tank removal
This is a prick of a task and ridiculously complex and time consuming. Also best done with a nearly empty tank. Apart from the number of parts needing to be undone or removed, the main problems are the reluctant “quickly detachable”fuel line connector and then what to do with the tank once off the bike.
I’ve removed a lot of tanks from a lot of bikes and the Breva’s would rate up there with the worst of them, which is why I raise it but don’t remove it when adjusting the tappets. The tank is a piss poor effort, maintenance-wise IMHO. Anyway here’s the method I use.
• Best to remove the front plastic panel above the oil cooler. That involves removing only one dome nut more than removing just the four screws which connect the panel to the tank side wings.
• Remove the plastic body panels at the rear of the tank and below the seat both sides. Screw at the back. Push in plug lower front. Lug up under tank upper front.
• Disconnect the tank vent and filler cap drain lines from the plastic T-union.
• Disconnect the tank electrical lead plug.
• Remove the rear of tank fixing bolt.
• Raise the rear of the tank and support it on a block of wood.
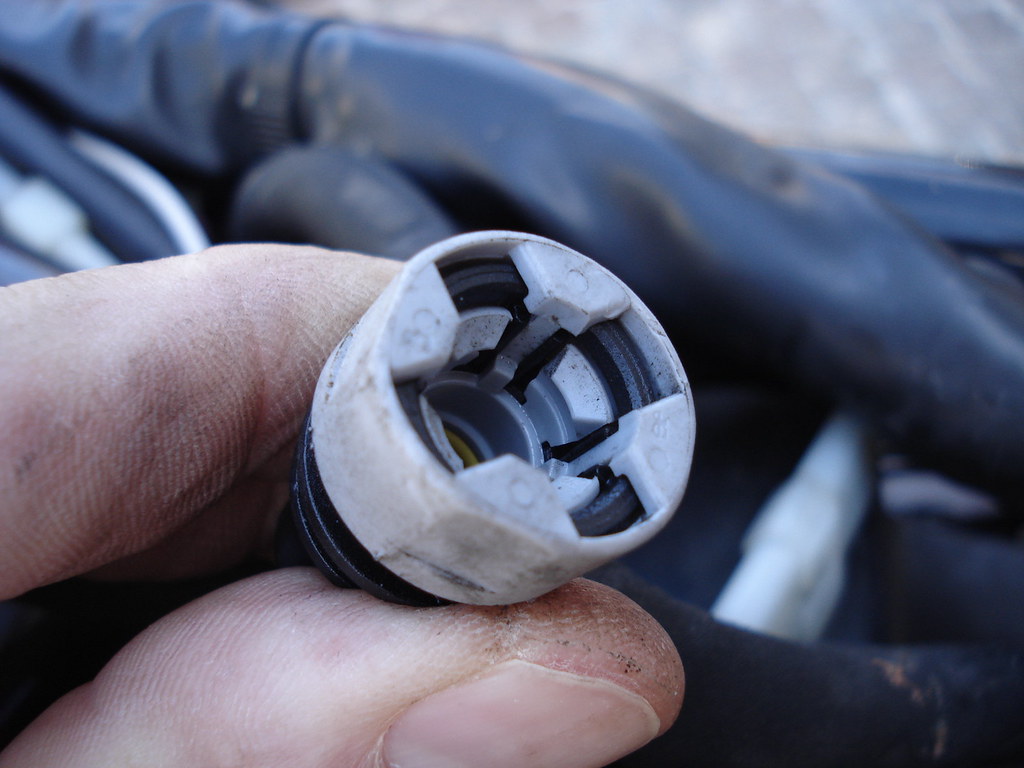
• Disconnect the fuel hose coupling. Be careful with the fuel connector, if you've not done it before, it is tricky. It works like a compressed air hose coupling. Push the hose towards the red elbow fitting and at the same time wiggle the grey collar back towards the hose. When it releases it will slide off easily. Refitting is very easy as the hose just pushes on and snaps into the locked position. With the hose removed the red plastic elbow is meant to be fuel tight but it isn’t completely so.
And another explanation: With left hand hold the 90 degree bend fixed flexibly to the tank base plate. With the right hand grip the hose between your middle to small fingers palm and push it towards the 90 degree bend, and at the same time with your right thumb and forefinger pull the grey collar back, all the while wiggling the thing a bit. A prick of a thing really, but it does come off with courage. Once off the stupid hose end still dribbles a bit so it's best to do it with an almost empty tank and then to place the tank down with the rear end raised a bit as if ready for mating doggy style.
• Lower the rear of the tank then pull the tank backwards and then up a bit and off the bike. It helps if a helper can spread the tank side wings a bit to clear things.
• If the tank is set down on a flat surface some fuel will drip from the red elbow fitting. If the tank is placed upside down fuel will seep from the filler cap and the fuel level sending unit may stick it the full position. The best position for the tank is nose down onto a support under the tank proper just behind the steering head and the tank set up at about 45 degrees and supported at the rear. I use a wall for that and a wooden stool for the nose.
The following is Courtesy of Graham In NZ from the old/old/old board - IMO worth repeating. The Norge is for most purposes the same but there are sure to be some differences because of your extra plastic bits.
Breva fuel tank removal
This is a prick of a task and ridiculously complex and time consuming. Also best done with a nearly empty tank. Apart from the number of parts needing to be undone or removed, the main problems are the reluctant “quickly detachable”fuel line connector and then what to do with the tank once off the bike.
I’ve removed a lot of tanks from a lot of bikes and the Breva’s would rate up there with the worst of them, which is why I raise it but don’t remove it when adjusting the tappets. The tank is a piss poor effort, maintenance-wise IMHO. Anyway here’s the method I use.
• Best to remove the front plastic panel above the oil cooler. That involves removing only one dome nut more than removing just the four screws which connect the panel to the tank side wings.
• Remove the plastic body panels at the rear of the tank and below the seat both sides. Screw at the back. Push in plug lower front. Lug up under tank upper front.
• Disconnect the tank vent and filler cap drain lines from the plastic T-union.
• Disconnect the tank electrical lead plug.
• Remove the rear of tank fixing bolt.
• Raise the rear of the tank and support it on a block of wood.
• Disconnect the fuel hose coupling. Be careful with the fuel connector, if you've not done it before, it is tricky. It works like a compressed air hose coupling. Push the hose towards the red elbow fitting and at the same time wiggle the grey collar back towards the hose. When it releases it will slide off easily. Refitting is very easy as the hose just pushes on and snaps into the locked position. With the hose removed the red plastic elbow is meant to be fuel tight but it isn’t completely so.
And another explanation: With left hand hold the 90 degree bend fixed flexibly to the tank base plate. With the right hand grip the hose between your middle to small fingers palm and push it towards the 90 degree bend, and at the same time with your right thumb and forefinger pull the grey collar back, all the while wiggling the thing a bit. A prick of a thing really, but it does come off with courage. Once off the stupid hose end still dribbles a bit so it's best to do it with an almost empty tank and then to place the tank down with the rear end raised a bit as if ready for mating doggy style.
• Lower the rear of the tank then pull the tank backwards and then up a bit and off the bike. It helps if a helper can spread the tank side wings a bit to clear things.
• If the tank is set down on a flat surface some fuel will drip from the red elbow fitting. If the tank is placed upside down fuel will seep from the filler cap and the fuel level sending unit may stick it the full position. The best position for the tank is nose down onto a support under the tank proper just behind the steering head and the tank set up at about 45 degrees and supported at the rear. I use a wall for that and a wooden stool for the nose.

")
")