Well, this isn't really a new thread but it has been a while since anyone last posted anything new. After dropping the tank from my 2007 Norge and snapping the red plastic elbow I conducted a successful internet search and parts installation. I thought I'd share what I've found/learned just in case there are other clumsy fingered 'wrenches' out there.
I've seen quite a few options for for 'fixing' a broken red elbow on the fuel tank but little or nothing for putting the bike back to the OEM configuration. I'm certainly not implying OEM is better but there are some of us who like things just the way they came from the factory.
Here is what I've learned.
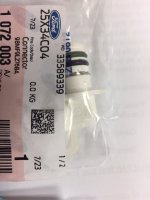
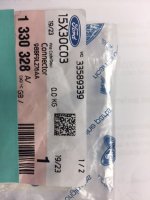
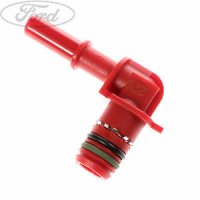
1) It is possible to obtain the EXACT same red plastic elbow that MG uses. I've read the plastic elbows are available from Aprilia but every time I checked the part was not in stock. Now get this: the part is available from FORD Europe. More specifically, from FORD UK. There are red and white plastic elbows (both red and white are identical size and shape) which are used on certain Ford Fiestas fuel rails. Ford p/n for the red elbow is 1330 328 and white is 1072 003. Bad news is that the couple of Ford dealers I contacted said they will NOT ship these parts to the USA. However, if you know anyone (or maybe another parts supplier), you can have the elbows shipped within the UK or GPB 1.00 or about $US 1.26 and then from the UK (via British Mail) to the USA for a few bucks. Photos of red and white plastic elbows attached with part numbers.
After you receive the new elbow you can drill it out what's left of the broken elbow in the fuel pump plate or just jerk it out of the pot metal fuel pump base plate. I chose to drill the plastic by hand very carefully with increasing drill sizes until you see the toothed washer which holds the elbow in the base plate. Once you've drilled to about 3/8 " you should see the toothed washer. I used a small pick to pry out the toothed washer. The remaining plastic can easily be pulled out of the plate. This tedious work eliminated scoring the ID of the pot metal fuel pump base and assures no leaks.
I applied a little Vasoline to the O-rings on the new elbow and tapped it into the opening. You are now back to OEM!
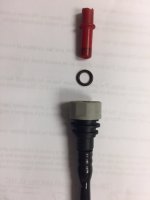
2) The troublesome connector which attaches to the red elbow sometimes leaks. From what I've seen the leak can simply be caused by a worn O-ring which is located down inside the connector. Look inside the connector and you should see a bright yellow O-ring. You have two options:
a) the O-Ring can be replaced with a Viton O-ring found at Advance or AutoZone but, holy smoke, what a PITA. I used a long sewing needle and was able to easily lift out the old (bright yellow color) O-ring. Getting the new Viton O-ring back in took an hour or so to get it seated properly. But..it can be done.
b) The connector is available from Gutsibits ( http://www.gutsibits.co.uk/ ) but then you will struggle with getting the barbed end of the connector into the 8mm hard nylon fuel line. If you do cut the old connector from the existing fuel line you will end up with a fuel line which is most likely too short to connect to the elbow. This mean you must splice in new nylon tubing (available from NAPA) or other parts suppliers. NOTE: most parts stores only sell the 8mm or 5/16 line in lengths no less than 10 feet (you only need a foot at most). Of course you will need a barb-to-bard connector, Oetiker type hose clamps and the crimping tool if you don't have one. And, of course, you will no longer be to OEM standards plus you'll be out of pocket $50+ just for the fuel line, clamps and crimping tool.
Now at this point you need to decide if you want to cut the connector off, spend the $$ or struggle replacing the O-Ring.
For the sake of full disclosure, I ended up cutting the original connector from the exiting fuel line. I was lucky enough to find a garage with a DORMAN tool which presses the barbed plastic fittings in to hard nylon fuel line. This is the CORRECT method...not heat shrinking as some some suggest. However, if you do not have access to the DORMAN tool then heat is just about the only option outside making a homemade press.
I cut 10-inches from the 10-foot length of fuel line (that was hard to swallow) and the garage pressed in the new connector. But, I had to heat the end of the existing fuel line and the 10-inch piece to be able to insert the barb-to-barb connector and connect the two pieces.
Now here's the irony: after cutting off the original connector I thought I'd have one more attempt at getting the O-ring back in place. In less than a minute the O-ring was securely/properly seated.
Well, I'm not to OEM specs, spent $50 but I have NO leaks. I've learned how to easily remove the OEM connector and hopefully not drop the tank again.


