• Ciao Guest - You’ve landed at the ultimate Guzzi site. NEW FORUM REGISTRATIONS REQUIRE EMAIL ACTIVATION - CHECK YOUR SPAM FOLDER - Use the CONTACT above if you need help. New to the forum? For all new members, we require ONE post in the Introductions section at the bottom, in order to post in most of the other sections. ALWAYS TRY A SEARCH BEFORE STARTING A NEW TOPIC - Most questions you may have, have likely been already answered. DON'T BE A DRIVE-BY POSTER: As a common courtesy, check back in and reply within 24 hours, or your post will be deleted. Note there's decades of heavily experienced Guzzi professionals on this site, all whom happily give endless amounts of their VALUABLE time for free; BE COURTEOUS AND RESPECTFUL!
  • There is ZERO tolerance on personal attacks and ANY HYPERLINKS to PRODUCT(S) or other competing website(s), including personal pages, social media or other Forums. This ALSO INCLUDES ECU DIAGnostic software, questions and mapping. We work very hard to offer commercially supported products and to keep info relevant here. First offense is a note, second is a warning, third time will get you banned from the site. We don't have the time to chase repeat (and ignorant) offenders. This is NOT a social media platform; It's an ad-free, privately funded website, in small help with user donations. Be sure to see the GTM STORE link above; ALL product purchases help support the site, or you can upgrade your Forum profile or DONATE via the link above.
  • Be sure to see the GTM STORE link also above for our 700+ product inventory, including OEM parts and many of our 100% Made-in-SoCal-USA GTM products and engine kits. In SoCal? Click the SERVICE tab above for the best in service, tires, tuning and installation of our products or custom work, and don't miss our GT MotoCycles® (not) art on the BUILDS tab above. WE'RE HERE ONLINE ONLY - NO PHONE CALLS MADE OR RECEIVED - DO NOT EMAIL AND ASK QUESTIONS OR ASK TO CALL YOU.
  • Like the new V100, GuzziTech is full throttle into the future! We're now running on an all-new server and we've updated our Forum software. The visual differences are obvious, but hopefully you'll notice the super-fast speed. If you notice any glitches or have any issues, please post on the Site Support section at the bottom. If you haven't yet, please upgrade your account which is covered in the Site Support section or via the DONATE tab above, which gives you full site access including the DOWNLOADS section. We really appreciate every $ and your support to keep this site ad-free. Create an account, sign in, upgrade your account, and enjoy. See you on the road in 2024.

Fitting PIAA Driving Lights to the V100

John in PA

Cruisin' Guzzisti
GT Contributor
Joined
Jul 31, 2009
Messages
255
Location
Hollidaysburg, PA

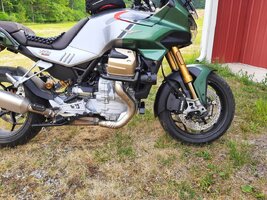
PIAA 02772 LP270 2.75" LED Driving Light Kit (complete with wiring harness and relay) ($248 plus tax)​

These are SERIOUS driving lights.

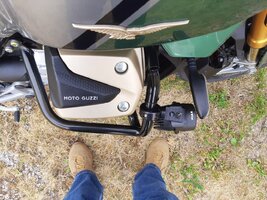
PIAA 74000 7/8"-1.25" L-Bracket, (Twin Pack) ($87 plus tax)​

Included multiple bushings allow the bracket set to fit multiple size bars securely. Infinitely adjustable for mounting angle in 3 axes.

The trickiest business is routing wires away from moving bits and hot bits. With the aid of good lighting and a long flexible "grabber" it can be done. Body work removed included both side covers, loosened both "sub-sidecovers,", seats, battery cover. Removed fasteners at rear of bodywork, just enough to get a bit of extra lift to apply cable ties and route wiring. Main power connected directly to battery terminals per harness design. Finding a keyed 12V supply for the positive trigger wire required a bit of detective work. The OBD2 plug just under the seat is out as it is directly connected to ECU circuitry. The other plug stowed just under the seat is for the on board multimedia system. While it is switched power, a meter check proved it only supplies 5.5V, not near the 12V required to trip the relay for the lights. The OEM power plug for the factory fog lights is attached right under the left side cover. Alas, it supplies NO voltage, keyed or otherwise, unless the factory harness is attached.
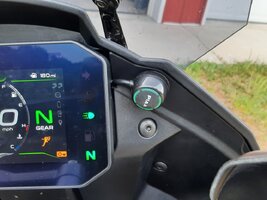
A search of the shop manual and wiring diagram revealed that the fuse for the OEM fog light trigger circuit is right under the passenger seat, right side fuse block, 2nd fuse from the front, a 5A. I piggybacked the trigger wire off the load side of the fuse so that that part of the circuit would also be fused (the main supply has its own fuse in the +ve lead to the battery) The lighted on/off switch (red=OFF, green=ON) I located in a perfect location on the right dash panel, which also has plenty of room behind it to stow the connector and extra loops of trigger wire.

Abundant extra wire in the harness was also easily stowed in a well in front of the battery. Altogether, a rather neat and tidy install, after considerable head scratching...

I like loud horns and bright lights on a motorcycle. PIAA has now met both needs for my V100.
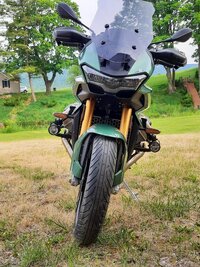
20230603 182854 20230603 182915 20230603 182936 20230603 183022 20230603 183033
 
Last edited:
Well done! Clean job… you have a nicely tricked out V100S👍😁! Thx for the write up. Seems like a great alternative to the MG accessory lights. Nice and bright, I’ll bet!
 
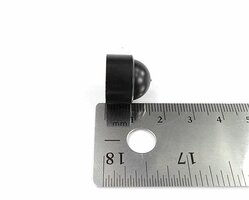
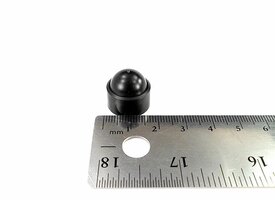
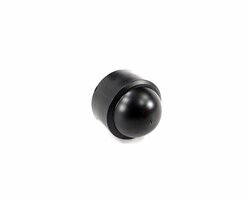
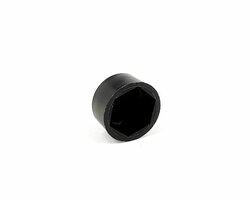
Nicely done. One suggestion. Get the BMW nut caps from the old R100 bikes. I bet the nut is the same size as your PIAA light bolts. They only cost about $2.30 each side.

If you use a Dremel with a cutting wheel or a hacksaw, cut down the excess bolt and cover them with these caps with a dap of RTV silicone inside to make it stay in place, it will totally clean up the appearance and reduce the chance of snagging anything with those bolts sticking up like that.

BMW Part : 46 51 1 234 785


Thanks, good observation. I'm leaving them alone till I have a chance to fine-tune the aim point of the lights after dark. Then, it would make a neater cleaner look for certain. I might even have a couple trim caps laying around the shop!

13mm trim caps
;)
 
Last edited:

PIAA 02772 LP270 2.75" LED Driving Light Kit (complete with wiring harness and relay) ($248 plus tax)​

These are SERIOUS driving lights.

PIAA 74000 7/8"-1.25" L-Bracket, (Twin Pack) ($87 plus tax)​

Included multiple bushings allow the bracket set to fit multiple size bars securely. Infinitely adjustable for mounting angle in 3 axes.

The trickiest business is routing wires away from moving bits and hot bits. With the aid of good lighting and a long flexible "grabber" it can be done. Body work removed included both side covers, loosened both "sub-sidecovers,", seats, battery cover. Removed fasteners at rear of bodywork, just enough to get a bit of extra lift to apply cable ties and route wiring. Main power connected directly to battery terminals per harness design. Finding a keyed 12V supply for the positive trigger wire required a bit of detective work. The OBD2 plug just under the seat is out as it is directly connected to ECU circuitry. The other plug stowed just under the seat is for the on board multimedia system. While it is switched power, a meter check proved it only supplies 5.5V, not near the 12V required to trip the relay for the lights. The OEM power plug for the factory fog lights is attached right under the left side cover. Alas, it supplies NO voltage, keyed or otherwise, unless the factory harness is attached.
A search of the shop manual and wiring diagram revealed that the fuse for the OEM fog light trigger circuit is right under the passenger seat, right side fuse block, 2nd fuse from the front, a 5A. I piggybacked the trigger wire off the load side of the fuse so that that part of the circuit would also be fused (the main supply has its own fuse in the +ve lead to the battery) The lighted on/off switch (red=OFF, green=ON) I located in a perfect location on the right dash panel, which also has plenty of room behind it to stow the connector and extra loops of trigger wire.

Abundant extra wire in the harness was also easily stowed in a well in front of the battery. Altogether, a rather neat and tidy install, after considerable head scratching...

I like loud horns and bright lights on a motorcycle. PIAA has now met both needs for my V100.
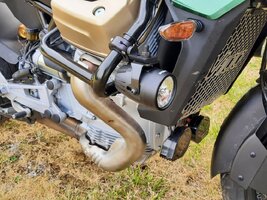
View attachment 30211View attachment 30212View attachment 30213View attachment 30214View attachment 30215
Turn it on bro, and at night please!!
 
Back
Top