• Ciao Guest - You’ve landed at the ultimate Guzzi site. NEW FORUM REGISTRATIONS REQUIRE EMAIL ACTIVATION - CHECK YOUR SPAM FOLDER - Use the CONTACT above if you need help. New to the forum? For all new members, we require ONE post in the Introductions section at the bottom, in order to post in most of the other sections. ALWAYS TRY A SEARCH BEFORE STARTING A NEW TOPIC - Most questions you may have, have likely been already answered. DON'T BE A DRIVE-BY POSTER: As a common courtesy, check back in and reply within 24 hours, or your post will be deleted. Note there's decades of heavily experienced Guzzi professionals on this site, all whom happily give endless amounts of their VALUABLE time for free; BE COURTEOUS AND RESPECTFUL!
  • There is ZERO tolerance on personal attacks and ANY HYPERLINKS to PRODUCT(S) or other competing website(s), including personal pages, social media or other Forums. This ALSO INCLUDES ECU DIAGnostic software, questions and mapping. We work very hard to offer commercially supported products and to keep info relevant here. First offense is a note, second is a warning, third time will get you banned from the site. We don't have the time to chase repeat (and ignorant) offenders. This is NOT a social media platform; It's an ad-free, privately funded website, in small help with user donations. Be sure to see the GTM STORE link above; ALL product purchases help support the site, or you can upgrade your Forum profile or DONATE via the link above.
  • Be sure to see the GTM STORE link also above for our 700+ product inventory, including OEM parts and many of our 100% Made-in-SoCal-USA GTM products and engine kits. In SoCal? Click the SERVICE tab above for the best in service, tires, tuning and installation of our products or custom work, and don't miss our GT MotoCycles® (not) art on the BUILDS tab above. WE'RE HERE ONLINE ONLY - NO PHONE CALLS MADE OR RECEIVED - DO NOT EMAIL AND ASK QUESTIONS OR ASK TO CALL YOU.
  • Like the new V100, GuzziTech is full throttle into the future! We're now running on an all-new server and we've updated our Forum software. The visual differences are obvious, but hopefully you'll notice the super-fast speed. If you notice any glitches or have any issues, please post on the Site Support section at the bottom. If you haven't yet, please upgrade your account which is covered in the Site Support section or via the DONATE tab above, which gives you full site access including the DOWNLOADS section. We really appreciate every $ and your support to keep this site ad-free. Create an account, sign in, upgrade your account, and enjoy. See you on the road in 2024.

Marzocchi Forks leaking even after new oil seal

Liz

Just got it firing!
Joined
Oct 17, 2023
Messages
11
Location
Southern Queensland, Australia
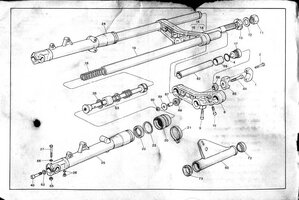
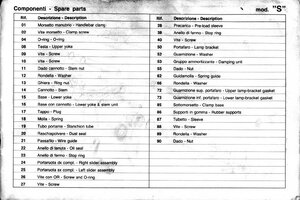
My Mk 3 Le Mans has Marzocchi forks, and I have a problem with one fork leaking, even after re-hard chroming and several oil seal replacements. Someone suggested replacing the bush. I have the 'S' type forks which don't seem to have a bush according to the exploded diagram I have. (The file of the service manual I have won't attach).
Any ideas on what I should look for that might be causing the leak?
 
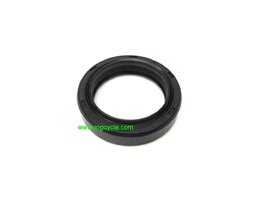
Most fork seals have the sealing lips designed to be installed with a specific face of the seal facing either up or down , incorrect and they become very ineffective. Someone else here may be able to post a picture that illustrates my point . Peter
 
Most fork seals have the sealing lips designed to be installed with a specific face of the seal facing either up or down , incorrect and they become very ineffective. Someone else here may be able to post a picture that illustrates my point . Peter
I would have thought they could only go in one way. I'll remove the seal tomorrow and have a look and get back to you. Thanks Peter.
 
To be quite honest, I can't remember. I haven't done much with the Mk 3 for a few years, but I probably used a rubber mallet and an old seal to gently tap the new one into position.

I’ve always done this the same way…

Seals go into the freezer. Tube gets heated with gentle handheld torch or heat gun.

Insert freezing cold seals into heated (hot but not scalding hot glowing red!) tubes.

[GENTLE - You are not making the metal molten again! You want a hot tube which is expanded slightly and a frozen seal which is contracted slightly.]

If they are like early BMW fork seals, they will most likely literally drop right into place or require very little insertion force. When the temperatures return to room temperature, the seal will be snug as a bug in a rug.

Orientation is obvious and you would have to be really drunk to put them in upside down.

Check carefully that the inside seating surface of the fork tube, is perfectly clean and free of any oil, dirt, dust, anything at all before inserting new seal. It must be 100% clean. No exceptions.

I have seen groves scrapped into the inner surface of the tube from using an awl or pick or screwdriver to pry out the old seal. This damage will cause leaking almost immediately.

IMG 2736
 
Last edited:
I use a different technique from Scott. To prevent any damage to the lip seal, I assemble the fork then slide the new seal down the fork tube to the slider. Then drive it home using a seal driver that goes around the tube to seat the seal into the slider. This if the application uses a dust cover that is installed the same way. This is a necessity if the fork tube has a bushing that go into the slider since the bush ends can damage the seal if you install the seal first.
 
Like John, I have installed other seals with that technique. In fact, the seals on the Stelvio are done that way. I have the split seal pressing tool that the two halves come around the stanchion tube to slide the seal down into place.

I didn’t mean to offer a definitive method, but rather to offer how I have done them in the past.

Best of luck to you!
 
I would have thought they could only go in one way. I'll remove the seal tomorrow and have a look and get back to you. Thanks Peter.
Apologies for the late reply. We've been fighting bushfires in our neck of the woods, and I can't even move the Guzzi to a safe location, due to the front wheel being worked on elsewhere atm. Well, the lip seal was damaged, so will try a new seal and see how it goes. I'll try the method of heating and freezing method. I'm still not convinced my model forks have bushes. Marzocchi 01 Marzocchi 02
 
From the parts diagram you posted, no bushes. Carefully inspect the fork tubes for any burrs or pits that can damage a seal. It doesn't take much to damage a lip on the seal.
 
I run a 45mm Marzocchi front end and have been through 2 seal sets in under 40k.
There simply had to be a reason why the seals were chewing out so quickly.
So I had the chrome professionally examined under a microscope and discovered micro pitting every where and since chrome plating is porous by nature I deducted that the abrasion caused by the pitting was the cause of accelerated wear.
The solution was to go to the third set of seals but also to lightly hone in a cross hatched pattern the area of wear.
Then thoroughly clean any grit away and reassemble the forks using rubber grease around the seals.
The first few days of riding ejected the grease and any further residual grit left over and once it settles down by the natural polishing action in use its perfect!
Moral of this story is here, it wasn't the seals fault but it's counterpart, the fork.
Chris.
 
Every motorcycle I own is fitted immediately with fork gaitors. I find the neoprene ones are the easiest to install. These bikes have never had a seal failure. Insect skeletons, stone nicks and such will ruin a seal in no time.
This is very true and here in Australia a lot of airborne insects have a high salt content (maybe the same elsewhere too) so it's doubly bad when touring around lakes and marshes.
 
Back
Top