• Ciao Guest - You’ve landed at the ultimate Guzzi site. NEW FORUM REGISTRATIONS REQUIRE EMAIL ACTIVATION - CHECK YOUR SPAM FOLDER - Use the CONTACT above if you need help. New to the forum? For all new members, we require ONE post in the Introductions section at the bottom, in order to post in most of the other sections. ALWAYS TRY A SEARCH BEFORE STARTING A NEW TOPIC - Most questions you may have, have likely been already answered. DON'T BE A DRIVE-BY POSTER: As a common courtesy, check back in and reply within 24 hours, or your post will be deleted. Note there's decades of heavily experienced Guzzi professionals on this site, all whom happily give endless amounts of their VALUABLE time for free; BE COURTEOUS AND RESPECTFUL!
  • There is ZERO tolerance on personal attacks and ANY HYPERLINKS to PRODUCT(S) or other competing website(s), including personal pages, social media or other Forums. This ALSO INCLUDES ECU DIAGnostic software, questions and mapping. We work very hard to offer commercially supported products and to keep info relevant here. First offense is a note, second is a warning, third time will get you banned from the site. We don't have the time to chase repeat (and ignorant) offenders. This is NOT a social media platform; It's an ad-free, privately funded website, in small help with user donations. Be sure to see the GTM STORE link above; ALL product purchases help support the site, or you can upgrade your Forum profile or DONATE via the link above.
  • Be sure to see the GTM STORE link also above for our 700+ product inventory, including OEM parts and many of our 100% Made-in-SoCal-USA GTM products and engine kits. In SoCal? Click the SERVICE tab above for the best in service, tires, tuning and installation of our products or custom work, and don't miss our GT MotoCycles® (not) art on the BUILDS tab above. WE'RE HERE ONLINE ONLY - NO PHONE CALLS MADE OR RECEIVED - DO NOT EMAIL AND ASK QUESTIONS OR ASK TO CALL YOU.
  • Like the new V100, GuzziTech is full throttle into the future! We're now running on an all-new server and we've updated our Forum software. The visual differences are obvious, but hopefully you'll notice the super-fast speed. If you notice any glitches or have any issues, please post on the Site Support section at the bottom. If you haven't yet, please upgrade your account which is covered in the Site Support section or via the DONATE tab above, which gives you full site access including the DOWNLOADS section. We really appreciate every $ and your support to keep this site ad-free. Create an account, sign in, upgrade your account, and enjoy. See you on the road in 2024.

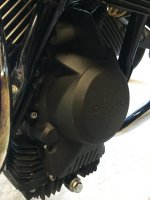
Removing the alternator cover on a V7 S

daviscr5

Tuned and Synch'ed
Joined
Jan 21, 2012
Messages
28
Hi All,
I feel like an idiot asking these questions but here it goes (2015 V7 5 speed):

So to complete the simple valve adjust task, I ordered a new alternator cover gasket along with head valve cover gaskets from AF1. I also downloaded their engine and service manual neither which was very helpful in this procedure. Long story short, when attempting to remove the alternator cover I realized that:

1. There are different sized hex screws that attach the cover to the housing - have no idea if I put them back in the right spot but must have since they went back in easily.
2. I guess the oil level is higher than the pan since oil started leaking at the bottom of the cover as soon as I removed the lower screws.

I didn't need an oil change since this was just a valve check (OCD thing..) so I didn't have any oil on hand to do a change. So I screwed the cover back on before finding out how much oil was behind the alternator cover, lifted my bike and found TDC with the roll the back wheel method. Questions:

1. Was my oil level maybe just a bit high, and could have I removed the alternator cover without losing excessive oil?
2. Is there any drama with the two different electronic bits that appear to be attached to the alternator cover when you pull it off (some Bosch piece and wiring harness at about 10 and 2)? Self explanatory removal of these once you pop the cover off the housing?
3. How in the heck do you know where the two longer alternator cover screws go? Of course it's not mentioned in the service manual since the valve adjustment service is explained while the engine is out of the frame! I should have used tape or a marker but too late now.
5. Do you think my alternator cover gasket is OK since I didn't actually begin to pry the cover off?
6. Why isn't there a cover like my old Griso that had a plug you could remove to rotate the engine without removing the cover?

Sorry for the noob questions but since I have no dealer nearby I'm the novice mechanic on duty.
Chris
 

Attachments

  • IMG_0215.JPG
    IMG_0215.JPG
    56.4 KB · Views: 30
This is not exactly something we do on a regular basis. Since going to a wet alternator, I've turned the engine over by putting the bike in 6th (5th, in your case) and turning the rear wheel. That said, I think you're OK. Oil is in there because the area is open to the crankcase. The parts book may tell you where the longer screws go.
 
1. Was my oil level maybe just a bit high, and could have I removed the alternator cover without losing excessive oil?
2. Is there any drama with the two different electronic bits that appear to be attached to the alternator cover when you pull it off (some Bosch piece and wiring harness at about 10 and 2)? Self explanatory removal of these once you pop the cover off the housing?
3. How in the heck do you know where the two longer alternator cover screws go? Of course it's not mentioned in the service manual since the valve adjustment service is explained while the engine is out of the frame! I should have used tape or a marker but too late now.
5. Do you think my alternator cover gasket is OK since I didn't actually begin to pry the cover off?
6. Why isn't there a cover like my old Griso that had a plug you could remove to rotate the engine without removing the cover?
John highlighted it above, but... do not remove the cover. However, some have done it successfully with no adverse outcome.
1. No, the alternator operates in an oil bath. Always.
2, No.
3. The longer bolts should be obvious when placing them until the just touch the threads. The gap to the cover should be the same on all. If you don't see this, it should either be visibly different as to the distance off the cases or the bolts would bottom before they got tight. If you didn't have this, then you lucked out.
4. Omitted?
5. Yes, I believe it is a metal gasket like the '13+ V7s, so all good there unless it was damaged.
6. Because it's a wet design, it would take a bolt-on door/cover with o-ring. Hopefully they'll add it, but at this point, I'd say likely not.

Thanks to you both for the responses. Agreed that I'm not messing with that cover again. Took it out for a good ride yesterday and all is cool, no leaks. Yep #4 was omitted. Thanks again!
 
My 5 speed alternator cover is a dry cover. No need to replace gaskets to get to the bolt to turn the motor over.

I would just turn the rear wheel to find top dead center. That was How I always did the valve adjustments on my BMW's. I got pretty good at it with one foot turning the wheel as I watched the screw driver or straw come on up that compression stroke.
 
Rear wheel method not so good on bikes without centre stands...too pricey just to turn the motor over

I'll use the Abba Superbike Stand for this, to get the rear wheel off the ground. The Pit Bull stand would do as well (once I ditch the V7III EVAP canister). I always like having a service stand anyway so haven't bothered with adding a center stand.
 
Back
Top