Ciao Guest - You’ve landed at the ultimate Guzzi site. NEW FORUM REGISTRATIONS REQUIRE EMAIL ACTIVATION - CHECK YOUR SPAM FOLDER - Use the CONTACT above if you need help. New to the forum? For all new members, we require ONE post in the Introductions section at the bottom, in order to post in most of the other sections. ALWAYS TRY A SEARCH BEFORE STARTING A NEW TOPIC - Most questions you may have, have likely been already answered. DON'T BE A DRIVE-BY POSTER: As a common courtesy, check back in and reply within 24 hours, or your post will be deleted. Note there's decades of heavily experienced Guzzi professionals on this site, all whom happily give endless amounts of their VALUABLE time for free; BE COURTEOUS AND RESPECTFUL!
There is ZERO tolerance on personal attacks and ANY HYPERLINKS to PRODUCT(S) or other competing website(s), including personal pages, social media or other Forums. This ALSO INCLUDES ECU DIAGnostic software, questions and mapping. We work very hard to offer commercially supported products and to keep info relevant here. First offense is a note, second is a warning, third time will get you banned from the site. We don't have the time to chase repeat (and ignorant) offenders. This is NOT a social media platform; It's an ad-free, privately funded website, in small help with user donations. Be sure to see the GTM STORE link above; ALL product purchases help support the site, or you can upgrade your Forum profile or DONATE via the link above.
Be sure to see the GTM STORE link also above for our 700+ product inventory, including OEM parts and many of our 100% Made-in-SoCal-USA GTM products and engine kits. In SoCal? Click the SERVICE tab above for the best in service, tires, tuning and installation of our products or custom work, and don't miss our GT MotoCycles® (not) art on the BUILDS tab above. WE'RE HERE ONLINE ONLY - NO PHONE CALLS MADE OR RECEIVED - DO NOT EMAIL AND ASK QUESTIONS OR ASK TO CALL YOU.
Like the new V100, GuzziTech is full throttle into the future! We're now running on an all-new server and we've updated our Forum software. The visual differences are obvious, but hopefully you'll notice the super-fast speed. If you notice any glitches or have any issues, please post on the Site Support section at the bottom. If you haven't yet, please upgrade your account which is covered in the Site Support section or via the DONATE tab above, which gives you full site access including the DOWNLOADS section. We really appreciate every $ and your support to keep this site ad-free. Create an account, sign in, upgrade your account, and enjoy. See you on the road in 2024.
I am in the process of refreshing the cylinder heads on my 2008 California Vintage. Does anyone have the the valve spring setting dimensions so that I can set the pre load shims? Many Thanks Don
That's correct Dave. it's to set the correct spring force for each valve which is achieved by placing shims under the base of the valve springs. It tends to be around 10% compression of the free length. So ideally I need the spring free length as per factory spec and then the factory tolerance for spring preload. On the Guzzi both inlet and exhaust valves have the same preload.
I replaced my springs (plus camshaft and followers) on a couple of 2002 EV Touring bikes. There was a special tool supplied which provided a reference point for measuring. You could possibly rig one up.
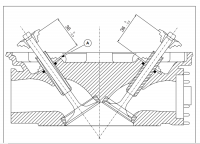
From the instructions:-
Using a gauge, measure the distance between the cylinder head and the reference point. Take note of the reading "A". (for example A = 89.2 mm).
Measure the distance between the valve stem end and the reference point. Take note of the reading "B". (for example B = 45.5 mm)
Calculate A - B - 43.2 = New shim to be fitted under the spring. Using the supplied shims, you should use a combination until the the value determined above exceeds the value calculated.
I could see you some scans of the pages involved if you provide me with an email address.
However, the heads on the Vintage may not be the same, as they were fitted with Breva 1100 versions I recall.
The real problem with the EV Touring was the valve springs originally fitted were way above specification (i.e. too strong) which lead to premature wear of the cams and followers. It took Moto Guzzi some considerable time to sort this out, and offered other fixes before deciding on the final solution. The cam also had a different profile with a ramp introduced to reduce the impact.
I owned three EV Tourings, I did two, the local shop did the first one as it was purchased from them. (They didn't do a thorough job IMHO). The other two I purchased from Moto International, and it was them that sent me the kit and instructions.
Thanks Charlie. I spent most of last night going through square barrel manuals trying to find data having first determined which models had the same valve spring part numbers. Many are silent on spring pre load but some do have the info. In the end I came up with 2 settings the one you have supplied and the one in the uploaded file at 34.7 +.35, so I installed the valves without shims and measured the installed length. All were less than the 36-,03 spec so I have now shimmed them to the 34.7+.35 setting as that is where my logic has taken me. What I did not say in my original post is that my engine has only done 8000 miles. I stripped off the heads and barrels as all the paint was flaking so I wanted to vapour blast them. In dismantling the heads I thought I had removed all the shims but when the blast cabinet was opened there were 5 shims on the floor of the cabinet. The valve seats have not been ground so my logic was the springs had been shimmed in the factory to a datum so I should be able to restore the datum using all the shims I have. They are now (I believe) back in spec. Long story but you offered help so I thought you deserved the full picture. Cheers Don i
I replaced my springs (plus camshaft and followers) on a couple of 2002 EV Touring bikes. There was a special tool supplied which provided a reference point for measuring. You could possibly rig one up.
From the instructions:-
Using a gauge, measure the distance between the cylinder head and the reference point. Take note of the reading "A". (for example A = 89.2 mm).
Measure the distance between the valve stem end and the reference point. Take note of the reading "B". (for example B = 45.5 mm)
Calculate A - B - 43.2 = New shim to be fitted under the spring. Using the supplied shims, you should use a combination until the the value determined above exceeds the value calculated.
I could see you some scans of the pages involved if you provide me with an email address.
However, the heads on the Vintage may not be the same, as they were fitted with Breva 1100 versions I recall.
The real problem with the EV Touring was the valve springs originally fitted were way above specification (i.e. too strong) which lead to premature wear of the cams and followers. It took Moto Guzzi some considerable time to sort this out, and offered other fixes before deciding on the final solution. The cam also had a different profile with a ramp introduced to reduce the impact.
I owned three EV Tourings, I did two, the local shop did the first one as it was purchased from them. (They didn't do a thorough job IMHO). The other two I purchased from Moto International, and it was them that sent me the kit and instructions.
Thanks for your input Dave. I don't fully understand your instructions without a diagram but no probs as I found the data and have shimmed my springs. See my reply if it interests you. Cheers Don
Thanks for your input Dave. I don't fully understand your instructions without a diagram but no probs as I found the data and have shimmed my springs. See my reply if it interests you. Cheers Don
No, I spent ages cross referencing valves and springs part numbers until I found similar parts to the Vintage then looked for the appropriate manual and then checked my spring length with no shims fitted to see what sort of datum I was looking for, a bit of a circuitous route but I think I've got there.