• Ciao Guest - You’ve landed at the ultimate Guzzi site. NEW FORUM REGISTRATIONS REQUIRE EMAIL ACTIVATION - CHECK YOUR SPAM FOLDER - Use the CONTACT above if you need help. New to the forum? For all new members, we require ONE post in the Introductions section at the bottom, in order to post in most of the other sections. ALWAYS TRY A SEARCH BEFORE STARTING A NEW TOPIC - Most questions you may have, have likely been already answered. DON'T BE A DRIVE-BY POSTER: As a common courtesy, check back in and reply within 24 hours, or your post will be deleted. Note there's decades of heavily experienced Guzzi professionals on this site, all whom happily give endless amounts of their VALUABLE time for free; BE COURTEOUS AND RESPECTFUL!
  • There is ZERO tolerance on personal attacks and ANY HYPERLINKS to PRODUCT(S) or other competing website(s), including personal pages, social media or other Forums. This ALSO INCLUDES ECU DIAGnostic software, questions and mapping. We work very hard to offer commercially supported products and to keep info relevant here. First offense is a note, second is a warning, third time will get you banned from the site. We don't have the time to chase repeat (and ignorant) offenders. This is NOT a social media platform; It's an ad-free, privately funded website, in small help with user donations. Be sure to see the GTM STORE link above; ALL product purchases help support the site, or you can upgrade your Forum profile or DONATE via the link above.
  • Be sure to see the GTM STORE link also above for our 700+ product inventory, including OEM parts and many of our 100% Made-in-SoCal-USA GTM products and engine kits. In SoCal? Click the SERVICE tab above for the best in service, tires, tuning and installation of our products or custom work, and don't miss our GT MotoCycles® (not) art on the BUILDS tab above. WE'RE HERE ONLINE ONLY - NO PHONE CALLS MADE OR RECEIVED - DO NOT EMAIL AND ASK QUESTIONS OR ASK TO CALL YOU.
  • Like the new V100, GuzziTech is full throttle into the future! We're now running on an all-new server and we've updated our Forum software. The visual differences are obvious, but hopefully you'll notice the super-fast speed. If you notice any glitches or have any issues, please post on the Site Support section at the bottom. If you haven't yet, please upgrade your account which is covered in the Site Support section or via the DONATE tab above, which gives you full site access including the DOWNLOADS section. We really appreciate every $ and your support to keep this site ad-free. Create an account, sign in, upgrade your account, and enjoy. See you on the road in 2024.

Workshop stands V7 II

Carl de Carvalho

Tuned and Synch'ed
Joined
Mar 27, 2016
Messages
33
Location
Sweden
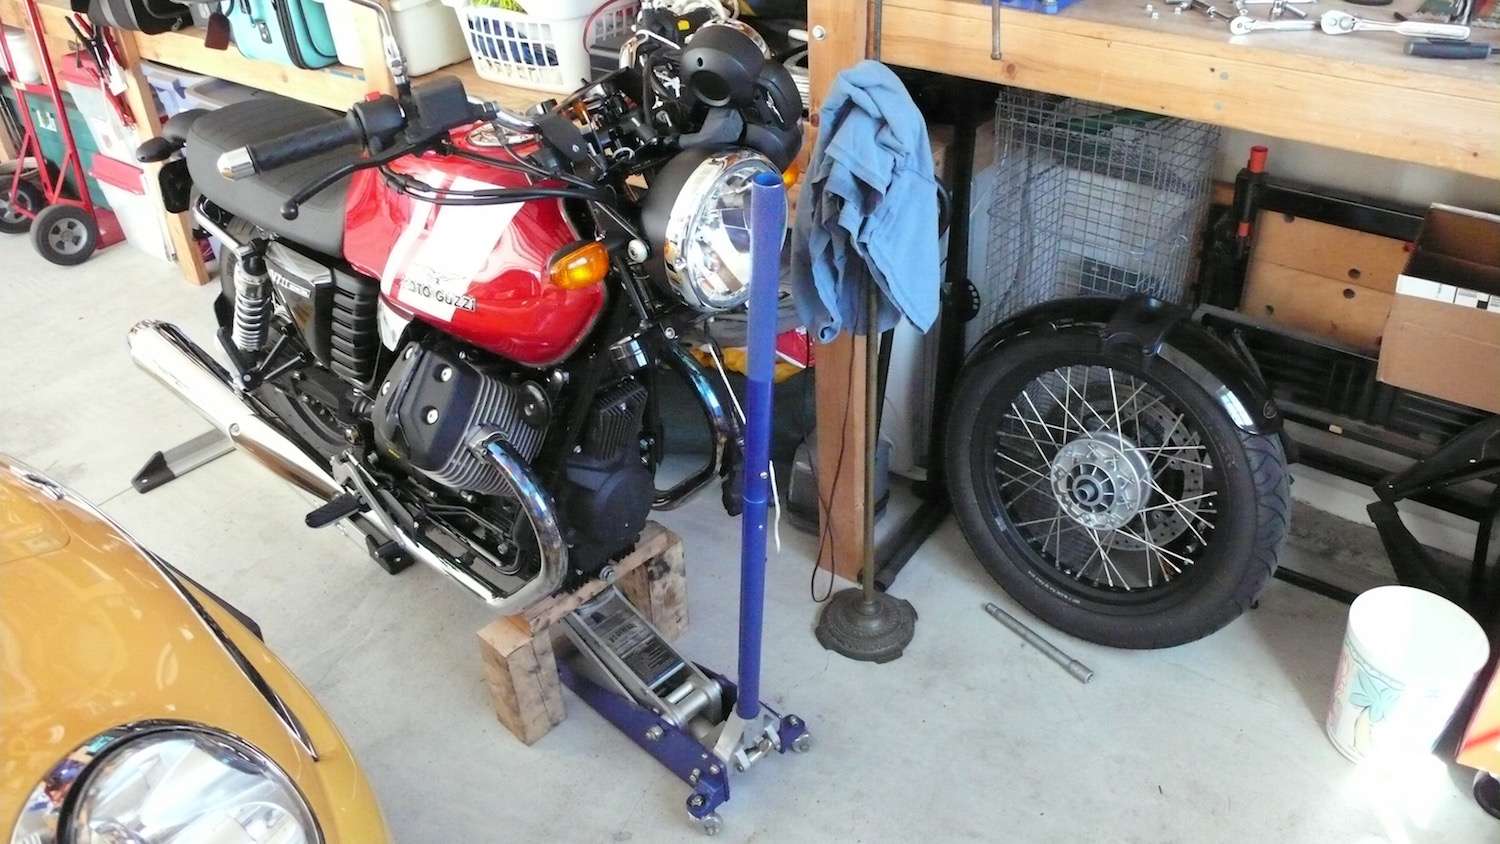
ANy ideas out their for a solution to a bike lift for a v7? As far as I can see the sump, exhaust pipes and the hinge for the kick stand are all lower that the frame. I have though of using blocks to take care of that problem , however it doesn't seem like it will be very stable. Any solutions or ideas would be great
 
I do believe there is a lift that grabs the cross brace on the back of the frame. I tend to make do with what I have. I usually put one wheel in a chock and then use the 2x4 method. It can be stable if you add some 4x4s:

k0nGZp.jpg
 
I would suggest a head lift stand from Pitbull http://www.pit-bull.com/category/front_stands.html for the front. Also they make excellent rear stands. However, for a little more than the price of two of their stands, you could acquire an inexpensive lift table such as this http://www.harborfreight.com/1000-lb-capacity-motorcycle-lift-68892.html
I have looked at the table type of lift , but I would really like a unit where I am able to remove both wheels if and when needed.
 
I do believe there is a lift that grabs the cross brace on the back of the frame. I tend to make do with what I have. I usually put one wheel in a chock and then use the 2x4 method. It can be stable if you add some 4x4s:

k0nGZp.jpg
Are you only able to remove one wheel at a time ?
 
Read wildguzzi.com/forum/index.php?topic=44352.0 for many ideas to solve your problem. I have a hydraulic lift for which I manufactured a support stand that clamps to the frame crossbar positioned under the swingarm pivot. This support fixes the bike to the lift, preventing a tipover. The bike also rests on a scrap piece of wood positioned under the oil sump, providing the three points of support that ensure stability. This idea is detailed in the link above, and was the source of my design.
 
I have a hydraulic lift for which I manufactured a support stand that clamps to the frame crossbar positioned under the swingarm pivot. This support fixes the bike to the lift, preventing a tipover. The bike also rests on a scrap piece of wood positioned under the oil sump, providing the three points of support that ensure stability. This idea is detailed in the link above, and was the source of my design.
Are you using something similar to this?

Image
 
No, this is what I'm using:
DSC_0021.jpg


The picture shows my BMW on the lift but the idea of supporting the M-G by its frame cross brace is the intent of my posting. The idea could be adapted to any hydraulic lift.
 
No, this is what I'm using:
DSC_0021.jpg


The picture shows my BMW on the lift but the idea of supporting the M-G by its frame cross brace is the intent of my posting. The idea could be adapted to any hydraulic lift.
Ok I see what you mean, thanks.
 
The problem is the bottom of the bike makes it difficult to make anything all that stable without turning into an engineering drill. Sort of like dropping eggs from a second story without breaking the damn thing.

The center stand for me thus far works just great. I can remove both wheels at the same time, it's worked great. I 've never gotten this much use out of a center stand.

If I ever need to replace the clutch, I guess it's going to turn into a drill. Noticed one guy used a chair to hold up the back of the bike. I've thought about chains from the rafters and just hang the frocking thing like that and drop the engine out the bottom. With a chain fall you could adjust it up and down.
 
Last edited:
Back
Top