• Ciao Guest - You’ve landed at the ultimate Guzzi site. NEW FORUM REGISTRATIONS REQUIRE EMAIL ACTIVATION - CHECK YOUR SPAM FOLDER - Use the CONTACT above if you need help. New to the forum? For all new members, we require ONE post in the Introductions section at the bottom, in order to post in most of the other sections. ALWAYS TRY A SEARCH BEFORE STARTING A NEW TOPIC - Most questions you may have, have likely been already answered. DON'T BE A DRIVE-BY POSTER: As a common courtesy, check back in and reply within 24 hours, or your post will be deleted. Note there's decades of heavily experienced Guzzi professionals on this site, all whom happily give endless amounts of their VALUABLE time for free; BE COURTEOUS AND RESPECTFUL!
  • There is ZERO tolerance on personal attacks and ANY HYPERLINKS to PRODUCT(S) or other competing website(s), including personal pages, social media or other Forums. This ALSO INCLUDES ECU DIAGnostic software, questions and mapping. We work very hard to offer commercially supported products and to keep info relevant here. First offense is a note, second is a warning, third time will get you banned from the site. We don't have the time to chase repeat (and ignorant) offenders. This is NOT a social media platform; It's an ad-free, privately funded website, in small help with user donations. Be sure to see the GTM STORE link above; ALL product purchases help support the site, or you can upgrade your Forum profile or DONATE via the link above.
  • Be sure to see the GTM STORE link also above for our 700+ product inventory, including OEM parts and many of our 100% Made-in-SoCal-USA GTM products and engine kits. In SoCal? Click the SERVICE tab above for the best in service, tires, tuning and installation of our products or custom work, and don't miss our GT MotoCycles® (not) art on the BUILDS tab above. WE'RE HERE ONLINE ONLY - NO PHONE CALLS MADE OR RECEIVED - DO NOT EMAIL AND ASK QUESTIONS OR ASK TO CALL YOU.
  • Like the new V100, GuzziTech is full throttle into the future! We're now running on an all-new server and we've updated our Forum software. The visual differences are obvious, but hopefully you'll notice the super-fast speed. If you notice any glitches or have any issues, please post on the Site Support section at the bottom. If you haven't yet, please upgrade your account which is covered in the Site Support section or via the DONATE tab above, which gives you full site access including the DOWNLOADS section. We really appreciate every $ and your support to keep this site ad-free. Create an account, sign in, upgrade your account, and enjoy. See you on the road in 2024.

Brake bleeding issue

So you're saying that your hand or foot pressure exceeds the sealing capacity of the brake system if applied for too long a period of time because there is no relief valve?

Jason
I’m asking, if there are relief valves in hydraulic systems, because I don’t know ?

I also don’t design brake systems, but can imagine there are some basic differences between the two systems.
What are the design constraints the engineers have to keep in mind when designing “Those systems”
i am Again imagining that the “duty cycle” for any brake system would be seconds, not hours or days ?
Would having the system under load ( pressure ) for hours or days have an adverse effect on seals in that system ?
Are there rubber seals in the Master cylinder like there are in the slave ( calipers ) ?

i don’t know , I’ve never taken one appart ?
That’s not what I do for a living ?
 
I'm sorry Scott but you're wrong here.

Think about what you are saying.

You're essentially saying that the brake system cannot maintain a seal for any more time than it takes to brake/stop a motorcycle, a few seconds perhaps?

I've designed, tested, operated and maintained many hydraulic systems and they are not designed to leak if pressure is applied in excess of a few seconds.

Jason

No Jason, that is not what I said at all!

Please quote me correctly if you are going to attribute it to me.

What I said was…

The brake system was never designed to remain under operating pressure for 12 hours or more!”

Yes, there are people who will say they do this zip tie on the brake lever with no problem. YMMV. (My point is that if a brake bleed is done correctly, this zip tie thing is unnecessary and prevents undue stress and potential damage on the system.)

This is what I said!

The brake systems on motorcycles are not designed to have the master cylinder compressed to maximum operating pressure (zip tie the lever to the bar) and be left in that position for 8-12 hours. From an engineering viewpoint, they are not continuous duty designed systems. They are interval systems.

The constant pressure for hours on end, stresses the seals and master cylinder piston o-rings. It also places undue stress on the caliper piston seals as well. This is especially true in older vintage systems that I work on a lot (>20 years old).

But you go ahead and tell me my occupation, and discount entirely what I witness and repair firsthand. You go ahead and say that I’m wrong. That’s fine. I won’t try and convince you otherwise.

Like I said… abusus non tollit usum.

“misuse of something is no argument against its proper use”

I have seen just about every “do it yourself” fix for just about every conceivable thing. People do strange things. Some work but there is an associated risk or cost.

However, there has never been a brake system on any motorcycle, that I cannot bleed down properly using good technique.

I’ve certainly never taken 6 hours to bleed one either like the ”mechanics” the one poster wrote about.

I have bleed significantly many more brakes than the average person, on every marque of motorcycle you can imagine.

Literally hundreds over the years, even including the very different, mineral oil systems on modern BMW motorcycle clutches, with the supposed “lifetime” fluid. (Right …)

Not once in my whole life, have I ever removed a caliper, and had to raise it higher than the ABS solenoid pump in order to purge the system of contaminants and air. (I’ve been working on ABS brakes since BMW Gen 1 was the very first system in 1988 on the K100 platform. )

I’ve never said that what you suggest and do, won’t work. Many people on the internet say the same thing. You say it does and I take that at face value.

I simply said that this is not correct technique, and unnecessary if the bleeding is done correctly in the first place.

Case in point. There are “speed” oil change devices out there now that you don’t have to open a drain plug anymore. You just shove a tube down the oil fill and suck the old oil out; so they claim. (Say what!)

There are even people who drain oils from a motorcycle, when the oil is cold.

Uh huh…ok. Not me.

So, it is what it is. Do as you will. I just offer information. Do with it as you wish. I don’t care one way or the other.

Be happy.

YMMV.
 
Last edited:
Reposted again for those who wish to know how a professional mechanic, a.k.a. a "hater" :eek: does it...

FWIW: Caveat emptor.


The brake system was never designed to remain under operating pressure for 12 hours or more!

What you are doing is pressurizing the whole system continuously for hours upon hours, something it isn’t designed to do, forcing the check valve into the open position and relying on the fact that air bubbles rise to the highest point in a closed system. If the banjo bolt on the master cylinder or a loop in the line is in fact the highest point, then the air will never get removed this way.

I have repaired blown caliper piston seals, master cylinder seals, broken hydraulic fluid lines, ruptured banjo bolt seals and more from this wrong technique.

Suffice it to say that this is not how to do this correctly.

Most air in the brake lines comes from opening the bleed valve too much and allowing air past the threads of the bleed valve.

It is also caused by not having either continuous pressure from the lever or continuous vacuum being pulled on the bleed valve, before you open it up very slightly to allow the fluid to be forced through the tube under pressure, and the air along with it.

Yes, there are people who will say they do this zip tie on the brake lever with no problem. YMMV. (My point is that if a brake bleed is done correctly, this zip tie thing is unnecessary and prevents undue stress and potential damage on the system.)

I have a long list of people who will tell you that it was an expensive mistake.

-----------------------

I bleed brakes on motorcycles of every marque literally every other day or so.

I have never needed this “zip tie” method. It’s not the way you do this as I wrote above.

I certainly never “crack open” the banjo bolt on the master cylinder. That is just beyond bizarre and one would be very hard-pressed to explain the rational for this.

The process of bleeding brakes is very simple. It’s not magic. It’s engineering. All you are doing is ensuring that brake fluid fills the entire brake line with no trapped air. Air can be compressed and gives that spongy feeling in the lever. Brake fluid cannot be compressed, and when all air is purged from the line, the lever feels solid and firm.

So to do this:

1. Open master cylinder cap.

2. Using plastic syringe, I remove all contaminated fluid from the reservoir.

3. I utilize 3-4 cotton swabs held together to pat against the reservoir bottom and absorb any remaining debris or contaminants from inside the master cylinder reservoir, and I also gently swab out the master cylinder sight glass from inside the master cylinder with 1 single cotton swab because brown contamination usually is stuck on the inside of the sight glass window. (When you pull out the swab, you will see the brown or black debris on it which has been wiped from the inside of the sight glass window)

4. I remove all previous fluid from the master cylinder by patting these cotton swabs to absorb the fluid, HOWEVER be sure that you do not snag the cotton swabs in anything inside the reservoir, just pat them like a mop to absorb the contaminated fluid, and NEVER touch the brake lever with the reservoir empty! You can safely empty the reservoir to near dry condition by just patting the cotton swabs on the fluid at the bottom of the reservoir, so long as you do not touch the lever. This leaves the line full of fluid but no air enters!

5. Refill master cylinder with clean, fresh brake fluid. The reservoir will now be full of fluid that is absolutely clear in color.

5. I attach a long clear (~ 2.5’ length) tubing to the bleed screw by simply sliding it tightly over the nipple. (This is the trick in my estimation, because the 2.5' of line allows me to see the expelled fluid clearly and completely. Any bubbles will be easily visible and they are most likely coming from the air slipping past the threads of the bleed screw if it is opened too far. If you intentionally open the bleed screw too far, you will see how this happens. )The other end is inside of my waste fluid catch bottle. It does not need to be under brake fluid or anything like that. (We will observe a continuous flow of brake fluid through this tubing in a moment).

6. Crack open the bleed valve by turning counterclockwise with your wrench just to the point where you feel the screw break loose, then turn it back every so gently clockwise to just reseat it back closed but not tight.

6. Gently squeeze the brake lever a few times to establish a solid working pressure and while holding the brake lever in, turn your bleed screw back counterclockwise very slowly and ever so slightly until the lever begins to slowly and smoothly move inward, thereby expelling the brake fluid under pressure. The opening of the bleed valve is such that the resistance you are looking for in the hydraulic line when under pressure from the lever, is one of being slightly resistant but not free flowing. The lever should be collapsing slowly and uniformly as the fluid is pushed out the bleed nipple.

7. Once you find this point in the bleed valve, it then becomes a simple matter. With the bleed valve still in this slightly cracked open position, I continue to squeeze the brake lever smoothly and uniformly while observing the continuous stream of old brake fluid now passing through my plastic tubing. There will be no air bubbles anywhere. Just a smooth continuous line of brake fluid, passing through the tubing. (Do not let the master cylinder go empty!)

8. As the master cylinder begins to empty, I refill it again with fresh brake fluid and continue this bleeding process for 3 refills of the master cylinder. This ensures that all previous old fluid and any contaminants are pushed out the brake line and out the bleed nipple.

9. As I get through the 3rd refill of fresh brake fluid in the master cylinder, while gently and smoothly squeezing the brake lever, I close the bleed valve completely and snugly with my wrench. (Don’t crush it, just closed and a little more to tighten.). Upon squeezing the lever again a few times, you will find the pressure and resistance in the line to be very solid and firm. The line from the master cylinder to the bleed screw, is now full of nothing but fresh clean brake fluid.

10. Repeat the same process for each individual brake caliper attached to the master cylinder. (1 or 2 in the front). 1 in the rear (attached to the other master cylinder fluid reservoir).

I can do this process by myself without issue. Some people use an assistant and that is fine but unnecessary.

The secret here is tuning your amount of opening the bleed screw so that the fluid that is pushed out of the bleed nipple, is pushed out under light resistance and pressure. You should have to squeeze the lever and pressurize the system to push the fluid out of the line. If the brake lever just immediately and quickly moves all the way through its stroke, then the bleed valve is open too much. If it hardly moves or moves excessively slow, it’s not opened enough. Find the correct opening! You want that continuous but light back-pressure resistance against your squeezing of the brake lever. We want to expel the fluid out under pressure.

The plastic line also visually shows you the fluid being pushed through. You won’t see any bubbles if you have the bleed screw opened correctly. If it is too open, air will enter from the threads area.
I agree 100% with your procedure. However, if someone is working on their rear brake, and now it doesn’t work properly, air has already gotten into the system. The question should be “how do you get the air out?”. My solution was to replace one of the banjo bolts on the top of the ABS with one with a bleeder. These are available at the GTM store. As you said “…air bubbles rise to the highest point in a closed system.”
 
Recently, I changed the fluid on my 1979 V50II... but found the outer dust seals on the callipers were split - probably from over 40 years of life, the guarantee had expired? So having ordered replacement seal kits, dismantled the callipers and found lots of rust inside from the water dissolved in the fluid attacking the clean cast steel surfaces of the pistons. New pistons required!
As a retired automotive engineer, responsible for procurement of lab equipment for testing moisture content of brake fluid (as new, in the factory-fill system, every delivery of brake fluid, etc.) and having a moisture tester for brake fluid, I have changed fluid 3 times previously in the past 24 years of ownership. NOT OFTEN ENOUGH! (I have also replaced the hoses, which had been replaced at the service just before I bought the bike).
Brake fluid is HYGROSCOPIC, which means that is a "sealed" system, it can still find moisture from the air (somehow, don't ask me how!) and after 3 years or so will likely have enough moisture to FAIL any moisture content check. Modern check tools cost less than £5 and work well, simply and consistently. (But leave the battery out when not in use as you'll only use this annually!).
My experience: When changing fluid in the past I have simply pumped fresh fluid through the system - as does Scott above. Bleeds air very well. But my original service manual says bleed again after a few trips out on the bike, as there may be a tiny amount of air that collects and can be removed, making the brakes feel even harder. (It happens for me!). I suspect that a tiny amount of air can become entrained when pumping new fluid into the system, (By being a bit quick pouring new fluid into the reservoir?) and micro-bubbles can take time to coalesce into a bubble and float to the bleed nipple? Or it may be a tiny amount of air from the serviced calliper (between piston and calliper wall?).
But here's what I realised when servicing the brakes. The passage of fluid when pumping through the calliper while pumping-out the old fluid, goes from inlet at the banjo, along a drilling to the calliper chamber, but on the way passes the bleed nipple... so NOT ALL THE OLD FLUID IS EXPELLED FROM THE CALLIPER CHAMBERS. - Hence an accumulation of "wet" fluid causing the rusting on the piston - even though I had changed the fluid a few times.
SO: To eliminate this accumulation of old corrosive wet fluid from the calliper, remove pistons and clean everything while servicing the brakes EVERY 3 years. Replace seals and hoses at MAX 20 years. The rubber seals may be good for 40 years or more (I think mine were), but WHO wants to take a chance on a brake failure when you need them in an emergency?
If you do not want to risk stripping and re-building callipers, GET A PROFESSIONAL to do it.
Otherwise before pumping in new fluid, use a G-clamp to press the pistons back into the housings as far as possible with the bleed valve just cracked, to expel as much old fluid as possible from the calliper chambers, before filling with new fluid.
Scott, any further advice? You have a lifetime more experience than my 20 years in the office, responsible for filling new cars with good brake fluid!
Incidentally, new brakes are filled following a pressure test (dry air/nitrogen) for leaks, then a vacuum is generated so the automatic filling machine fills the system with fluid and there is no air or moisture in the system as new.
Incidentally, don't forget to service Master cylinder seals at 20 years as well!
After working on bleeding brakes, I always wash well with a detergent, allow to dry and wipe clean with paper tissue. I re-use the pads for the first few runs, in case there is any molecular residue in the surface of the discs, etc., and when I am sure the old brake pads have cleared that off I then fit new pads and bed them in carefully (NO OVERHEATING!).
My rule - even though we do not need a statutory annual check after the bike is 40 years old, I take mine to the local dealer who is glad to check the brakes - free - with his expert mechanics (Guys I know and trust to find a fault). While I have never needed further work on the brakes, it is comforting to have a "buddy check" from an inspection by an expert with a brake dyno, who knows what can go wrong and how to find it.
Hope this helps keep you all SAFE!
 
On Brake performance.
Having just serviced my brakes, and fitted new pads, the performance is "as good as ever", but the V50 was never praised for high performance brakes. Indeed, for comparison, my 1980 Yamaha 350LC was superb and could "howl" the front tyre without too much pressure on the front brake lever. But with front a combined rear I have never had the same deceleration with my 1979 V50II.
Any suggestions as to how I can improve brake performance? - Different discs or pads to "regular" ones? Right-hand gripping exercises? - I am afraid the arthritic finger joints limit the pull I can achieve on the lever.
Ta,
 
There is nothing so egregious that I have seen in all my years working on motorcycles, as the willingness to use no name “brake pads” from eBay and such.

I do not ever do this. Every motorcycle I own has either Brembo, EBC, or Galfer brake pads. They all perform excellent.

If you cannot afford premium braking components, you cannot afford motorcycling. Some things you should never skimp on and the system responsible for safely stopping you, is at the top of the list not to skimp!

Do not use garbage brake linings! Ever.
 
I have always used Ferodo pads - the "best name" known to me... but as Brembo, EBC and Ferodo pads were not available I bought some unpronounceable Japanese branded pads. Just as good as the previous Ferodo pads after very little bedding-in. I haven't checked contact surfaces yet, but that affects heat dissipation, rather than absolute brake performance. I was wondering if it was associated with the steel used for the disc? - Cast steel are supposed to be better than Stainless? Carbon/ceramic not available for the V50!
 
Honestly it is my opinion that you will get the best performance with a quality pad which you say you have already. Cast iron rotors were once the gold standard but not anymore I think.

Maybe there is a more modern Brembo or Ferrodo replacement rotor?
 
Last edited:
I let a friend have a go around the streets today. He only used the pedal linked brakes but said they were everything he expected compared to another mates V50... Didn't think they were "poor" at all. Just nice and progressive.
So maybe it is me...? - I just need re-calibrating!
Thanks for the feedback guys.
Safe riding - Enjoy!
 
Checked the packaging on my new brake pads = Kyoto. Is that a good brand? The parts look OK but that really means nothing. After a little bedding-in, the brakes feel the same as with the previous Ferodo pads....
I figured perhaps the lack-of- "bite" that I am missing may possibly be due to the pad material.
In the 1970s when the bike was designed and made, pads contained a lot of Asbestos. Now that is banned there are many alternative pad materials around. Sintered iron, being one that I think has a lot of "bite", but maybe not "feel"? But to make modern Road-use brakes user friendly, there are fibrous (NON-asbestos) elements, graphite and copper, etc. used in "regular" pads so they do not judder (stick-slip) at partial or high loading. I think that some of the material components are insulating, so the copper inclusions helps conduct heat away from the contact zone? The matrix is a compound of a few major materials - each with a different coefficient of friction, so as pressure is applied to the contact face, where stick-slip could occur the varying bits of different coefficient of friction stick-or-slip accordingly so there are a series of small slip-stick steps instead of a single "judder" occurring. I know it is a "black art" when tuning friction materials. Back in the 1970s amongst my peers, it was common practice to fit "green" linings (racing parts) to improve cable driven drum brakes. If they became "too grabby", the simple solution was 1 green (leading shoe) and 1 brown (trailing shoe) lining. Which usually retained a pretty good full brake yet reduced the initial grab. It also meant that if the green shoe got too hot and faded, there was usually still a bit of brake performance left... though not much for hard riding.
Are there "racing" pads for these Brembo brakes?
 
I know nothing of Kyoto brake linings.

All I can recommend is to see if a high quality set from the well known manufacturers is available.

As you are in the UK, you may want to give Stein Dinse in Italy a look. They stock a great many things for your motorcycle.
 
Last edited:
Thanks for the advice people,
I had a chat with another mate who said he understood the "cure" to be fitting a Honda brake lever with reservoir and Master cylinder, and direct hydraulic to the independent front disc. But which one...? They all have different diameter master pistons, which affects the effectiveness of the brake per stroke of lever. Any clues?
 
Looks like the standard V50 Master cylinder is 13mm dia, the Honda is 12mm dia so Mechanical advantage goes from 10.65 to 12.5-ish... a 20% improvement in brake effort per finger pull, but 20% more stroke required.... (But should be practical?).
Any thoughts?
 
Hi!

I did the unlinking on my V50/2 and on my v65 lario. Including steelflex hoses. The feeling and braking power is perfect after that, one finger braking as it is known with modern bikes. Guzzi made the ratio too conservative on these old bikes.

Surprisingly, the rear has still enough bite for me, altough serving only one disk now.

I am using standard brembo brake pads on the cast discs of the v50 and steel discs of the lario.

I tried ferodo and brembo sinter pads, but i was not happy withit. Too much wear and temperature.
 
I tried ferodo and brembo sinter pads, but i was not happy withit. Too much wear and temperature.

FWIW: Sintered pads are not for vintage machines. They are for state of the art, high-performance and/or racing motorcycles with stainless rotors that can handle the higher heat, friction, and the metal particles properly.
 
Xtron 99. I would expect (as the mathematics tell me) that the front brake would have about twice the "braking force" with twice the callipers attached. You have essentially double the mechanical advantage of the system. Which incidentally halves the velocity ratio, meaning you use twice the stroke to develop the same hydraulic pressure.... SO another way of looking at it is that for the same finger-pull, twice the stroke on 2 discs does twice the work on braking the front wheel.
Maybe you are missing the point of the Guzzi system? It is set so you can give t some front brake independently of the rear brake, but the "balanced coupling" of the second front disc and rear wheel provides near full braking just by using the foot pedal. Something you lose completely when you decouple the front disc from the pedal circuit. To me it is a bit like the people who turn OFF ABS systems... 99% of the time the system is better than the human, but Humans like to play and take risks... so want to increase the 1% where they are better to maybe 10% where they think they are better?
Having worked in the car industry, and discussed this with racers (Factory teams and amateur hobby racers), their consensus is that unless racing, the "Safety system" is the clear winner for safety, compared to the "human-skill"...
Hope you are one of those special people that are better without the "safety feature". In my experience, the coupled rear pedal system is one of the beauties of old Guzzis, and why people say the ride is so relaxing. Simply the foot gives so much effective braking, that the front hand-lever brake gets very little use. As a normal person (not exceptional as far as I know) I do use much more pedal braking on the V50 than I ever did on anything without the coupled system.

scottmastrocinque

Brilliant treatise on "doing it right because it is the right way". I totally support your comments. Just one addition, I would strongly recommend - to the vary capable mechanics (NOT amateur bodgers!) that slave cylinders are totally cleaned of all old fluid and crap when changing to new fluid. Otherwise, any "water contaminated" fluid remains in the slave cylinders - with the clean stuff in the master cylinder and pipes all the way to the bleeders... Because the slave cylinders have bleeders connected to where the fluid just reaches the brake body. It cannot pump the slave cylinder fluid out! (The old stuff has spent years absorbing water out of the atmosphere, which is what turns it brown!).
I am also amazed that there are brakes with air vents such that you can hose water and soap into the system with a pressure washer. On cars (basically the same components from the same brake manufacturers!) I have supervised pressure washer testing of engine bays, and searched for water ingress where there should be none. And the regular caps and inner rubber diaphragm seals keep the water out and are there as SEALS to prevent moisture from the air from contaminating the fluid.
You may wonder how water gets in to contaminate fluid?
Some microscopic "molecules" of water permeate through rubber, and also where the seals have air on one side and fluid on the other. (slave cylinders). A molecule of water on the slave cylinder where exposed to air can creep through the seal surface, encouraged by the normal "Absence" of fluid pressure, and by the motion of piston past the seal surface. Likewise, the huge (in molecular size terms) hydraulic fluid molecule doesn't escape so easily from the slave cylinder, but does manage to creep in tiny amounts past the seal, helping lubricate the seal in the process.
So Please remove, dismantle and clean slave cylinders about every 3 years (NOT longer!) when you change your fluid. That way you won't get corroded expensive pistons and damaged seals that must be replaced! (like I had).
Sorry if the Engineering is too complex for some, but the message is to learn from my "bad and stupid" experience, and do it right. Don't neglect fluid changes.
K
 
Scott
What are your thoughts on pushing the caliper pistons all the way in ( and holding them there) during bleeding to reduce the volume in the caliper that needs bleeding.

Secondly, the long tube makes sense (I should have thought of that 😳), but is its path critical.
ie should it go up from the bleed nipple or doesn't it matter
 
Last edited:
Scott
What are your thoughts on pushing the caliper pistons all the way in ( and holding them there) during bleeding to reduce the volume in the caliper that needs bleeding.

Never done this but you could I’m sure.

Secondly, the long tube makes sense (I should have thought of that 😳), but is its path critical.
ie should it go up from the bleed nipple or doesn't it matter

No. Wouldn’t matter as I’m pushing fluid through 2.5 feet. I usually have it hanging down from the bleed nipple and then laying out in a straight line with the end hanging in a catch basin.

It’s more important to me to see the long line of fluid ejected.
 
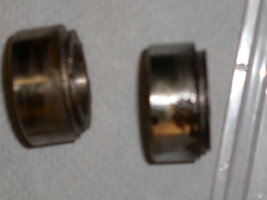
Just pushing the pistons right in does not expel everything. A bit like flushing the loo with a coffee cup of water. It dilutes the existing stuff, but does NOT flush it out completely. And I was surprised how much corrosion existed on all my pistons, which would damage the seals - so had to replace the lot on all callipers. P4050003

If you don't strip the callipers you don't see what is wrong. It was the first time in 5 or 6 years since I had removed pistons, previously OL. (originals for nearly 40 years). But stood in the garage un-touched for most of Covid - hence the long time between strip and clean servicing. The rust spot inside the clean band where the seal sat is at the lowest point of the calliper as installed. The other piston (hard to see) was tarnished, not pitted at the same point. Brake fluid is Hygroscopic and absorbs water from the atmosphere - over time. Then steel rusts with that water.
But it is a free world. I was riding on functioning brakes in this condition, but they could have failed at any moment. I was lucky. Nothing more.
I would not emphasise this so much, but it is YOUR BRAKES. Which may SAVE YOUR LIFE one day...
Please don't take chances like this...
Maintain brakes properly and completely, or get an expert to do it.
 
Back
Top