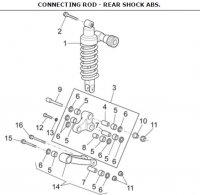
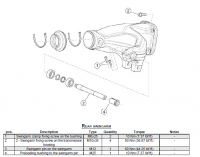
This is a combination of several recent threads all heading in the same direction: swingarm bearings for CARC bikes.
This 2012 Stelvio NTX showed no signs of any bearing or linkage problems but as a preventative measure I decided to check anyway. The bike has about 6500 miles. Since the seat was off for a re-cover this was the perfect time.
The service manual spells out the procedure: put bike on center stand, remove rear wheel (caliper first), remove speed sensor, remove left side rack, remove left foot peg assembly, remove muffler. Now we are down to the real operation.
Disconnect the reaction arm from the CARC assembly, support the CARC so it does not drop down too far. I used rope.
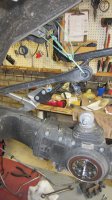
Remove the aluminum link that goes between the shock, swingarm, and frame.
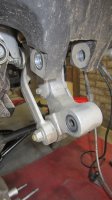
There are three bolts. Pay attention to which way they are inserted because you want to put all this back the same way. Each bolt goes through a bushing. Push that bushing out with your finger, watch out for the needle bearings that will want to fall out. I recommend doing this over a towel to catch the bearings. The bearings fell out because there was not much grease there to hold them in place. Put the bearings back and slather in lots of high quality bearing grease, I recommend synthetic but use what you like.
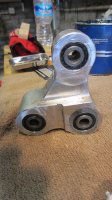
Re-insert the bushings and reassemble two of the three bolts. The third bolt will link up with the swingarm when you are finished with the swingarm bearings.
Loosen two pinch bolts on the left side of the swingarm. There is a special nut on the swingarm axle, I got the appropriate socket from the UK but now they are available from GuzziTech. This nut is not very tight, it's actually just a sleeve that goes over the axle. Next, you will need a 14mm allen wrench to unscrew the axle itself. Before you take the axle out it's a good idea to snip off the straps holding the rubber bellows that go between the transmission and the swingarm...on the right side of the bike. OK, now remove the swingarm axle. It helps if you have a second person working with you. I used some 1/4" nylon line to support the CARC/swingarm assembly.
I pulled the swingarm free but that left the driveshaft attached to the output shaft.
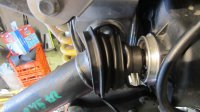
The shaft is held in place on a splined shaft by a circlip.
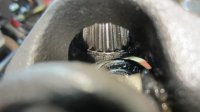
It took some taps with a ball peen hammer but all of a sudden everything was in my hands.
Now you can clearly see the swingarm bearings.
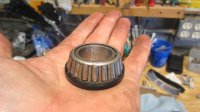
and driveshaft splines.
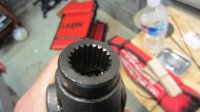
I'll bet there is very little grease on the bearings. Inspect the bearings and the cones they run in.
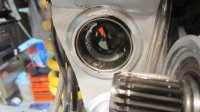
If you see any imperfections or can feel any it's time to replace the bearings. The bearings are getting pricey at the dealer, but I can't find anyone else who carries the correct bearing with attached seal.
Once again, slather lots of high quality grease on the bearings. For the splines I recommend a moly paste.
Now comes reassembly. Obviously this is the same process but in reverse, however I found it impossible to get the drive shaft to mate up with the CARC splines so I had to split the CARC from the swingarm.
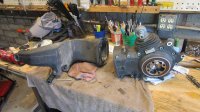
It's really no big deal, just 4 bolts. Now you can re-attach the drive shaft to the output shaft and thread the driveshaft through the swingarm as you line it up to insert the swingarm axle. This is really easy as the CARC is still unattached. Here I'm using the 14mm allen socket to screw the axle into place.
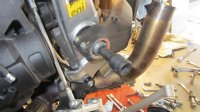
This is the business end of the CARC.
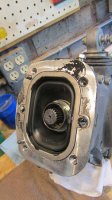
After the swingarm is secure you can re-attach the CARC and proceed with reassembly.
This 2012 Stelvio NTX showed no signs of any bearing or linkage problems but as a preventative measure I decided to check anyway. The bike has about 6500 miles. Since the seat was off for a re-cover this was the perfect time.
The service manual spells out the procedure: put bike on center stand, remove rear wheel (caliper first), remove speed sensor, remove left side rack, remove left foot peg assembly, remove muffler. Now we are down to the real operation.
Disconnect the reaction arm from the CARC assembly, support the CARC so it does not drop down too far. I used rope.

Remove the aluminum link that goes between the shock, swingarm, and frame.

There are three bolts. Pay attention to which way they are inserted because you want to put all this back the same way. Each bolt goes through a bushing. Push that bushing out with your finger, watch out for the needle bearings that will want to fall out. I recommend doing this over a towel to catch the bearings. The bearings fell out because there was not much grease there to hold them in place. Put the bearings back and slather in lots of high quality bearing grease, I recommend synthetic but use what you like.

Re-insert the bushings and reassemble two of the three bolts. The third bolt will link up with the swingarm when you are finished with the swingarm bearings.
Loosen two pinch bolts on the left side of the swingarm. There is a special nut on the swingarm axle, I got the appropriate socket from the UK but now they are available from GuzziTech. This nut is not very tight, it's actually just a sleeve that goes over the axle. Next, you will need a 14mm allen wrench to unscrew the axle itself. Before you take the axle out it's a good idea to snip off the straps holding the rubber bellows that go between the transmission and the swingarm...on the right side of the bike. OK, now remove the swingarm axle. It helps if you have a second person working with you. I used some 1/4" nylon line to support the CARC/swingarm assembly.
I pulled the swingarm free but that left the driveshaft attached to the output shaft.

The shaft is held in place on a splined shaft by a circlip.

It took some taps with a ball peen hammer but all of a sudden everything was in my hands.
Now you can clearly see the swingarm bearings.

and driveshaft splines.

I'll bet there is very little grease on the bearings. Inspect the bearings and the cones they run in.

If you see any imperfections or can feel any it's time to replace the bearings. The bearings are getting pricey at the dealer, but I can't find anyone else who carries the correct bearing with attached seal.
Once again, slather lots of high quality grease on the bearings. For the splines I recommend a moly paste.
Now comes reassembly. Obviously this is the same process but in reverse, however I found it impossible to get the drive shaft to mate up with the CARC splines so I had to split the CARC from the swingarm.

It's really no big deal, just 4 bolts. Now you can re-attach the drive shaft to the output shaft and thread the driveshaft through the swingarm as you line it up to insert the swingarm axle. This is really easy as the CARC is still unattached. Here I'm using the 14mm allen socket to screw the axle into place.

This is the business end of the CARC.

After the swingarm is secure you can re-attach the CARC and proceed with reassembly.

