• Ciao Guest - You’ve landed at the ultimate Guzzi site. NEW FORUM REGISTRATIONS REQUIRE EMAIL ACTIVATION - CHECK YOUR SPAM FOLDER - Use the CONTACT above if you need help. New to the forum? For all new members, we require ONE post in the Introductions section at the bottom, in order to post in most of the other sections. ALWAYS TRY A SEARCH BEFORE STARTING A NEW TOPIC - Most questions you may have, have likely been already answered. DON'T BE A DRIVE-BY POSTER: As a common courtesy, check back in and reply within 24 hours, or your post will be deleted. Note there's decades of heavily experienced Guzzi professionals on this site, all whom happily give endless amounts of their VALUABLE time for free; BE COURTEOUS AND RESPECTFUL!
  • There is ZERO tolerance on personal attacks and ANY HYPERLINKS to PRODUCT(S) or other competing website(s), including personal pages, social media or other Forums. This ALSO INCLUDES ECU DIAGnostic software, questions and mapping. We work very hard to offer commercially supported products and to keep info relevant here. First offense is a note, second is a warning, third time will get you banned from the site. We don't have the time to chase repeat (and ignorant) offenders. This is NOT a social media platform; It's an ad-free, privately funded website, in small help with user donations. Be sure to see the GTM STORE link above; ALL product purchases help support the site, or you can upgrade your Forum profile or DONATE via the link above.
  • Be sure to see the GTM STORE link also above for our 700+ product inventory, including OEM parts and many of our 100% Made-in-SoCal-USA GTM products and engine kits. In SoCal? Click the SERVICE tab above for the best in service, tires, tuning and installation of our products or custom work, and don't miss our GT MotoCycles® (not) art on the BUILDS tab above. WE'RE HERE ONLINE ONLY - NO PHONE CALLS MADE OR RECEIVED - DO NOT EMAIL AND ASK QUESTIONS OR ASK TO CALL YOU.
  • Like the new V100, GuzziTech is full throttle into the future! We're now running on an all-new server and we've updated our Forum software. The visual differences are obvious, but hopefully you'll notice the super-fast speed. If you notice any glitches or have any issues, please post on the Site Support section at the bottom. If you haven't yet, please upgrade your account which is covered in the Site Support section or via the DONATE tab above, which gives you full site access including the DOWNLOADS section. We really appreciate every $ and your support to keep this site ad-free. Create an account, sign in, upgrade your account, and enjoy. See you on the road in 2024.

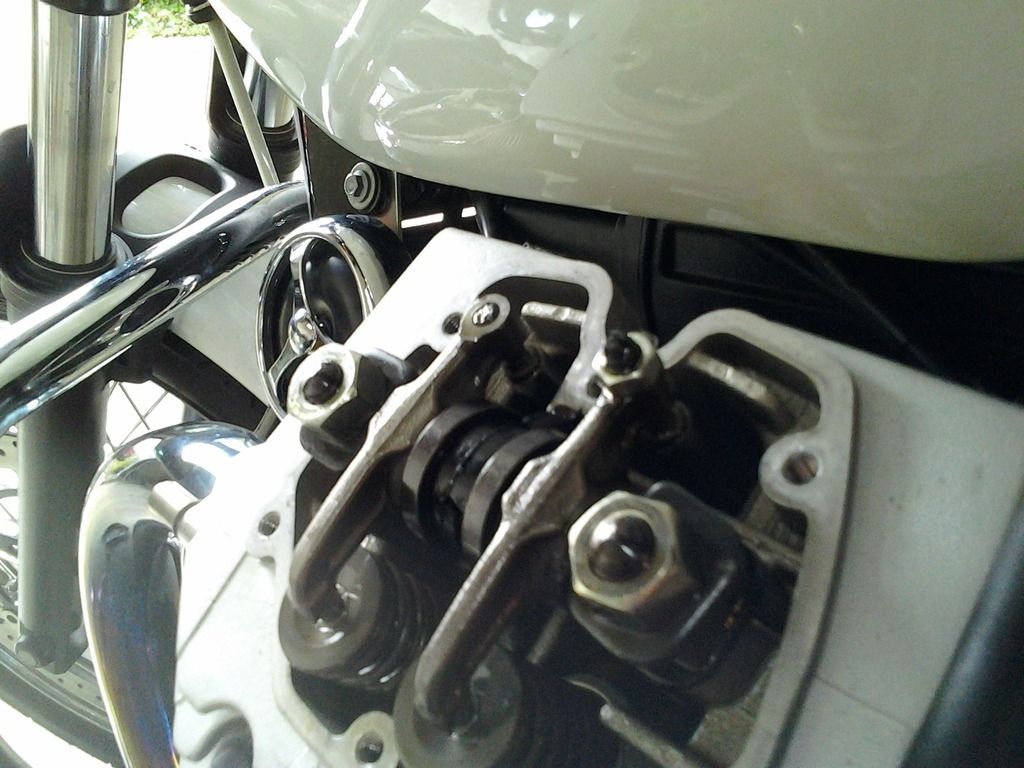
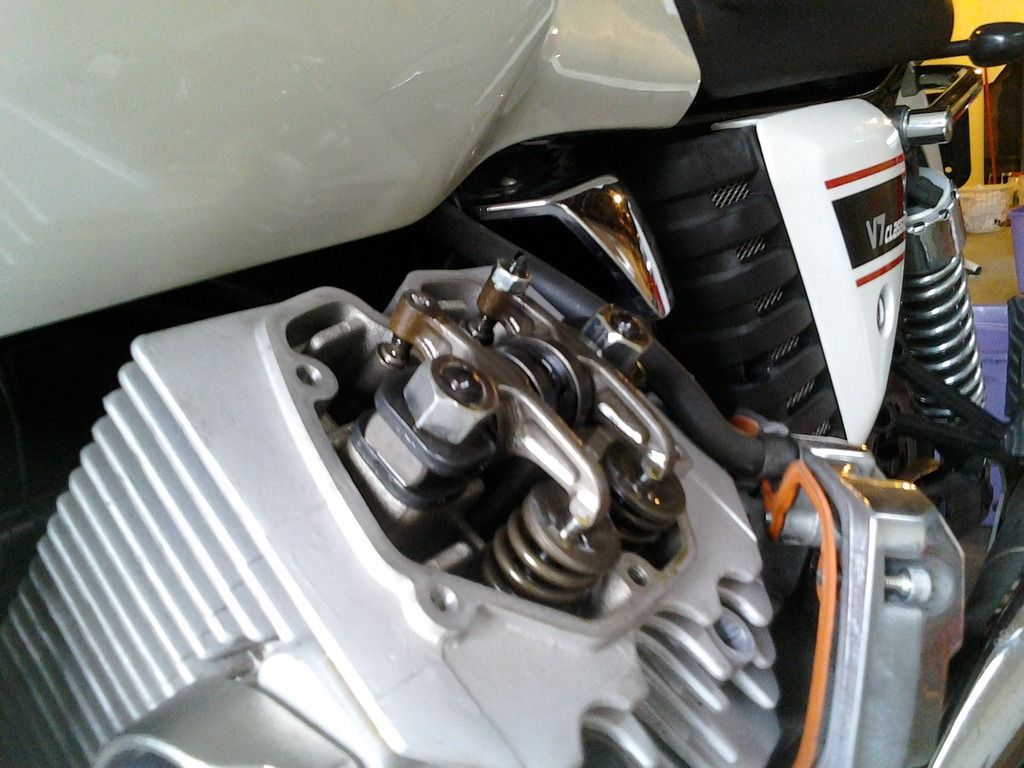
Don't be an idiot like me! (For newbs adjusting valves)

Do you have a torque wrench to re-torque the heads after you replace the adjuster? If not, acquire one. The service manual should be in the resource section to get the torque specification.
 
If you rotate the engine so there is no pressure on the adjuster you may be able to just unscrew it. May need long nose pliers to get it started, but it will save a bit of work and having to re torque the head .
 
It should come out quite easily, that thread is not usually tight. You might even be able to get a screwdriver to have enough grip on the broken end to unscrew it.
 
I think I'm following. Here was my game plan:
1. Take of the rocker arms.
2. Unscrew the valve guide.
3. Screw the new valve guide in making sure it is as close to where the other one was.
Not that bad, right? I'm very apprehensive about repairing it myself since I screwed up a simple valve adjusting job.
Does that little valve guide screw just lay on top of the push rod?
 
Its not called a valve guide, its called the tappet adjuster. A valve guide is a bush pressed into the head, one for each valve. When you adjust the clearance, that cylinder has to be on TDC (top dead centre) on the compression stroke. ie both valves closed.
 
I agree with Brian. You should be able to use a pair of needle nose pliers or even thin pliers and twist the bottom that pushes on the valve stem to loosen to screw enough that you can unscrew it by hand from the top. Just try not to mess up the threads with the pliers. Been there, done that and never had a problem removing the screw. Actually it normally is just put your finger on the top and push while twisting and it comes out.
 
Other trick I have used is small dab of JB weld putty on a screw that is smaller and press it on to the remaining screw. Just be careful you don't get it on the threaded hole, which is why I use the putty instead of the liquid. Both surfaces need to be oil free. It will just screw right out. What I don't know is will the tappet adjuster screw all the way out from the top or does it need to be removed from the bottom. Pretty sure on my 8V it needs to come out from the bottom since the adjuster will not fit through the thread. But then again, the 8V adjuster is over the valve and not the tappet. Hard to tell from the picture but looks doable.
 
What I don't know is will the tappet adjuster screw all the way out from the top or does it need to be removed from the bottom.
In for a penny, in for a pound. Try removing the other tappet adjuster, the one that's not broken. If it removes, there's your answer. The OP will have to do a full valve gap adjustment anyways, whether he tries this or not.
 
It will not unscrew through the threaded hole. The adjuster end ball is a larger diameter than the threads...
 
Last edited:
By the way, don't just put the new adjuster in to about the same position as the original broken one, you need to set it accurately with a feeler gauge. If that's what you meant then sorry.
 
Fixed it. Not bad at all.

Finally, I got around to adjusting my valves. It's an easy procedure but takes a steady hand. I would get the space just perfect, and as I would tighten the nut, the adjusting screw would move slightly, and they would be too tight. The left cylinder (the one I had to fix), was super tough to get perfect. I went more loose than tight. The feeler gauge would touch metal on both sides, but there wasn't a lot of resistance. I moved on to the right cylinder and got that one exactly how I wanted it. I took it for a spin, and it felt great. When I got back I noticed that the exhaust down tube didn't get as blue on the left side. Oh well. I might ride it into work tomorrow, let it sit a couple of days and adjust again next Saturday. I've got Roma v. Lazio and the last Moto GP race tomorrow, so I won't get to it.


Thanks to everyone for the help. After I broke it, I went into panic mode and almost got it towed to a repair shop. Glad I posted for help.

All in all for this 4700 mile service, I adjusted valves, put a nice air filter and fuel filter in it (from Guzzi Tech, by the way). I still need to change all the fluids and I'll be golden for a long time.

Before this service, I had the center stand and Euro side stand put on and I never want to own another bike without a center stand. I love that thing!
 
Last edited:
The technique I use for adjusting valves is to first check. If tight or loose I make a slight adjustment and lock teh nut again. Then check clearance. I repeat until I get the clearance I want as the center screw will move if you don't hold it, and even tightening the nut while holding will move it a very small amount. With practice, it doesn't take long to get the adjustment done.
 
I set mine by feel but then take one size larger and one size smaller feeler gauge and try them. Smaller should slide right in and larger no go. Like John I have found even holding the screw it changes when the nut is tightened. Just a lot less.
 
Fixed it. Not bad at all.

Finally, I got around to adjusting my valves. It's an easy procedure but takes a steady hand. I would get the space just perfect, and as I would tighten the nut, the adjusting screw would move slightly, and they would be too tight. The left cylinder (the one I had to fix), was super tough to get perfect. I went more loose than tight. The feeler gauge would touch metal on both sides, but there wasn't a lot of resistance. I moved on to the right cylinder and got that one exactly how I wanted it. I took it for a spin, and it felt great. When I got back I noticed that the exhaust down tube didn't get as blue on the left side. Oh well. I might ride it into work tomorrow, let it sit a couple of days and adjust again next Saturday. I've got Roma v. Lazio and the last Moto GP race tomorrow, so I won't get to it.


Thanks to everyone for the help. After I broke it, I went into panic mode and almost got it towed to a repair shop. Glad I posted for help.

All in all for this 4700 mile service, I adjusted valves, put a nice air filter and fuel filter in it (from Guzzi Tech, by the way). I still need to change all the fluids and I'll be golden for a long time.

Before this service, I had the center stand and Euro side stand put on and I never want to own another bike without a center stand. I love that thing!
Today I also became the noob you were back in 2015...
Can you please tell me how you got the broken bolt out? Did you end up unscrewing the rocker arms (with no hassle) and then remove the bolt from underneath? Also, where did you buy the broken bolt from?
Thanks and Merry xmas from Norway :)
 
Yes, just take the 2 stud nuts off, lift up rocker assy and take off. back off other nuts (3 of them) replace rockers re-torque heads per book
 
Back
Top