• Ciao Guest - You’ve landed at the ultimate Guzzi site. NEW FORUM REGISTRATIONS REQUIRE EMAIL ACTIVATION - CHECK YOUR SPAM FOLDER - Use the CONTACT above if you need help. New to the forum? For all new members, we require ONE post in the Introductions section at the bottom, in order to post in most of the other sections. ALWAYS TRY A SEARCH BEFORE STARTING A NEW TOPIC - Most questions you may have, have likely been already answered. DON'T BE A DRIVE-BY POSTER: As a common courtesy, check back in and reply within 24 hours, or your post will be deleted. Note there's decades of heavily experienced Guzzi professionals on this site, all whom happily give endless amounts of their VALUABLE time for free; BE COURTEOUS AND RESPECTFUL!
  • There is ZERO tolerance on personal attacks and ANY HYPERLINKS to PRODUCT(S) or other competing website(s), including personal pages, social media or other Forums. This ALSO INCLUDES ECU DIAGnostic software, questions and mapping. We work very hard to offer commercially supported products and to keep info relevant here. First offense is a note, second is a warning, third time will get you banned from the site. We don't have the time to chase repeat (and ignorant) offenders. This is NOT a social media platform; It's an ad-free, privately funded website, in small help with user donations. Be sure to see the GTM STORE link above; ALL product purchases help support the site, or you can upgrade your Forum profile or DONATE via the link above.
  • Be sure to see the GTM STORE link also above for our 700+ product inventory, including OEM parts and many of our 100% Made-in-SoCal-USA GTM products and engine kits. In SoCal? Click the SERVICE tab above for the best in service, tires, tuning and installation of our products or custom work, and don't miss our GT MotoCycles® (not) art on the BUILDS tab above. WE'RE HERE ONLINE ONLY - NO PHONE CALLS MADE OR RECEIVED - DO NOT EMAIL AND ASK QUESTIONS OR ASK TO CALL YOU.
  • Like the new V100, GuzziTech is full throttle into the future! We're now running on an all-new server and we've updated our Forum software. The visual differences are obvious, but hopefully you'll notice the super-fast speed. If you notice any glitches or have any issues, please post on the Site Support section at the bottom. If you haven't yet, please upgrade your account which is covered in the Site Support section or via the DONATE tab above, which gives you full site access including the DOWNLOADS section. We really appreciate every $ and your support to keep this site ad-free. Create an account, sign in, upgrade your account, and enjoy. See you on the road in 2024.

Griso Pannier Rack Fitting

kiwijohn

Tuned and Synch'ed
Joined
Nov 10, 2011
Messages
40
Location
Christchurch, New Zealand
Hi,

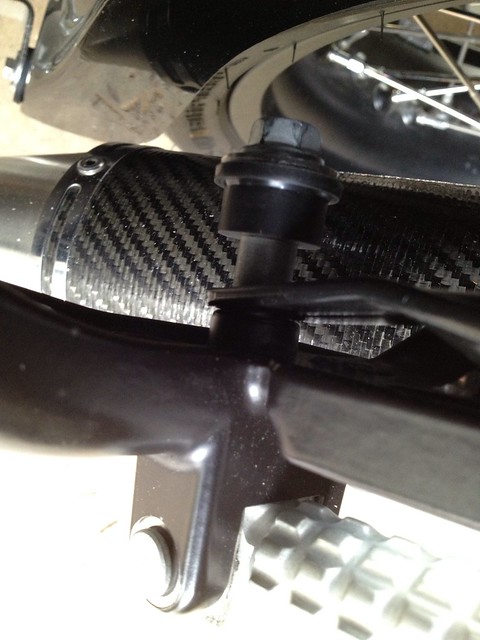
I just received a pannier kit, used, for my Griso. The only instructions I can find are to fit the panniers onto the rack. Does anyone have instructions on fitting the rack to the bike. Its looks straight forward, but it would be good to be sure all the washers, spaces etc are in the right place.

Also, should it have keys? Looks like locks on the inside.

Thanks.
 
It's all fairly obvious but check the allen cap screws that fit the rack to the underside of the seat are long enough. As supplied by Guzzi they weren't always! I replaced mine with slightly longer stainless steel ones and used locking washers too. From memory (it was a long time ago I fitted mine) the spacers for the front/lower mounts to the pillion footpegs are different with a longer one on the left. Mine were a bit of a fiddle to get right as the racks almost had to be sprung into place or they don't line up. I had to be careful the bolts didn't cross thread in the holes in the footpeg hangers. There should be keys for the internal locks to fix the panniers to the frame. You could use them unlocked but only the snap clips will be holding them on so not that secure. Have you checked inside the zip pockets inside the panniers....it's where I keep my key!
 
Keys are probably in one of the side pockets. That's where mine were, if I recall.

I can't remember if I followed written instructions to the letter, but the installation was pretty straightforward, as you suspect. There's a couple of spacers that need to be used for the lower bolts. The lowers bolt to the inside of the passenger foot-peg brackets. On the left side it also uses the same hole as for the factory pipe.
 
Has anyone else noted that the promotional pictures for the panniers, such as on the MG website, show the bags mounted backwards on the rack frames? Just a tip: You want the reflective stripe on the pannier bag to face the rear of the bike. At least that is how I have mine mounted.

FWIW, I think the factory kit is really quite nice and comparable to the Tekno kit I had for my v11. After having this set up I don't think I would like a bike with no bags at all.

P.S. I think a custom pair of chestnut leather bags in a style similar to the V7 "vintage" look bags, would look nice on the Tenni Green 8V SE.

Whats this? They've released a new paint scheme : gray/black. Looks nice too....
 
Yep. I definitely noticed that too about the backwards bags. Makes me wonder how that official(?) Guzzi image of the setup persists.
 
Thanks all. I am fitting these now. Could someone please confirm that the 4 silver fixing bolts are replaced with the rack.

Also please confirm which side the longer spacer goes on. I could probably make it go on either side.
 
If you mean some silver aluminum bobbins under the seat, yes those were removed. Those are for hooking the accessory tailbag or bungee cords. My dealer installed my racks and I received the bobbins in a bag.

Looking at my 2012 8V, with the racks at the passenger footpegs, I don't see the spacer on the muffler side between the muffler and the rack bracket. The bracket is flush up against it. It goes foot peg bracket - muffler tang- rack bracket.

On the right side (starboard) I can see the spacer between the rack bracket and the back of the foot peg bracket... Hope that helps.
 
kiwijohn said:
Also please confirm which side the longer spacer goes on. I could probably make it go on either side.

I checked mine. I see one spacer on the right (starboard) side and a long one on the left (port). The longer one seems to be about an inch, twice as long as the shorter one.

I installed my rack some time ago, and didn't have any fitting problems.

By the way, my experience differed from Pete Roper's. He found his Termignoni interfered with his saddlebag, while mine barely kisses the bag. I have no idea what his spacer fitment was, but this suddenly seems like it could be the answer.

Mine is a 2007, G1100, but I'm essentially sure the racks and brackets are the same.
 
:idea: Is it possible everyone is talking about the same rack kit as both Pete ropers and Moto are talking about the soft bag kit and I had assumed Kiwijohn was talking about the hard bag kit from Hepco-Becker if not carry on :blush: :blush:
 
So I am putting the longer spacer on the muffler side. I have ordered longer bolts as the one that came is too short to accommodate the spacer and muffler. Looks like a need a 75-80mm bolt. It is difficult to line up and get in with the hugger.
 
Eureka! solved the problem with muffler clearance.

I did this install yesterday, and it is frustrating with no instructions.

The right side worked fine with the single included metal spacer.

The left or muffler side uses the existing spacer that went between the footpeg and muffler bracket.

I'd replaced the stock muffler with a Mistral, and the bottom seam on the left bag just touched the top of it. I was afraid that when loaded it would be a problem.

After sleeping on it, I removed the left bracket and reinstalled with the leg of the pannier mount INSIDE the spacer next to the footpeg bracket. It was a bitch to get all three bolts started because the holes didn't line up unless there was a fair amount of pressure to spring the mount. I had to use one of the original bobbin bolts on the last one to give me some extra length, but it had the advantage of pulling the mount into alignment with the cone-shaped head.

The result was that the mount was pushed slightly away from the bike and the bag now clears the muffler by about an inch.

It was a pain to get it right by trial and error, and I hope this can save someone else wasted effort.

8671037891_6ce40cc682_z.jpg


8672139576_7c17c6e0a1_z.jpg
 
Back
Top