• Ciao Guest - You’ve landed at the ultimate Guzzi site. NEW FORUM REGISTRATIONS REQUIRE EMAIL ACTIVATION - CHECK YOUR SPAM FOLDER - Use the CONTACT above if you need help. New to the forum? For all new members, we require ONE post in the Introductions section at the bottom, in order to post in most of the other sections. ALWAYS TRY A SEARCH BEFORE STARTING A NEW TOPIC - Most questions you may have, have likely been already answered. DON'T BE A DRIVE-BY POSTER: As a common courtesy, check back in and reply within 24 hours, or your post will be deleted. Note there's decades of heavily experienced Guzzi professionals on this site, all whom happily give endless amounts of their VALUABLE time for free; BE COURTEOUS AND RESPECTFUL!
  • There is ZERO tolerance on personal attacks and ANY HYPERLINKS to PRODUCT(S) or other competing website(s), including personal pages, social media or other Forums. This ALSO INCLUDES ECU DIAGnostic software, questions and mapping. We work very hard to offer commercially supported products and to keep info relevant here. First offense is a note, second is a warning, third time will get you banned from the site. We don't have the time to chase repeat (and ignorant) offenders. This is NOT a social media platform; It's an ad-free, privately funded website, in small help with user donations. Be sure to see the GTM STORE link above; ALL product purchases help support the site, or you can upgrade your Forum profile or DONATE via the link above.
  • Be sure to see the GTM STORE link also above for our 700+ product inventory, including OEM parts and many of our 100% Made-in-SoCal-USA GTM products and engine kits. In SoCal? Click the SERVICE tab above for the best in service, tires, tuning and installation of our products or custom work, and don't miss our GT MotoCycles® (not) art on the BUILDS tab above. WE'RE HERE ONLINE ONLY - NO PHONE CALLS MADE OR RECEIVED - DO NOT EMAIL AND ASK QUESTIONS OR ASK TO CALL YOU.
  • Like the new V100, GuzziTech is full throttle into the future! We're now running on an all-new server and we've updated our Forum software. The visual differences are obvious, but hopefully you'll notice the super-fast speed. If you notice any glitches or have any issues, please post on the Site Support section at the bottom. If you haven't yet, please upgrade your account which is covered in the Site Support section or via the DONATE tab above, which gives you full site access including the DOWNLOADS section. We really appreciate every $ and your support to keep this site ad-free. Create an account, sign in, upgrade your account, and enjoy. See you on the road in 2024.

Mindis V7-850 Mods

Since I got clip-ons I have that nice space for my phone over top triple. I don't like the idea of phones hanging over handlebars, "less is more" is my cup of tea:)
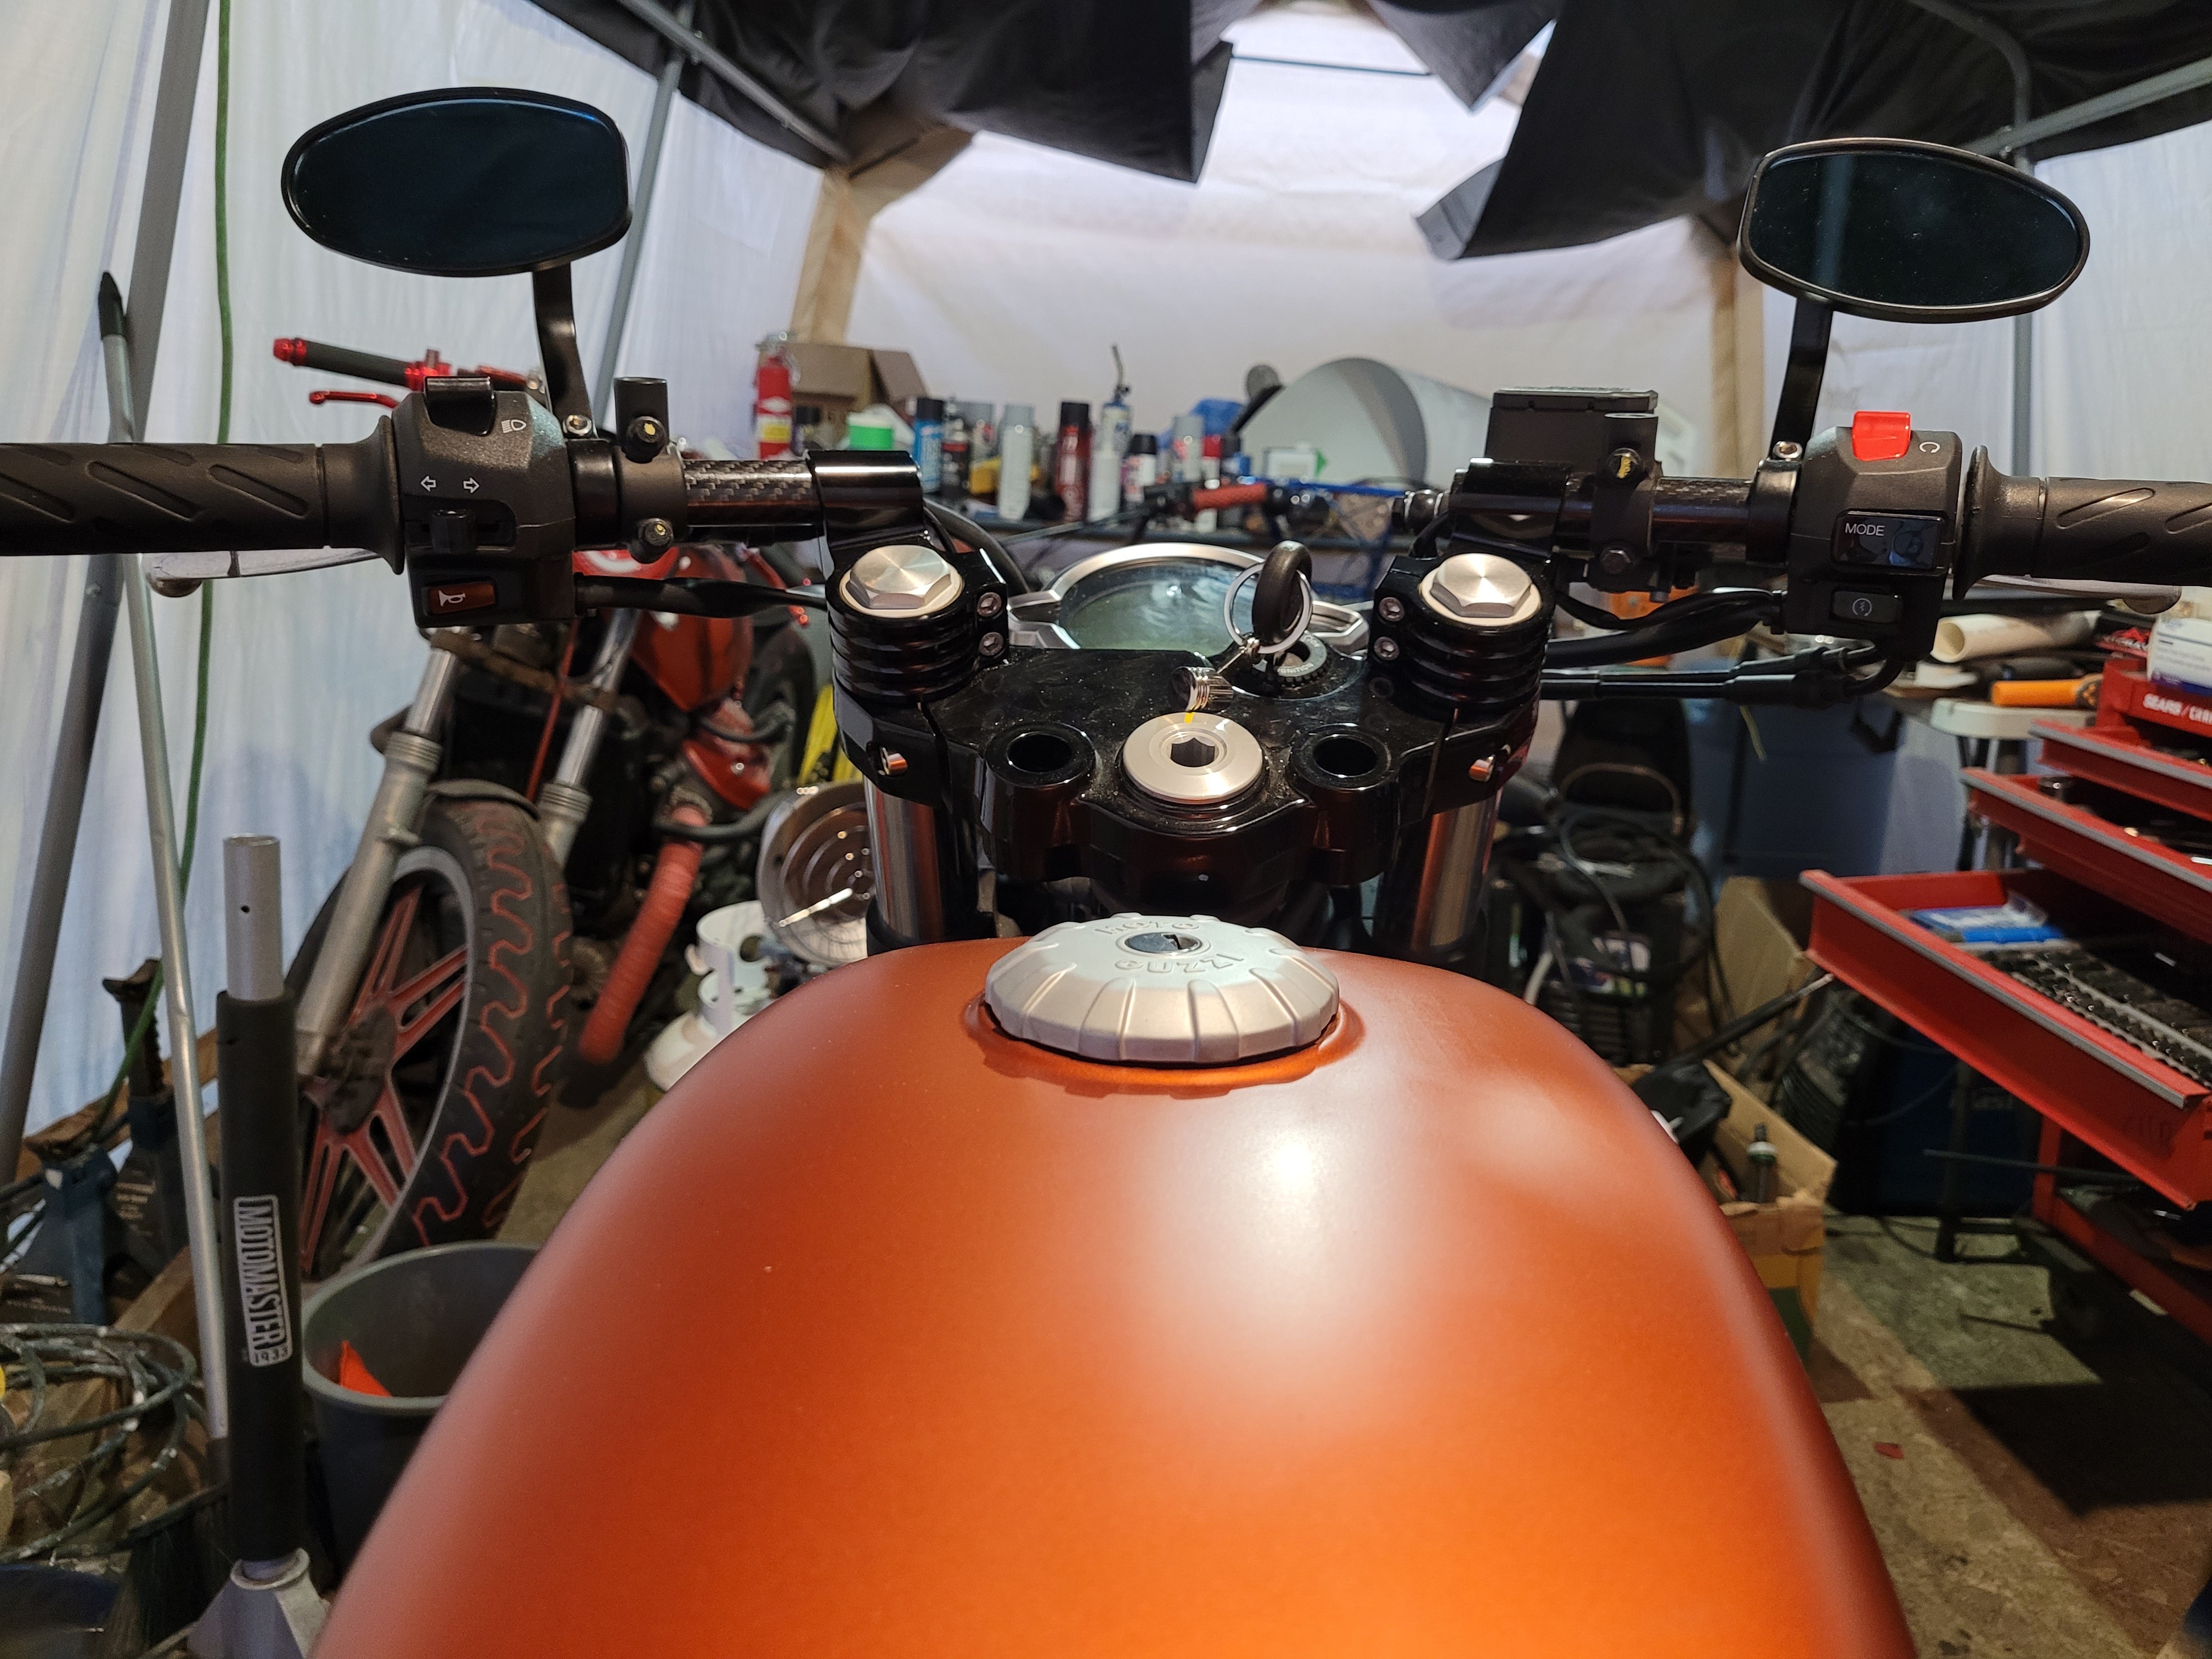
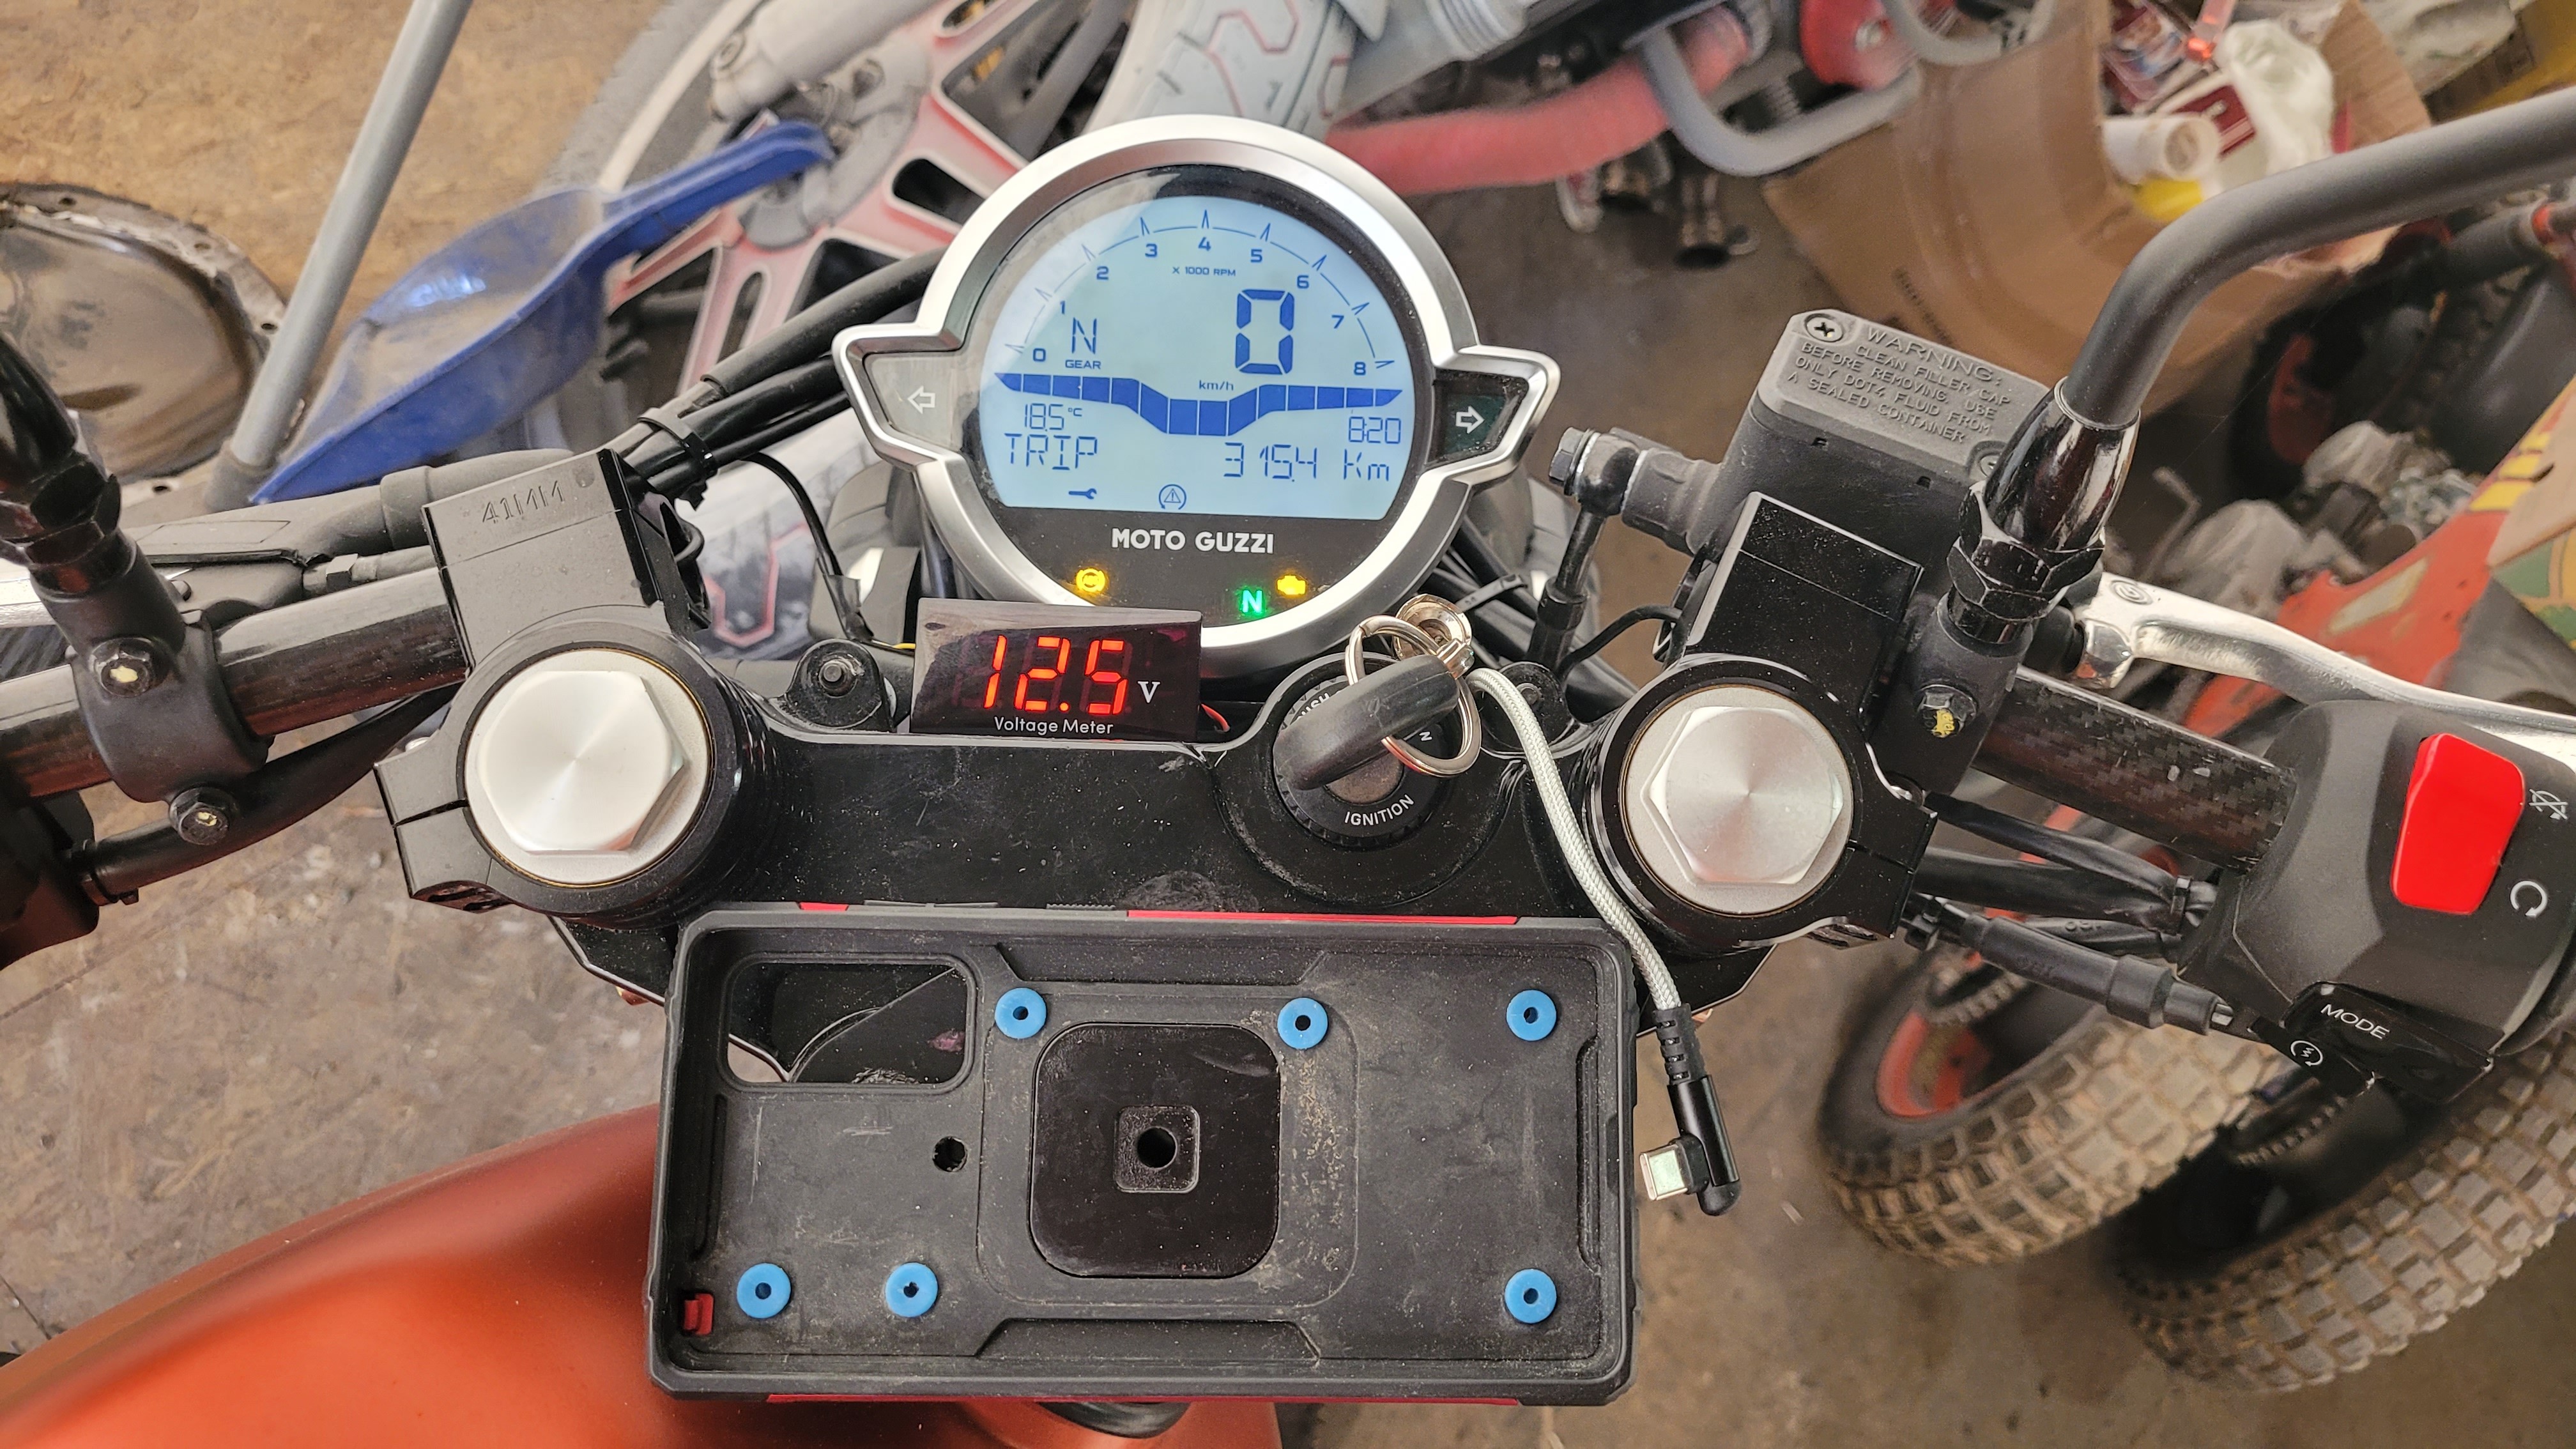
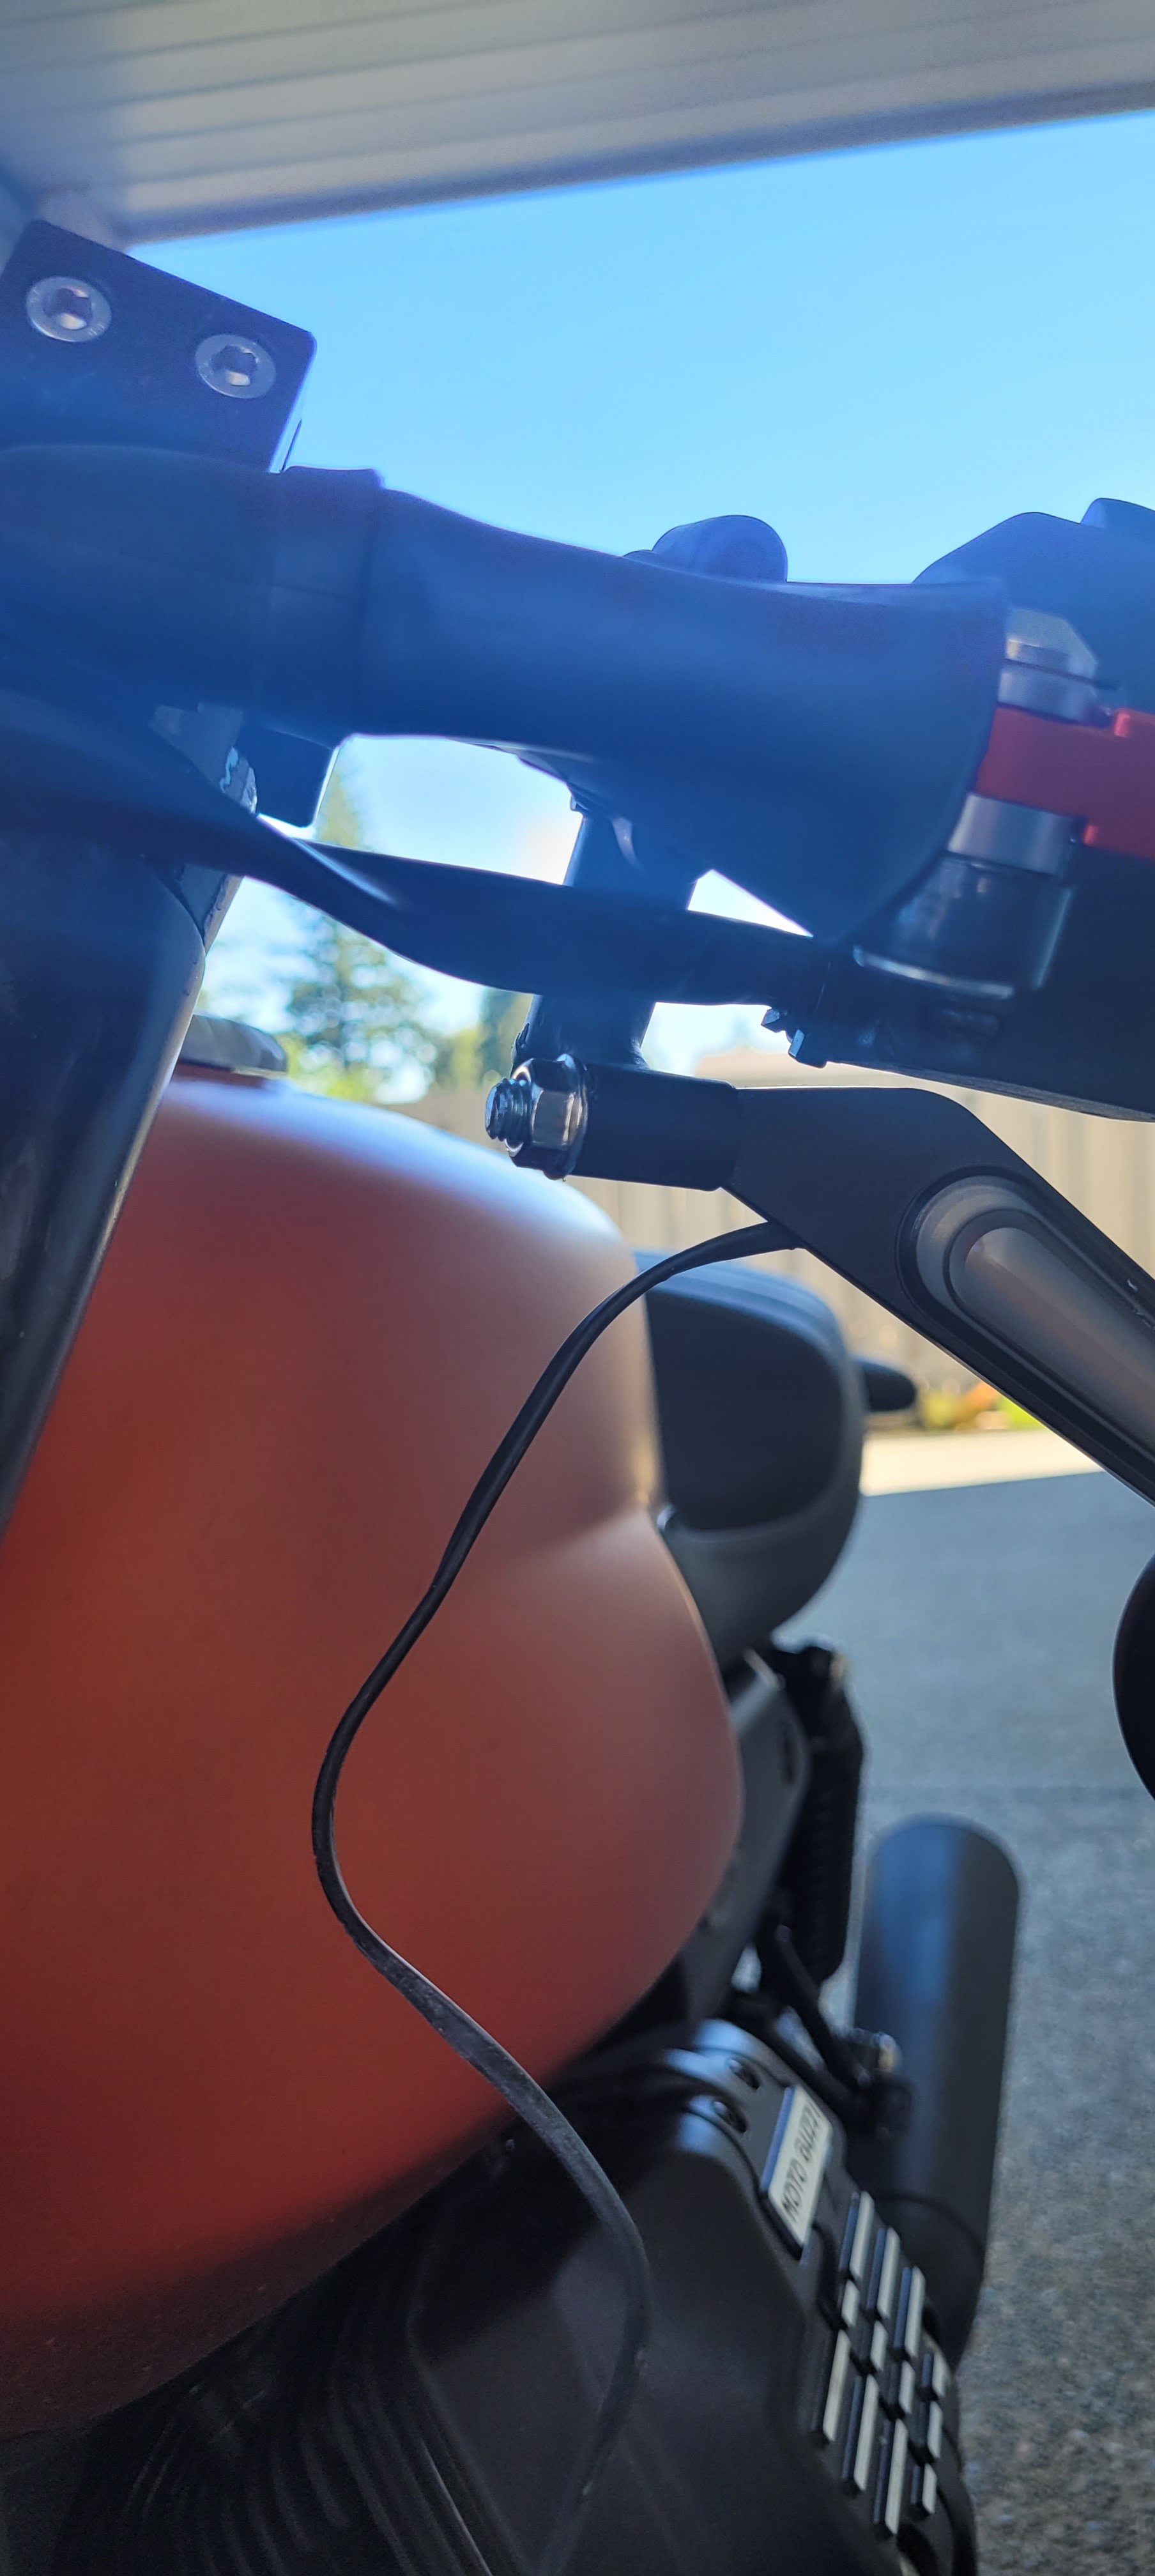
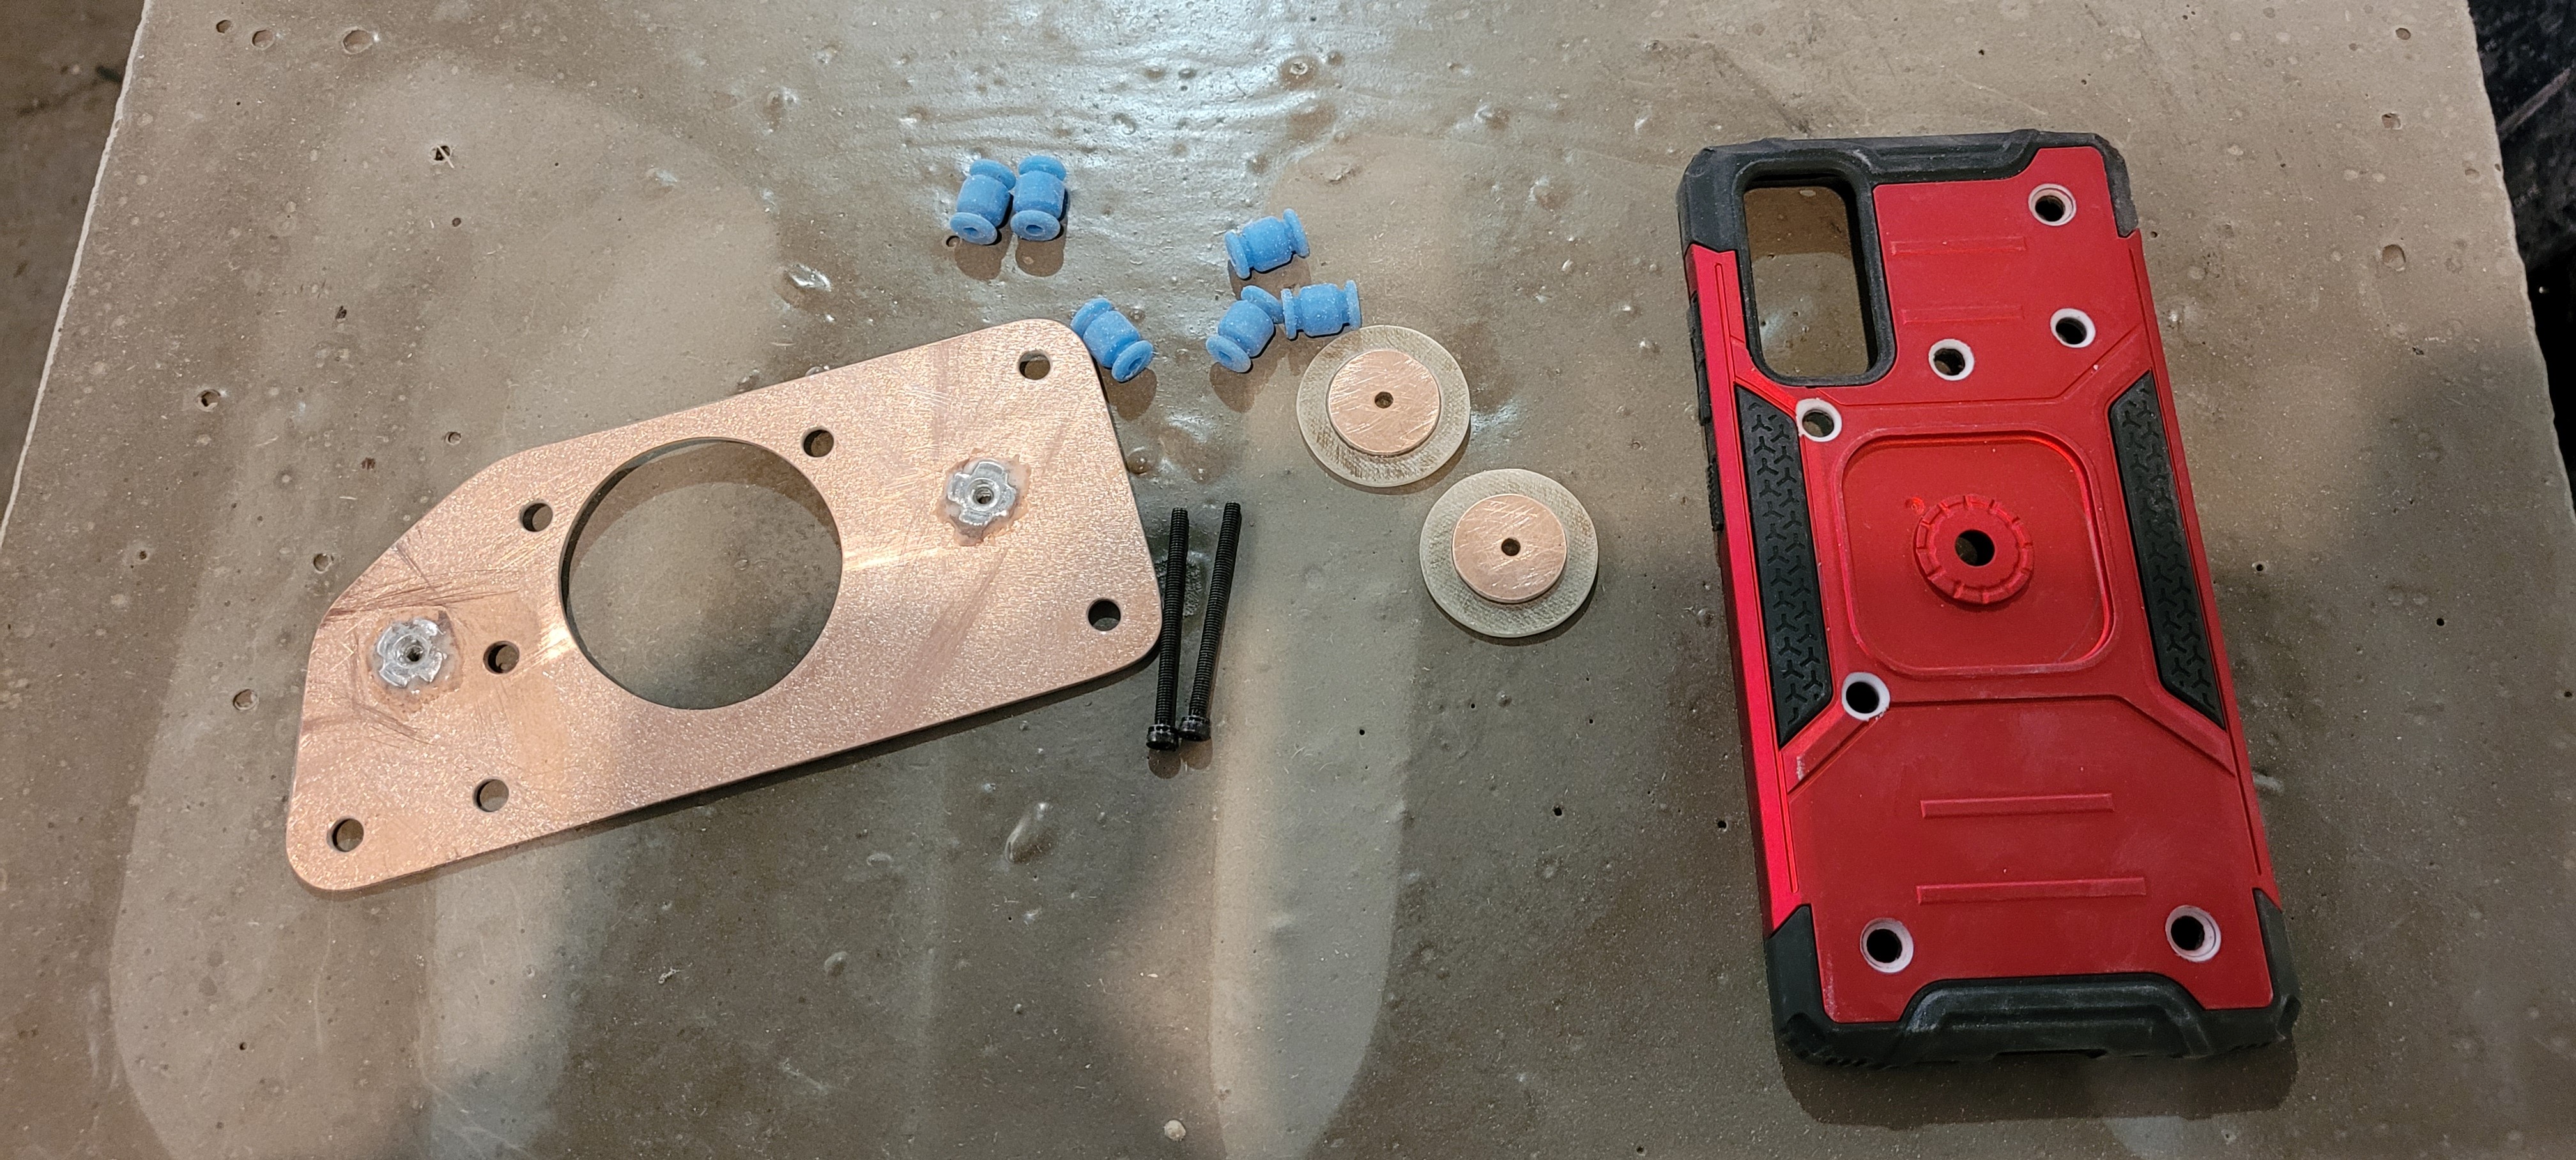
I sandwitched fiberglass parts on the triple with long M3 bolts through the holes where original handlebars suppose to be mounted. As excessive vibrations can damage phone's camera I mounted my case through silicone dampeners I had from my previous RC drone hobby. When I'll need GPS or smth I'll take my phone out of my case and put it in to bike's case. I have to install USB block and route charger cable to the front but not in a rush to do so, it'll do for now:)


Since I got clip-ons I have that nice space for my phone over top triple. I don't like the idea of phones hanging over handlebars, "less is more" is my cup of tea
Man, you have WAY too much time on your hands, heh. Good on you. Crafty.
I personally prefer my phone on my body in case I ever separate from the bike and likely need it the most, but that's me.
 
Man, you have WAY too much time on your hands, heh. Good on you. Crafty.
I personally prefer my phone on my body in case I ever separate from the bike and likely need it the most, but that's me.
Cheers brother!
Time is the only thing I'm short on in life, but hey, "when there's a will, there'll be a way" :)

On the same note.... lol Some might think it's squid'ish but that's just me being me🤷‍♂️ 
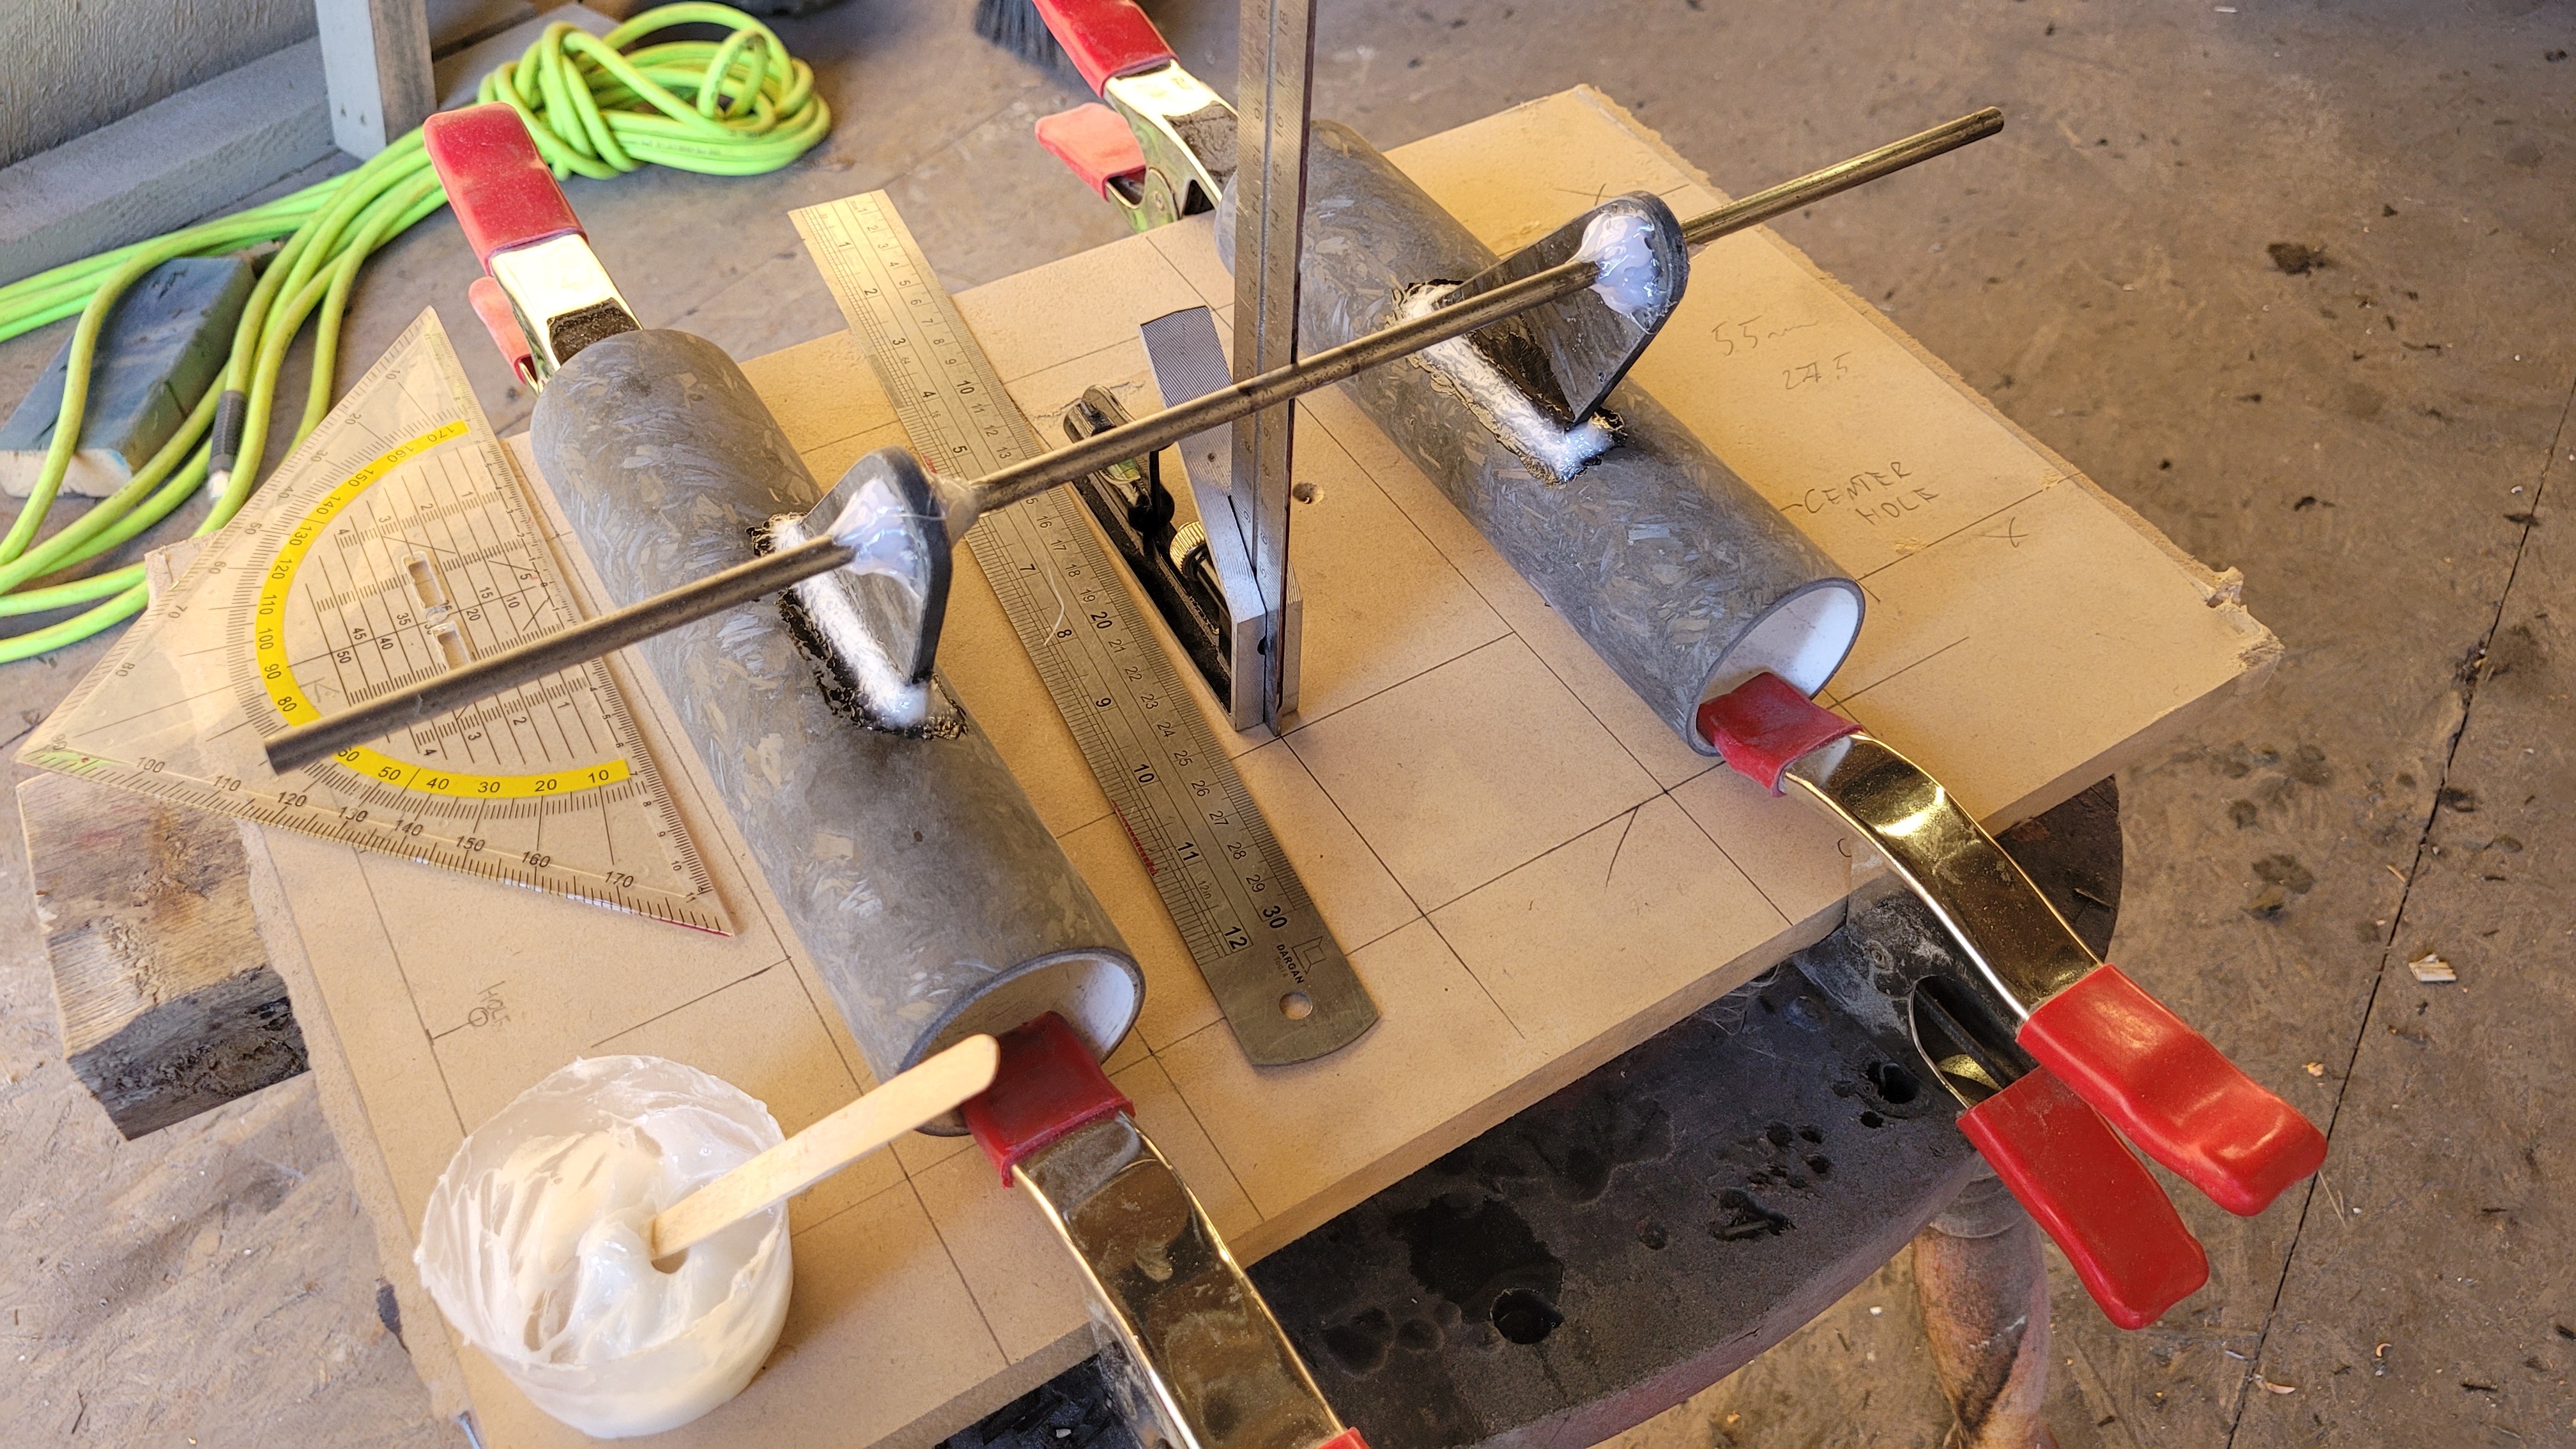
My brother has a little decal hobby/business and made some decals for my wheels. I made templates of wheel curvature and measured letter size as it's kinda hard to do it on computer program alone.
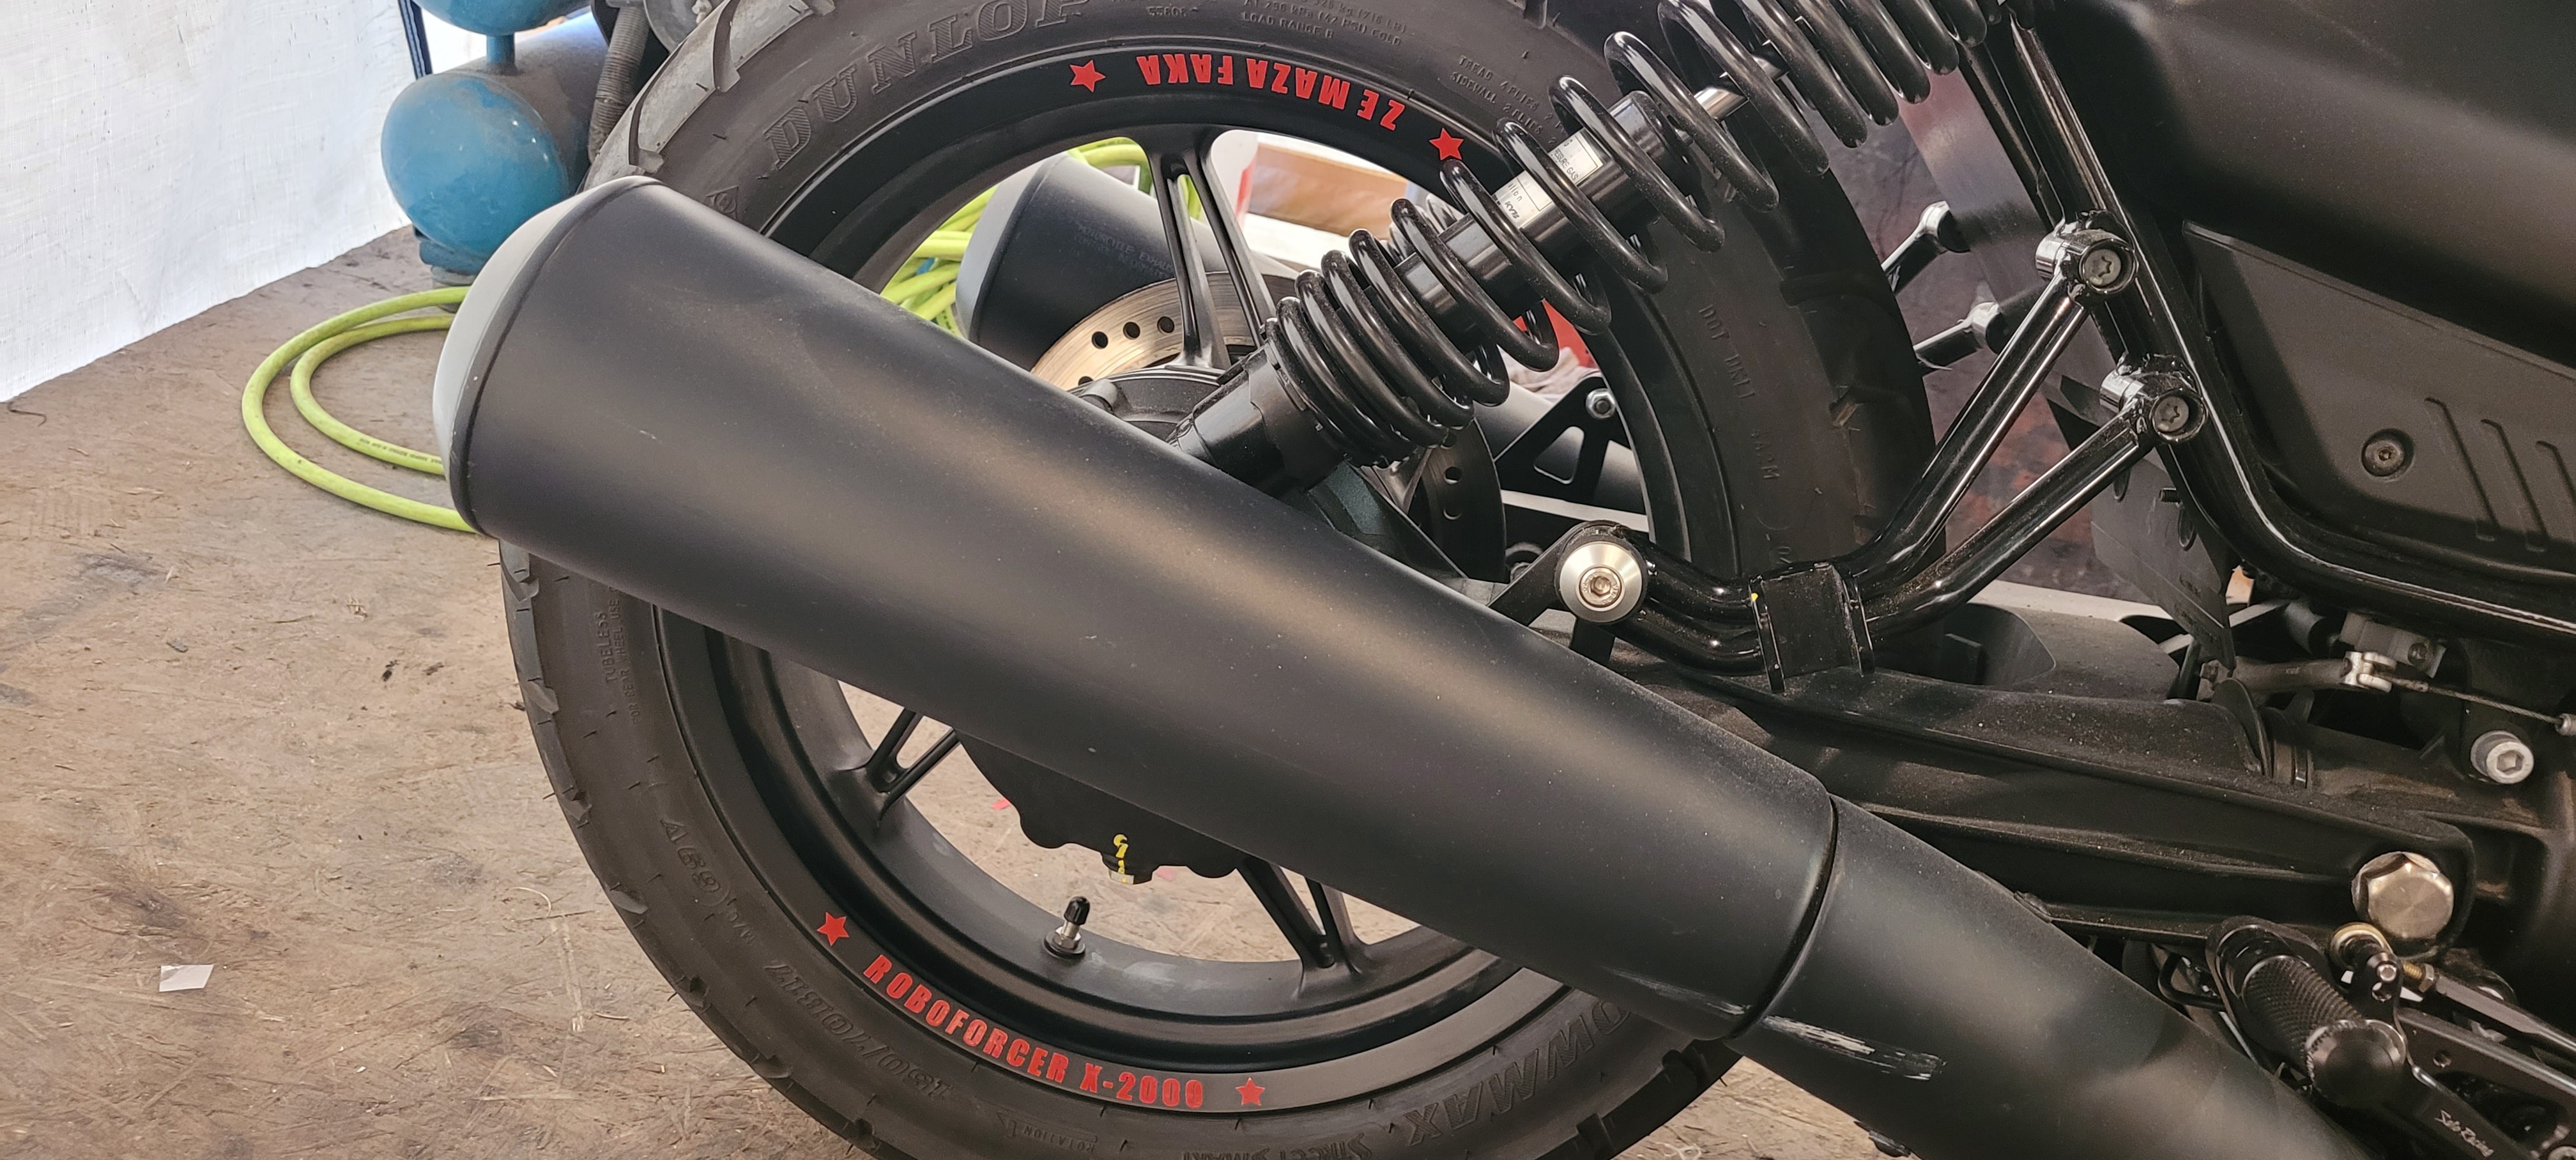


This one is more of a hack then a mod and it could be done with any bike, but still:)
Got fed up carrying my helmet everywhere and I don't like chains and locks so I made a little bracket that bolts on the frame under the seat. This way, the only way to get the helmet off is to lift the seat, and ya can't do it without a key;)


Love this mod, I need to do something like this
This one is more of a hack then a mod and it could be done with any bike, but still:)
Got fed up carrying my helmet everywhere and I don't like chains and locks so I made a little bracket that bolts on the frame under the seat. This way, the only way to get the helmet off is to lift the seat, and ya can't do it without a key;)


And to accommodate rearsets I got my clip-ons on. First of all, I discarded my temporary gauge drop bolts and made a proper bracket that keeps my gauge centered angled to my preference and the height I want:


I got clip-on clamps with 1 inch riser. I thought I'll have the right handlebar height if I slide them in forks just under the top triple. But after trying things there and there I realized that riding posture became a bit too aggressive for what I want. I'm planning to do a bit longer rides then just zip around town so I don't want to bend my back too much. So I slid my forks up 30mm to lower the front like I planned and put clip-on clamps on top. But now with 1 inch rise they became a wee bit too high for my liking... Looks like I want clamps on top of triple without that 1 inch rise, jeez I'm fussy... LOL So I ordered another set and be riding as it is for now.
Got my bar-end mirrors as well but put them the "normal" way for now until I pass my road test. Yes, I have only N driving licence and as I overheard instructors are not tolerant to such mods in my area...


But I hope my bar-end turn signals will do fine:)

I love how you mounted those mirrors on the inside of grips. I think I got those exact mirrors or look just like them on two of my bikes. They are great for the price.
 
Also that helmet and bike color combo is awesome!!!
Cheers brother, Scorpion helmets don't come in the style I like, had to Mindi'fy it a bit:)
I love how you mounted those mirrors on the inside of grips. I think I got those exact mirrors or look just like them on two of my bikes. They are great for the price.
Dunno what are the laws in your neck of the woods but in BC they're not legal... technically lol It states that mirrors should be at least 3 inches above handlebars and no less than 2 inches in diameter. As I see lots of bikes with them mounted whatever I'll just play dumb till caught:)
Now for the mirrors itself. I would definitely not recommend them, nor mounting them the way I did. Ya can't tighten them bolts enough for them mirrors stay in place and not be loose. Tightening further strips the threads. I put longer bolts with nuts and it cracked brackets. Cheap Chinesium stuff, ya get what ya pay for. Personally I'm OK with that as I get cheap stuff and make it work and last.
I would not recommend to mount them in position I have either, I can't see much as they are now... With clip-ons my handlebars got shorter 2'ish inches each side, plus them mirrors are closer to center rather than towards outside of handlebars. If I'm looking at them without moving my head, all I see is sides of my legs. For my particular comfort I have to move them outwards 2-3 inches. Bracket doesn't allow that, I don't want to mount them as bar end. So I'll open a beer, power on my welder, and make some custom brackets:)
 
Got Sato rearsets done:) They're pricey indeed but very well engineered, fits like they just should've been there from the start. Was brewing ideas how to DIY-style push back and up original footrests but then I thought- screw this, I'll treat my favorite girlfriend with sm quality stuff. Ya know, when ya treat them right they love you back :) Pressure switch included for rear brake has a tiny delay compared to mechanical switch but barely noticeable. Haven't done a test ride yet, not a fan of rain with heavy winds, but looks like I'm comfortable with most far back and most up settings so far. Now when I sit comfy, my knees can grip the tank right behind the bumpouts above valve covers. Also my feet are not as wide anymore as well. Feels like a lot more sportier stance. If I would be a bigger guy I'd probably want to move my feet back another wee bit more, I'm 179cm height. Dunno what's that in feet, I don't measure my beer in "olympic swimming pools" lol


Well... I might throw out my Guareschi rear sets. Unless i get some assistance. These have been a huge headache. I absolutely regret my purchase.

Zero instructions, what should be a quick install took me hours. Had to look up photos of the V7 fast Endurance bikes on google to have details.

The one email reply i had from guareschi showed the shifter linkage they use was nearly twice as long the the one i received. I ended up having to make my own linkage. The mounting bolts were all too short, that when i realized the round spacers are beveled. Now I have them properly positioned, 3 of 4 bolts barely have a full nut, the 4th bolt only has 2/3 of a nut on it.

Spent 300€ + shipping and custom duty. on a rear set then I had to buy new bolts and make my own shifter linkage.... Now comes the issues with the brakes since i installed them.

Feels like the brake line is too short, but Guareschi claim that they sent me the complete kit. And it should fit. I had to unclamp the brake line at the base of the motor so it would reach the new possition of the master cylinder. Soon after i had my rear brake stick on and completely destroyed my rear disk brake.

Trying to troubleshoot, i disassembled the master cylinder and calliper. Cleaned everything and reinstalled.

Tried to bleed the brakes... Usually a 15-20min job.... It took my two evening of trying three different techniques to bleed the brakes to have almost no brake at all. Feeling like an idiot, I went to the dealership with my tail between my legs. They told me due to the abs the bike needed to be connected to the computer to properly bleed the brakes

International Motorsport in Langley had two mechanics working on bleeding my rear brakes for 6 hrs....6hrs!!!! That is a moto guzzi dealer!!! I only have marginal braking power. Nothing I would consider safe for use on the road. My foot is nearly vertical when trying to brake. They claim thats the best they can do for me. And that they cant properly bleed the brakes because of the aftermarket rear sets...

Guareschi has given me no support, i sent out 15 email asking for assistance and only had 2 replies. One simply replying that the kit is mounted wrong..... No shit, thats why i send them all the emails.
 
I know that. I tried and failed.
Heck. The dealer had two mechanics working 6 hrs trying to bleed my brakes....
Oh brother, that's a bummer...
I sure did have a bit of an issue with brake bleeding but nothing major. I took my calipers off, raised them above ABS, bled them, and the brakes were still soft'ish. Bled again with vacuum pump, still meh... Left rear caliper raised up for a day thinking that if there's an air bubble then it might eventually rise upwards. Bled again, put caliper back on and went riding. Brakes were still kinda meh but stiffened up shortly so I called it a win. I went through sm Dot4 through out the the process but blame myself for not knowing the trick (and not figuring it out myself lol) as mentioned above- raise rear calipers above ABS:)
 
Since I'll be putting a Lipo battery I want to see my charging voltage so I don't overcharge it or drain it dead in case of sm failure. so I added a voltage monitor. On the same note, I installed a USB charger as well and routed the cord under the tank to the front. Both are connected to Aux plug that gets power when ignition is on. There's a ~0.5v difference between voltage reading from Aux plug and battery itself but that's no big deal, half a volt doesn't make any difference.


I like inverted forks but V7s don't come with them. Once I'll upgrade with Matris kit they'll be more then good enough but that thin top part between the Ts is still poking my eye so I visually beefed it up with my fancy fork boots:) And at the same time as a part of my minimalistic vision I added headlight mount brackets. That's 2 for 1 Mindi's special :D
I laminated carbon plates for strength and added carbon fiber strands for forged carbon fiber looks, came out around 6mm overall thickness:


On a PVC tube I added carbon fiber strands and epoxied brackets on. For that part I made a jig to make sure I have the right width and height for my headlight:


Beefed up the joint with more carbon fiber, sanded, and finished with satin clear coat on:


Forks are 40mm and PVC pipe's ID is 48mm so I needed spacers to center them. Found some double sided tape that is like hard silicone rubber. Few layers did the job for tight fit. I left gaps for water to run out if there would be any:


Slid the forks down, slid the boots between the Ts, forks back up, and call it done. Now that I have my headlight fixed where I wanted, I can proceed to making front cowl😎


Cheap Chinesium bar end mirrors, ya get what ya pay for. I'm OK with that as I get cheap stuff and I make it work to suit me, and I even get my kick out of DIYing lol
I mounted them under my handlebars as I wanted but they were not sticking out far enough and all could see is my thighs. And cast brackets cracked quicker then eggs for my omelette, specific half aluminum half pewter breed of substance that I wouldn't even call a metal... But I like the mirrors, so I opened a beer, powered my TIG and welded sm brackets:)


The initial plan was to make them brackets from carbon fiber but I thought I'll save sm time ant try welded ones. The more I look at them the more I don't like them... They kinda doesn't suit, looks like just a bent wire... Oh well, it'll do for now, I'll make another ones later and next time I won't try to fool myself LOL
 
I have a wee bit of carpal tunnel syndrome. Not bad but I still have to address those tingling fingers. I'll be making bar end weights later so my bar end turn signals have to go. Also I don't like anymore my mirror brackets I made earlier so to shoot 2 birds with one stone I got mirrors with integrated turn signals.
They didn't fit the way I wanted. Throttle cables were in the way, as well as left handlebar switches. I reversed original mirror mounts and welded 90deg adapters to push mirrors forward ands so I could mount them sideways to have a lower profile:


For a $100 eBay mirrors I was surprised of a good'ish quality, and most definitely happy that they're super bright:)

 
Next on my menu, bumstop with integrated LED taillights:)
I wrapped my seat with cling film (aka saran wrap lol) and made a fiberglass condom:


Added fiberglass plate to raise it up at my bum, filled with expandable foam, sanded. Then I added a "tunnel" at the back where my LED strip will be. This way LED strip won't be squishing the seat:


Put thin fiberglass layer on and carbon fiber chopped strands for that forged carbon fiber looks. After rough sanding I poured resin "glass". This way after final sanding LED strip is not sticking out, resin glass is seamless and is a part of that bumstop:)


After tons of sanding and prep, sprayed satin clearcoat on. Bumstop slides in and being held by tiny screws from underneath. Wire stays attached to the seat, connected to original taillight connector. I barely fully take off my seat and if I have to, I'll have to unplug it. A bit inconvenient but it's not the first time I sacrifice convenience for the looks, and most definitely not the last time;)


Number plate eventually will go behind rear wheel, I don't like it where it is now lol
In a daylight sunshine that LED strip is not as bright as original taillights. When driving lights are on, turn signals are even less bright but as stop light is plenty bright then I'll call it good and roll with it.


So here's what my Rosseta looks like now. I mean for now...;)

 
I have a wee bit of carpal tunnel syndrome. Not bad but I still have to address those tingling fingers. I'll be making bar end weights later so my bar end turn signals have to go. Also I don't like anymore my mirror brackets I made earlier so to shoot 2 birds with one stone I got mirrors with integrated turn signals.
They didn't fit the way I wanted. Throttle cables were in the way, as well as left handlebar switches. I reversed original mirror mounts and welded 90deg adapters to push mirrors forward ands so I could mount them sideways to have a lower profile:


For a $100 eBay mirrors I was surprised of a good'ish quality, and most definitely happy that they're super bright:)

Impressive. As a matter of interest any cable / brake line issues when fitting the clip-ons bars? I've probrake (German) clip-ons in mind
 
Mindis, you define the concept of “making it your own!” every time, more and more. I am always impressed with your mad skills!
 
Impressive. As a matter of interest any cable / brake line issues when fitting the clip-ons bars? I've probrake (German) clip-ons in mind
After clip-ons there was some slack in lines indeed. I saw kits that has shorter lines included but I'm a cheapskate and will do anything to make it work with whatever I have. I took my headlight off and rerouted clutch cable round the front of the speedo so there's no big break/bend in the line. Same with throttle cables. Also I push cables a bit back inside the tank, not much. In other words, between all the points I made my cables "shorter". Now that I have cables sticking out ugly in front of my speedo, I'm making a flyscreen to hide them:)
 
Back
Top