The one thing I found on my Norge with a Rostra installed is that the rod to which you have attached the link block in the last picture appears to be prone to strain, and the plastic caps at each end that grip the ball connectors lost their grip. I replaced the whole thing with a carefully measured and equally adjustable Heim joint setup, since you can't order that rod as a replacement part. It was a pain...
Navigation
Install the app
How to install the app on iOS
Follow along with the video below to see how to install our site as a web app on your home screen.
Note: This feature may not be available in some browsers.
More options
-
Ciao Guest - You’ve landed at the ultimate Guzzi site. NEW FORUM REGISTRATIONS REQUIRE EMAIL ACTIVATION - CHECK YOUR SPAM FOLDER - Use the CONTACT above if you need help. New to the forum? For all new members, we require ONE post in the Introductions section at the bottom, in order to post in most of the other sections. ALWAYS TRY A SEARCH BEFORE STARTING A NEW TOPIC - Most questions you may have, have likely been already answered. DON'T BE A DRIVE-BY POSTER: As a common courtesy, check back in and reply within 24 hours, or your post will be deleted. Note there's decades of heavily experienced Guzzi professionals on this site, all whom happily give endless amounts of their VALUABLE time for free; BE COURTEOUS AND RESPECTFUL!
-
There is ZERO tolerance on personal attacks and ANY HYPERLINKS to PRODUCT(S) or other competing website(s), including personal pages, social media or other Forums. This ALSO INCLUDES ECU DIAGnostic software, questions and mapping. We work very hard to offer commercially supported products and to keep info relevant here. First offense is a note, second is a warning, third time will get you banned from the site. We don't have the time to chase repeat (and ignorant) offenders. This is NOT a social media platform; It's an ad-free, privately funded website, in small help with user donations. Be sure to see the GTM STORE link above; ALL product purchases help support the site, or you can upgrade your Forum profile or DONATE via the link above.
-
Be sure to see the GTM STORE link also above for our 700+ product inventory, including OEM parts and many of our 100% Made-in-SoCal-USA GTM products and engine kits. In SoCal? Click the SERVICE tab above for the best in service, tires, tuning and installation of our products or custom work, and don't miss our GT MotoCycles® (not) art on the BUILDS tab above. WE'RE HERE ONLINE ONLY - NO PHONE CALLS MADE OR RECEIVED - DO NOT EMAIL AND ASK QUESTIONS OR ASK TO CALL YOU.
-
Like the new V100, GuzziTech is full throttle into the future! We're now running on an all-new server and we've updated our Forum software. The visual differences are obvious, but hopefully you'll notice the super-fast speed. If you notice any glitches or have any issues, please post on the Site Support section at the bottom. If you haven't yet, please upgrade your account which is covered in the Site Support section or via the DONATE tab above, which gives you full site access including the DOWNLOADS section. We really appreciate every $ and your support to keep this site ad-free. Create an account, sign in, upgrade your account, and enjoy. See you on the road in 2024.
You are using an out of date browser. It may not display this or other websites correctly.
You should upgrade or use an alternative browser.
You should upgrade or use an alternative browser.
Rostra Cruise Control Installation on '12 NTX
- Thread starter ChuckH
- Start date
.
Last edited:
Well finally started my install. Was supposed to be a winter project, but couldn't wait.
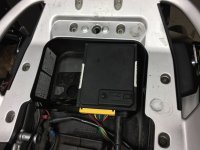
Controller fit nicely in the rear storage compartment. I lucked out on this. I have a Corbin seat that sits higher. Seat locks down perfectly. Just need to make a bracket to hold it down.

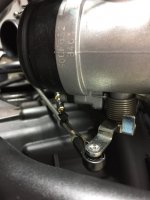
Went a different route for the throttle link. Used the cable loop that comes with the kit and hooked it around the ball for the right hand ball and socket linkage. Popped the socket off and just slipped the loop on.

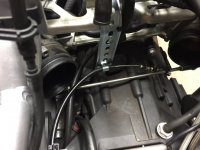
Cable needed three balls to extend it to the needed length. Then used the supplied throttle cable bracket. Bent it into shape and cut off the end to make it the right shape. Bolts in nicely to the throttle body frame. Used the supplied threaded flag nut and then bolted it to the bracket. THere is a slot at the top of the throttle body bracket so did the final adjustment there. Then drilled a second hold in the TB bracket to lock it in place. Fine adjustments can be made by bending the bracket as needed.


Works nicely with no binding or obstructions on either the throttle or the pull on the cruise. Adjusted the slack so that at full pull, it is just at full throttle. Loosely tie wrapped the cable to the linkage so it is a linear pull on the ball so no excessive side pull to stress the ball and socket.
That was the easy part, now have to start on the wiring and needed relays.
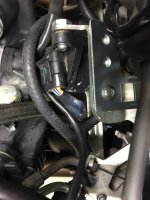
Question on the RPM output. Can I just tap into the phase sensor and use that signal or does it need to come from the dash signal. The connector is right in the V of the motor so full accessible at the moment. Also the speed sensor connector for the rear wheel is right beside the air box. Looks like everything will be fully accessible for me to tap into including the brake light wire as I have already tapped into it for my tailbox lights. Will need to run a wire for the clutch switch but don't think I will need it if I use the RPM signal.
Will post more on the wiring later. Hopefully get it done before the snow starts to fly.
Controller fit nicely in the rear storage compartment. I lucked out on this. I have a Corbin seat that sits higher. Seat locks down perfectly. Just need to make a bracket to hold it down.

Went a different route for the throttle link. Used the cable loop that comes with the kit and hooked it around the ball for the right hand ball and socket linkage. Popped the socket off and just slipped the loop on.

Cable needed three balls to extend it to the needed length. Then used the supplied throttle cable bracket. Bent it into shape and cut off the end to make it the right shape. Bolts in nicely to the throttle body frame. Used the supplied threaded flag nut and then bolted it to the bracket. THere is a slot at the top of the throttle body bracket so did the final adjustment there. Then drilled a second hold in the TB bracket to lock it in place. Fine adjustments can be made by bending the bracket as needed.


Works nicely with no binding or obstructions on either the throttle or the pull on the cruise. Adjusted the slack so that at full pull, it is just at full throttle. Loosely tie wrapped the cable to the linkage so it is a linear pull on the ball so no excessive side pull to stress the ball and socket.
That was the easy part, now have to start on the wiring and needed relays.
Question on the RPM output. Can I just tap into the phase sensor and use that signal or does it need to come from the dash signal. The connector is right in the V of the motor so full accessible at the moment. Also the speed sensor connector for the rear wheel is right beside the air box. Looks like everything will be fully accessible for me to tap into including the brake light wire as I have already tapped into it for my tailbox lights. Will need to run a wire for the clutch switch but don't think I will need it if I use the RPM signal.
Will post more on the wiring later. Hopefully get it done before the snow starts to fly.
Update, if anyone is interested........
Got everything working today. Found a tach signal from the coil and used the speed signal coming out of the ABS unit. Works great after a bit of fine tuning of the settings. Will need a little more once I can get it out for a longer ride, but engages, controls and disengages as designed. After some more research, ditched the beads on the control cable and removed all the slack other than 1/8".
Just need a bit more tuning and waterproof the switch.
Update, if anyone is interested........
Got everything working today. Found a tach signal from the coil and used the speed signal coming out of the ABS unit. Works great after a bit of fine tuning of the settings. Will need a little more once I can get it out for a longer ride, but engages, controls and disengages as designed. After some more research, ditched the beads on the control cable and removed all the slack other than 1/8".
Just need a bit more tuning and waterproof the switch.
Definitely interested as I am planning to do the same to my Stelvio in the Spring.
Cheers,
Shaun
Hang tight Shawn....have all the data and some pics, just need to find some time to get it together.
I thought I saw somewhere (Autotrader, kijiji...) that your Stelvio was for sale. Did I just dream that........
I thought I saw somewhere (Autotrader, kijiji...) that your Stelvio was for sale. Did I just dream that........
Hang tight Shawn....have all the data and some pics, just need to find some time to get it together.
I thought I saw somewhere (Autotrader, kijiji...) that your Stelvio was for sale. Did I just dream that........
Thanks -- will look forward to seeing the details of your installation. Seems like everyone has a slightly different approach, and I appreciate being able to learn from the experience of others.
Yes, indeed, I did have my Stelvio advertised for sale, as I am pressed for garage space (5 bikes and two project cars!), and wanted to make room to work on a car restoration over the winter. Lots of serious interest in the bike, but no one was able to complete, so I still have it. As a result, I have had to make other accommodations to be able to proceed with my project, and there is less urgency now to make space.
Also, In the meantime, I have kept riding the Stelvio, making improvements to it as I have gone along, and I find that I have become more and more attached to it in the process. It seems to have become my go-to bike for both travel and everyday rides, so I am seriously thinking about keeping it for the long term. Cruise control would make it that much better.
Cheers,
Shaun
OK folks here are the instructions for the install I just did for the Rostra Cruise on the 2012+ Stelvio NTX ABS. Posted it to the Stelvio Maintenance Tutorials Sticky Thread. Any questions, let me know.
https://www.guzzitech.com/forums/th...s-maintenance-tasks-on-the-stelvio-ntx.10815/
https://www.guzzitech.com/forums/th...s-maintenance-tasks-on-the-stelvio-ntx.10815/
