• Ciao Guest - You’ve landed at the ultimate Guzzi site. NEW FORUM REGISTRATIONS REQUIRE EMAIL ACTIVATION - CHECK YOUR SPAM FOLDER - Use the CONTACT above if you need help. New to the forum? For all new members, we require ONE post in the Introductions section at the bottom, in order to post in most of the other sections. ALWAYS TRY A SEARCH BEFORE STARTING A NEW TOPIC - Most questions you may have, have likely been already answered. DON'T BE A DRIVE-BY POSTER: As a common courtesy, check back in and reply within 24 hours, or your post will be deleted. Note there's decades of heavily experienced Guzzi professionals on this site, all whom happily give endless amounts of their VALUABLE time for free; BE COURTEOUS AND RESPECTFUL!
  • There is ZERO tolerance on personal attacks and ANY HYPERLINKS to PRODUCT(S) or other competing website(s), including personal pages, social media or other Forums. This ALSO INCLUDES ECU DIAGnostic software, questions and mapping. We work very hard to offer commercially supported products and to keep info relevant here. First offense is a note, second is a warning, third time will get you banned from the site. We don't have the time to chase repeat (and ignorant) offenders. This is NOT a social media platform; It's an ad-free, privately funded website, in small help with user donations. Be sure to see the GTM STORE link above; ALL product purchases help support the site, or you can upgrade your Forum profile or DONATE via the link above.
  • Be sure to see the GTM STORE link also above for our 700+ product inventory, including OEM parts and many of our 100% Made-in-SoCal-USA GTM products and engine kits. In SoCal? Click the SERVICE tab above for the best in service, tires, tuning and installation of our products or custom work, and don't miss our GT MotoCycles® (not) art on the BUILDS tab above. WE'RE HERE ONLINE ONLY - NO PHONE CALLS MADE OR RECEIVED - DO NOT EMAIL AND ASK QUESTIONS OR ASK TO CALL YOU.
  • Like the new V100, GuzziTech is full throttle into the future! We're now running on an all-new server and we've updated our Forum software. The visual differences are obvious, but hopefully you'll notice the super-fast speed. If you notice any glitches or have any issues, please post on the Site Support section at the bottom. If you haven't yet, please upgrade your account which is covered in the Site Support section or via the DONATE tab above, which gives you full site access including the DOWNLOADS section. We really appreciate every $ and your support to keep this site ad-free. Create an account, sign in, upgrade your account, and enjoy. See you on the road in 2024.

V7-850 Mods Thread

I cut off about 60mm from that standard cable including the bend at the handlebar lever end.
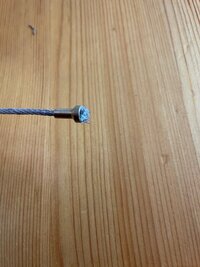
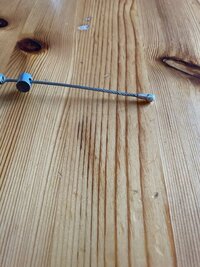
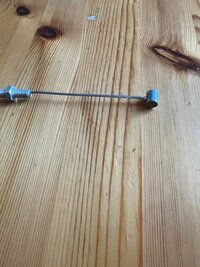
How did ya make the end stop thingy on the cable?
When I installed clip-ons on mine I chickened out cutting my cable LOL I have some screw-on end knobs but they don't look reliable to me so I just "made" some slack there or there. Mainly rerouted my clutch cable around my speedo
 
Although I cut the outer sheath at the handlebar end I cut the inner cable at the clutch end. I then soldered on a brass trumpet nipple and used the original barrel. At first I thought the cable was stainless steel and tested the soldering on a stainless steel bicycle brake cable but wasn't successful.

After testing the magnetism of the cable I realized it was galvanized wire which is relatively easy to solder. But first it has to be absolutely clean. I splayed out the wires for about 2 inches and cleaned them with alcohol, acetone, and brake cleaner. Then I had to twist them all back together again.

That was the hard part because it is 7 bundles x 7 strands making 49 thin wires that tangle with each other. After I had got them twisted back together I assembled the cable parts, again splayed out a short bit of the cable so that it seats into the brass trumpet.

Then dipped it into liquid flux for about 15 seconds, and then dipped it into a solder bath. The bath I made out of a 1/2 inch metal water pipe end cap that I heated with a small propane torch. I used none-cored solder 50/50 lead/tin.
The liquid flux I used is a product from Goot supposedly for stainless steel. It's an acid based flux.

The result came out quite well. When the weather warms up I'll test ride but several test pulls on the clutch lever indicates that it is strong enough.
 

Attachments

  • IMG_2562.jpg
    IMG_2562.jpg
    46.8 KB · Views: 17
  • IMG_2563.jpg
    IMG_2563.jpg
    70.2 KB · Views: 16
  • IMG_2565.jpg
    IMG_2565.jpg
    66.2 KB · Views: 16
I didn’t unwind the ends... big pita
I put the final 1/2 inch in battery acid for a while, rinse and go..
 
Interesting about the battery acid. I'll try that next time. As you can see from my earlier post I was a bit paranoid about failing to get it right and ruining my cable :)

Hindis, I've been looking at some of your posts. Jeepers, I'm surprised you chickened out on modifying your cable. With what you've already done I would have thought you would have made a custom carbon outer sheath with carbon threads for the cable LOL.
Fine... I'll fix it, I suppose... LOL
On a serious note, I won't touch mine while it's working fine, but now I know few tricks to try when I need it. Cheers!
 
Our new friend and customer Dana wanted a valve cover color change on this Centenario. The bronze we used on GTM-02.4 is just so right with this color combo. We might be able to offer a color exchange program if anyone is so interested. Email us direct; Sales @GTMotoCycles.com

5FAAB74A E7BB 4D5B AB7C BD9E0BB2192A 011B30EC 43CC 453F BEDA C2FEAF2C3B4D
 
Our new friend and customer Dana wanted a valve cover color change on this Centenario. The bronze we used on GTM-02.4 is just so right with this color combo. We might be able to offer a color exchange program if anyone is so interested. Email us direct; Sales @GTMotoCycles.com

View attachment 28771View attachment 28772
Ok how much for a color exchange? Those look sharp!
 
Today was one of the first warm days of the year. I was able to put the OEM tip-over bars that I ordered a couple of months ago. They went on extremely easily. not really much else to say except to be sure to only do one side at a time.

That said, I was not ready to tackle the centre stand today.
Guzzi-with-Tip-Over-Bars.jpg
 
Curious to know, for those of us not as mechanically inclined as all the people fabricating their own parts (you guys are awesome!), if I’m wanting to switch to clip ons is my only option to buy the whole OEM clip on kit? Just asking because I could possibly want bars that aren’t swept up like the OEM ones but haven’t found the cables sold separately.
 
I would get the handlebar first before you start buying cables and hoses! Sometimes it’s not even necessary to change… Just re-route...
This would be an alternative to clip ons as well...

And be aware there are a lot of clip on handlebars who are absolute trash and not safe!
 

Attachments

  • F6354D1C-5E72-4815-B45A-42470867DD96.png
    F6354D1C-5E72-4815-B45A-42470867DD96.png
    167.4 KB · Views: 5
I would get the handlebar first before you start buying cables and hoses! Sometimes it’s not even necessary to change… Just re-route...
This would be an alternative to clip ons as well...

And be aware there are a lot of clip on handlebars who are absolute trash and not safe!
Thanks for the tips! I remember having them put on my 2015 V7 and wasn’t sure if I needed a whole kit. At the time I just dropped my bike off at the shop and let them work on it with Tarozzi clip ons i provided. If I do put clip ons on my 850 then you’ve saved me a lot of money haha
 
Didn’t change anything on my 2022
Only the clutch cable needs more attention...
 

Attachments

  • F893C05D-0DFE-45FB-8F67-CA68AC57050A.jpeg
    F893C05D-0DFE-45FB-8F67-CA68AC57050A.jpeg
    111.2 KB · Views: 26
Wow... you certainly went in depth with the handlebar configuration and measurements!
I drew up a lot of things in my life but never that..
Now that’s a man with a plan!
 
I started the bikes own thread now of the build.. from the beginning....
Because I’m in it already for a few months it will be a time lapse and won’t drag on forever...
Look for it if interested...
 
Back
Top