Ciao Guest - You’ve landed at the ultimate Guzzi site. NEW FORUM REGISTRATIONS REQUIRE EMAIL ACTIVATION - CHECK YOUR SPAM FOLDER - Use the CONTACT above if you need help. New to the forum? For all new members, we require ONE post in the Introductions section at the bottom, in order to post in most of the other sections. ALWAYS TRY A SEARCH BEFORE STARTING A NEW TOPIC - Most questions you may have, have likely been already answered. DON'T BE A DRIVE-BY POSTER: As a common courtesy, check back in and reply within 24 hours, or your post will be deleted. Note there's decades of heavily experienced Guzzi professionals on this site, all whom happily give endless amounts of their VALUABLE time for free; BE COURTEOUS AND RESPECTFUL!
Be sure to see the GTM STORE link also above for our 700+ product inventory, including OEM parts and many of our 100% Made-in-SoCal-USA GTM products and engine kits. In SoCal? Click the SERVICE tab above for the best in service, tires, tuning and installation of our products or custom work, and don't miss our GT MotoCycles® (not) art on the BUILDS tab above. WE'RE HERE ONLINE ONLY - NO PHONE CALLS MADE OR RECEIVED - DO NOT EMAIL AND ASK QUESTIONS OR ASK TO CALL YOU.
There is ZERO tolerance on personal attacks and ANY HYPERLINKS to PRODUCT(S) or other competing website(s), including personal pages, social media or other Forums. This ALSO INCLUDES ECU DIAGnostic software, questions and mapping. We work very hard to offer commercially supported products and to keep info relevant here. First offense is a note, second is a warning, third time will get you banned from the site. We don't have the time to chase repeat (and ignorant) offenders. This is NOT a social media platform; It's an ad-free, privately funded website, in small help with user donations. Be sure to see the GTM STORE link above; ALL product purchases help support the site, or you can upgrade your Forum profile or DONATE via the link above.
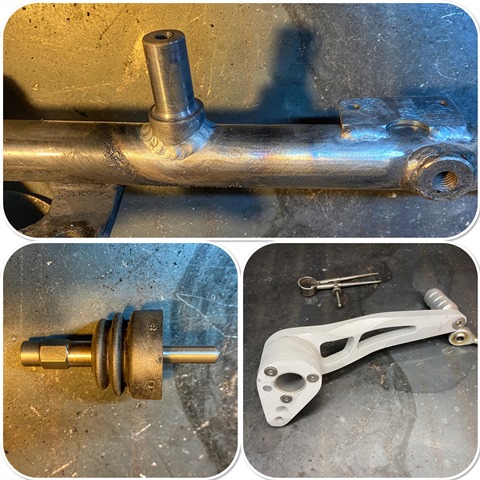
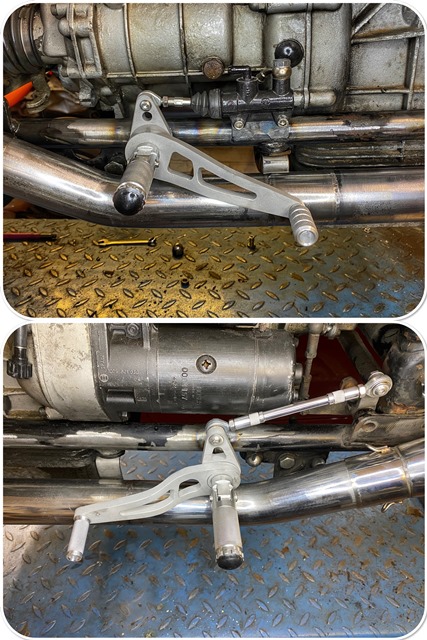
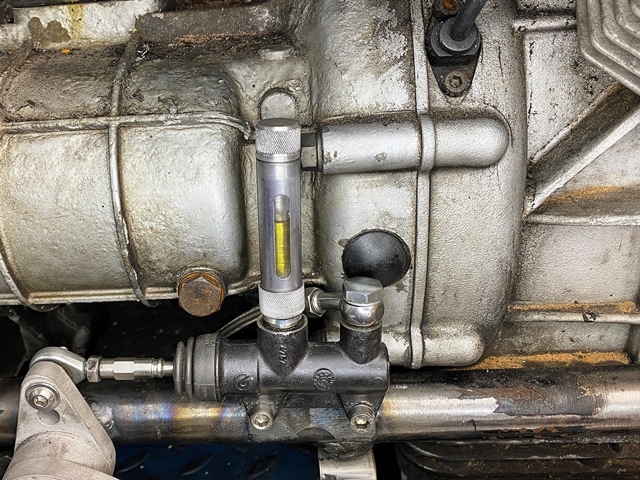
The finished results, apart from a good polish... As I am going to use a Ducati rear calliper, I have also used a Ducati Master cylinder, and also used the same leverage ratio for the pedal... here is a short video
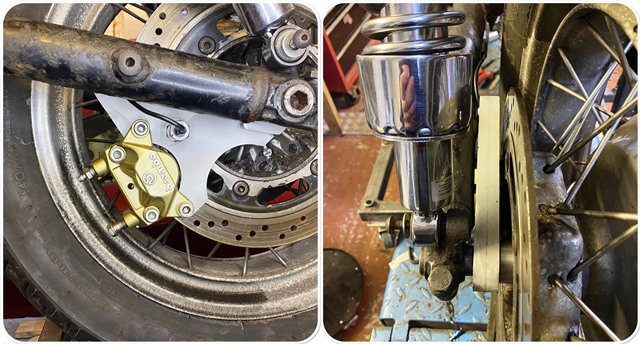
As I am taking off the linked brakes I needed to use a different rear caliper. I toyed around with making the rear caliper floating and using a torque arm… but in the end decided to use a neater, smaller bracket instead. It also meant that I could mount the speed sensor for the speedo as I am using a combined speedo / tacho.
Nice work. As an FYI... The 2-piston calipers will overheat and boil the fluid fast. I've made brackets to adapt the 4-piston caliper that comes on all of the California 1100s to the V11 Sports.
I'll keep watching here, thanks for the continuing posts.
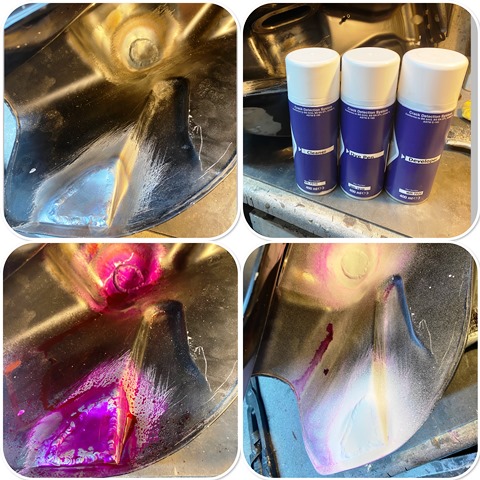
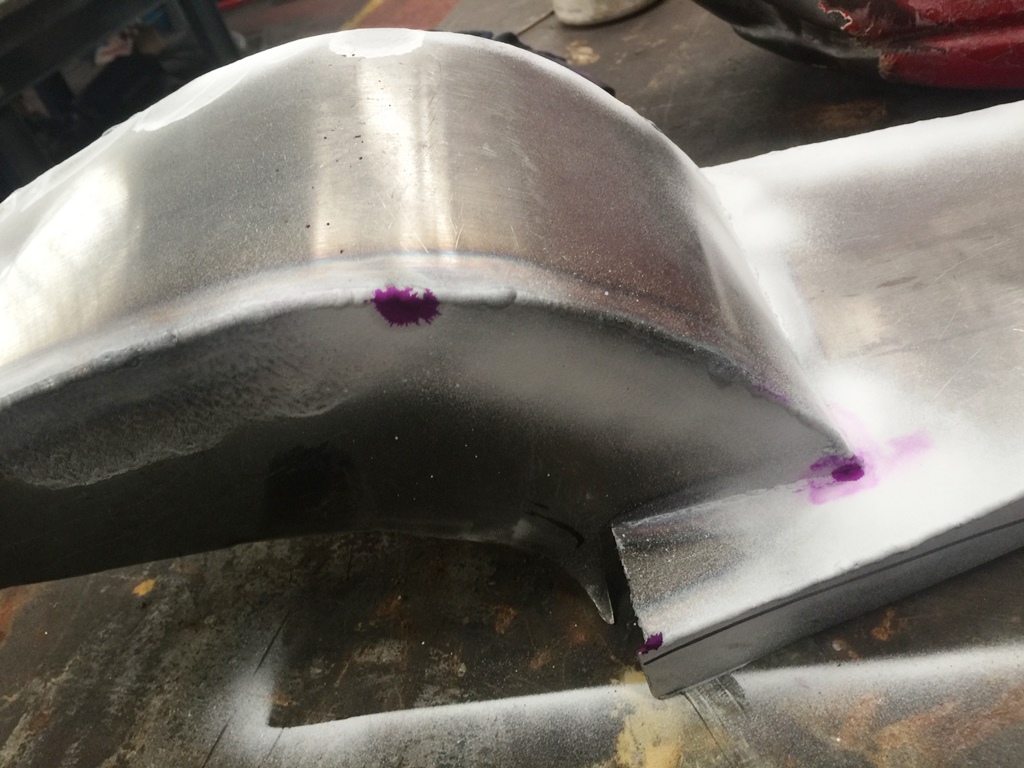
The tank I am using is off a V7… It was cheap to buy because it had a couple of big dents, which I have managed to get out. To do this I had to cut a couple of holes in the bottom to give access with a 20mm bar with a dome on the end, which I then used to knock most of the dent out, just needing a skim of filler. I then welded some plates on the holes and leak tested them with dye penetrant.
I use this a lot, its great for checking for holes and cracks, they show up immediately. fortunately all was good in this case. I prefer doing it this way to filling it with petrol as if you do have a leak its a pain to clean it out again. I have taken to using the dye penetrant on frames before I have them blasted… its surprising how many have cracks! especially Ducati!
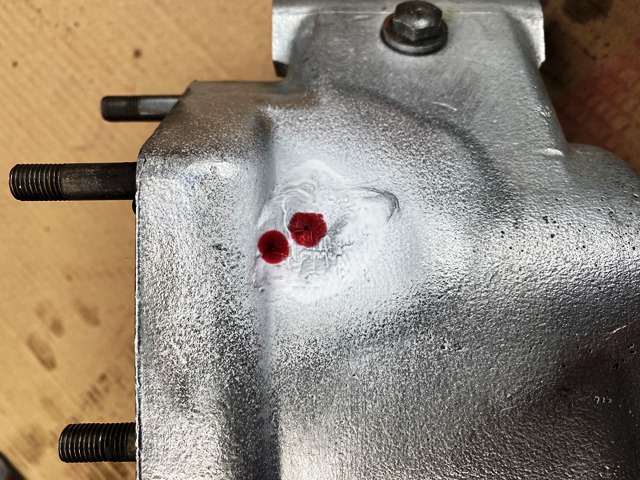
A while ago my mate welded an RGV 250 engine mounting on the alloy frame. When he had welded it, he used some dye penetrant around the joints on the frame to check for cracks… There were quite a few! he welded them up and re-checked. Here is a gearbox I recently welded that still had a leak after someone had already welded it, you could not see it with the naked eye, but its easily visible with the dye…
its a three tin kit, and its called NDT (none destructive testing) Dye Penetrant. here is a link below but of course I am in the UK, but you should find it across the pond!
there is a cleaner, dye, and developer. you clean the part to be tested first, spray on the dye, leave for 15 mins and wipe it off. Then you spray the developer on and that pulls any dye out of the cracks. its obvious where there is a crack. it also works well if you can spray the dye on from the back, and let it permeate any cracks and spray the developer from the front.
With the new master cylinder mounted I looked at a way of mounting a reservoir. I could have used one of the small plastic ones, but instead decided to make one. I am pleased with the way it came out! here is a short video of how I made it! Last update for a while... I have to go on holiday apparently!
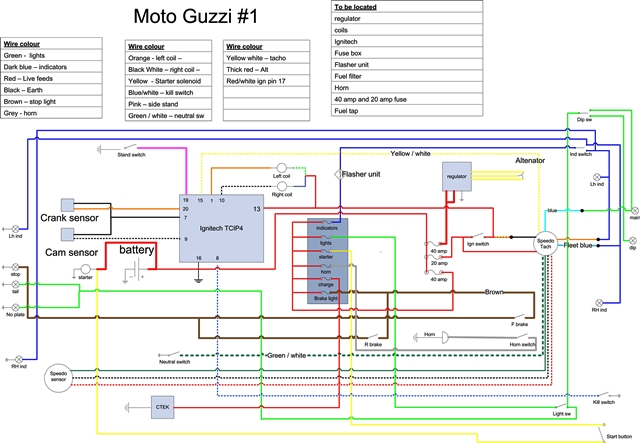
Back from holiday where I unfortunaly got a dose of the virus! Not too bad though, I have had worse colds… But for a few day I have kept out the garage, and did some computer time instead and constructed the wiring diagram… I like to keep it simple, and wire from scratch, so many builds are spoiled by patching up the old loom. I am using an ignitech for the ECU, and its interesting that the the unit uses the cam sensor for one cylinder, and the crank sensor for the other. I like that idea!
Back from holiday where I unfortunaly got a dose of the virus! Not too bad though, I have had worse colds… But for a few day I have kept out the garage, and did some computer time instead and constructed the wiring diagram… I like to keep it simple, and wire from scratch, so many builds are spoiled by patching up the old loom. I am using an ignitech for the ECU, and its interesting that the the unit uses the cam sensor for one cylinder, and the crank sensor for the other. I like that idea!
thats going to be a while... I tend to build the bikes up, do all the fabrication, paint it, and do the loom on the bike near the end...
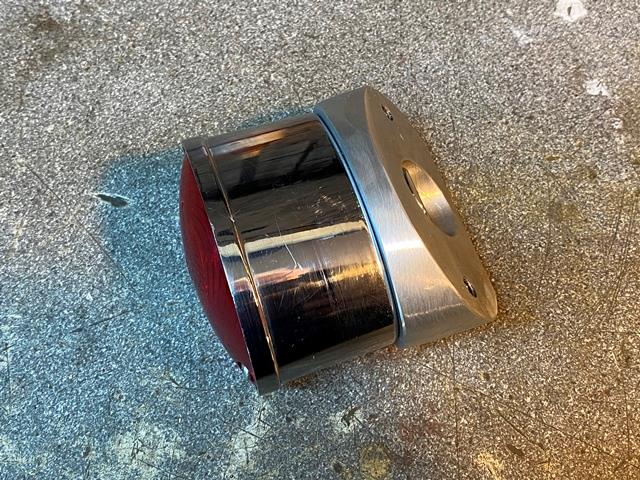
I have agonised over the rear light / number plate arrangement…
No matter how I plan it, it just does not look right with the number plate on the back, So I am going for a side mounted plate. that leaves the rear light to consider… the rear of the seat is angled (more later) so I needed an angled plinth to mount the light I am using on… here it is, bar a good polish.
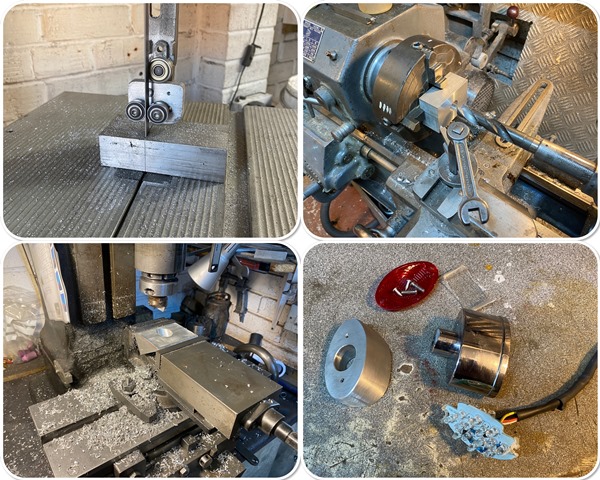
A new addition to the workshop is a bandsaw... How did I manage without one all these years! I modified the top and bottom guides so they have bearing supports and it works an absolute treat!
The tank I am using is off a V7… It was cheap to buy because it had a couple of big dents, which I have managed to get out. To do this I had to cut a couple of holes in the bottom to give access with a 20mm bar with a dome on the end, which I then used to knock most of the dent out, just needing a skim of filler. I then welded some plates on the holes and leak tested them with dye penetrant.
I use this a lot, its great for checking for holes and cracks, they show up immediately. fortunately all was good in this case. I prefer doing it this way to filling it with petrol as if you do have a leak its a pain to clean it out again. I have taken to using the dye penetrant on frames before I have them blasted… its surprising how many have cracks! especially Ducati!
A while ago my mate welded an RGV 250 engine mounting on the alloy frame. When he had welded it, he used some dye penetrant around the joints on the frame to check for cracks… There were quite a few! he welded them up and re-checked. Here is a gearbox I recently welded that still had a leak after someone had already welded it, you could not see it with the naked eye, but its easily visible with the dye…
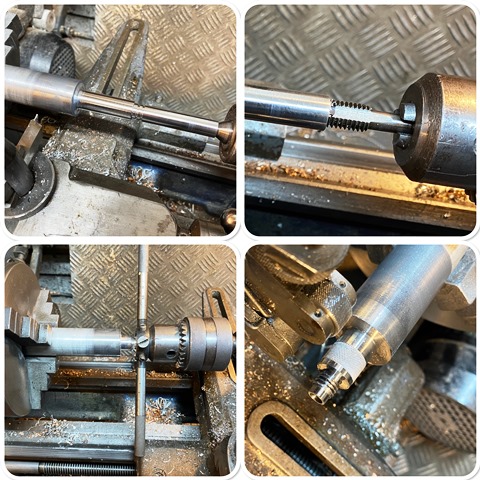
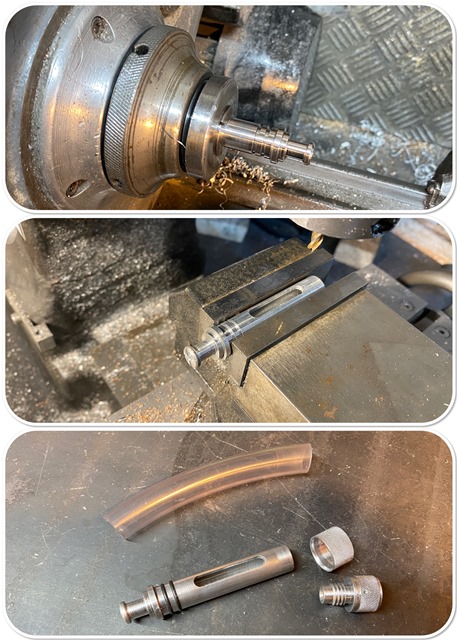
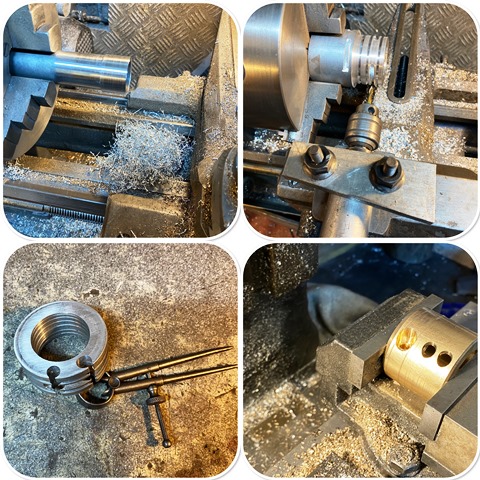
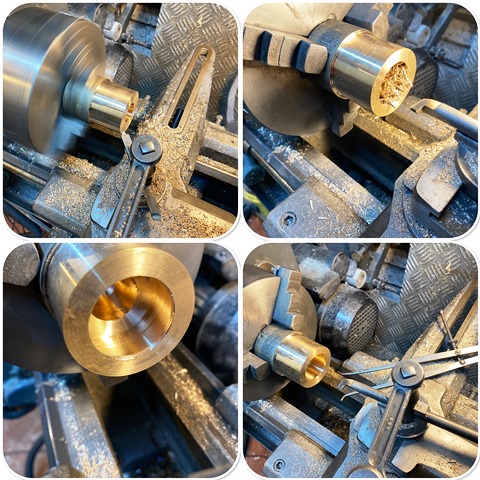
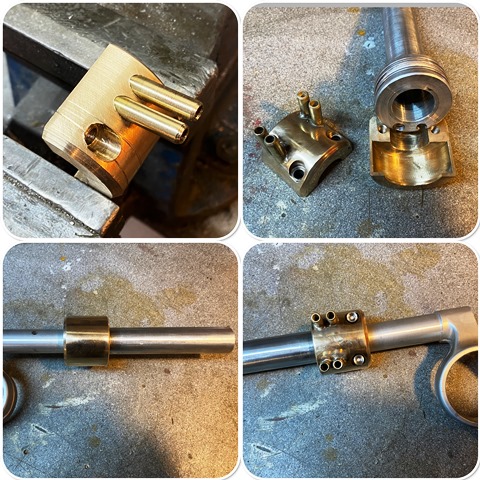
One thing I always like on a build is a light throttle… in these days of EFI its easy to forget just how heavy some carb throttles were, always a balance of lightness Vs a throttle spring strong enough to prevent sticking, As I am using flat slides on this build I really wanted to use a pull / pull throttle set up, which would either mean a pair of splitters, or a dual throttle. that way I can retain the light springs. Try as I might I couldn’t find a dual pull / pull one so I have ended up making one! If anyone knows of a company that makes them… DONT TELL ME! here is the story in pictures…
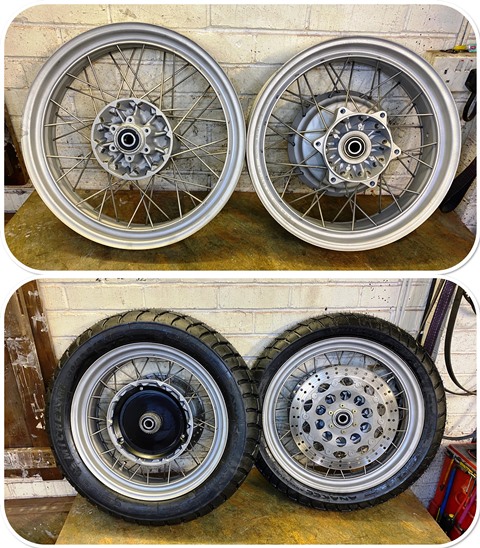
the wheels are back from the vapour blasters… they have come out FAR better than I expected, and I quite like the finish, so I will be leaving them as they are. just a coat of ACF – 50 should keep them looking good. the spokes are stainless and have also come up well. First time in MANY years I have put my own tyres on! they are tubeless so went on very easily. just got to get them balanced.