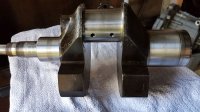
NPS, I feel your pain. I started a restoration on a 1926 Model T Ford in 2010. That T is one my Dad purchased in 1967 and I drove it when I was a teenager. Last time it was on the road was 1969 and after 41 years of neglect in a shed it was a daunting task. Many trials and tribulations, not to mention cost. Hang in there as it seems that bike has a special place for you just as the model T does for me.
Navigation
Install the app
How to install the app on iOS
Follow along with the video below to see how to install our site as a web app on your home screen.
Note: This feature may not be available in some browsers.
More options
-
Ciao Guest - You’ve landed at the ultimate Guzzi site. NEW FORUM REGISTRATIONS REQUIRE EMAIL ACTIVATION - CHECK YOUR SPAM FOLDER - Use the CONTACT above if you need help. New to the forum? For all new members, we require ONE post in the Introductions section at the bottom, in order to post in most of the other sections. ALWAYS TRY A SEARCH BEFORE STARTING A NEW TOPIC - Most questions you may have, have likely been already answered. DON'T BE A DRIVE-BY POSTER: As a common courtesy, check back in and reply within 24 hours, or your post will be deleted. Note there's decades of heavily experienced Guzzi professionals on this site, all whom happily give endless amounts of their VALUABLE time for free; BE COURTEOUS AND RESPECTFUL!
-
There is ZERO tolerance on personal attacks and ANY HYPERLINKS to PRODUCT(S) or other competing website(s), including personal pages, social media or other Forums. This ALSO INCLUDES ECU DIAGnostic software, questions and mapping. We work very hard to offer commercially supported products and to keep info relevant here. First offense is a note, second is a warning, third time will get you banned from the site. We don't have the time to chase repeat (and ignorant) offenders. This is NOT a social media platform; It's an ad-free, privately funded website, in small help with user donations. Be sure to see the GTM STORE link above; ALL product purchases help support the site, or you can upgrade your Forum profile or DONATE via the link above.
-
Be sure to see the GTM STORE link also above for our 700+ product inventory, including OEM parts and many of our 100% Made-in-SoCal-USA GTM products and engine kits. In SoCal? Click the SERVICE tab above for the best in service, tires, tuning and installation of our products or custom work, and don't miss our GT MotoCycles® (not) art on the BUILDS tab above. WE'RE HERE ONLINE ONLY - NO PHONE CALLS MADE OR RECEIVED - DO NOT EMAIL AND ASK QUESTIONS OR ASK TO CALL YOU.
-
Like the new V100, GuzziTech is full throttle into the future! We're now running on an all-new server and we've updated our Forum software. The visual differences are obvious, but hopefully you'll notice the super-fast speed. If you notice any glitches or have any issues, please post on the Site Support section at the bottom. If you haven't yet, please upgrade your account which is covered in the Site Support section or via the DONATE tab above, which gives you full site access including the DOWNLOADS section. We really appreciate every $ and your support to keep this site ad-free. Create an account, sign in, upgrade your account, and enjoy. See you on the road in 2024.
You are using an out of date browser. It may not display this or other websites correctly.
You should upgrade or use an alternative browser.
You should upgrade or use an alternative browser.
Breva 1100 Restoration Project
- Thread starter NPS
- Start date
NPS, I forgot to mention, it helps to place an index mark on the rear main carrier. There are oil passages internal to the carrier that must be lined up to the passageways in the block.
OK got that. I measured the clearance with plastigauge and I got 0.0019 (after conversion from metric) on both sets of shells.
Is it a complete no no to reuse the big end bolts?
Is it a complete no no to reuse the big end bolts?
Is it a complete no no to reuse the big end bolts?
Depends on the type of bolts. If they are stretch type then a definite yes, don't re-use them. If standard bolts, as used on the older bikes, I have re-used them but some say not to. In the end it is up to you, your bike. New bolts would be cheap insurance and peace of mind.
The bolts have a number ridges machined into them. I suspect they are stretch bolts and I will replace. Thank you again for your advice.
I'm going to include a bit more information in my renovation as someone may be doing this or will do something similar in future.
I ordered online a 34mm deep socket 1/2 inch drive to undo the last remaining nut (Cranskshaft) of the three timing chain sprockets. When I rotated the crank with the flywheel, I was surprised about the roughness of the teeth engaging sprocket teeth. Oh no, not another problem I thought! But if I went faster the roughness diminished. Odd that I would have thought chain engaging these sprockets would be quite smooth. The tensioner has taken some wear and needs replacing. If I remember I will take a photo tomorrow. On initial examination the sprocket teeth look fine on all three wheels. I will look in more detail when I have them off. So far the other two sprockets appear easy to slide off when the nuts are removed.
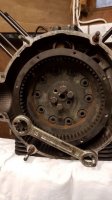
I have a very simple method to replace the tool to lock the flywheel. After removing the outer clutch there is a series of M6 threaded holes around the circumference. I use the double ended ring spanner from the toolkit and place this over a M6 bolt on the flywheel and one of the gearbox engine studs. The bolts are a little small I admit but they are far from the centre and will have an order of magnitude less stress than that on the end nut I have to undo.
Just got some photos. This is the view of the timing chain and wheels.
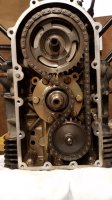
Here is the worn tensioner
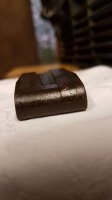
Rust end of crankshaft after the seal, where the alternator pully attaches.
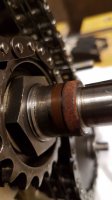
My very rough method to stop the crank from turning. It works!
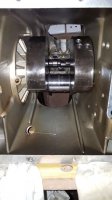
This is a view up inside the engine from the bottom showing the crank and the cam above. Notice the machinist wasnt that careful and left a scratch inside from the dipstick hole. Or some other explanation.
I'm going to include a bit more information in my renovation as someone may be doing this or will do something similar in future.
I ordered online a 34mm deep socket 1/2 inch drive to undo the last remaining nut (Cranskshaft) of the three timing chain sprockets. When I rotated the crank with the flywheel, I was surprised about the roughness of the teeth engaging sprocket teeth. Oh no, not another problem I thought! But if I went faster the roughness diminished. Odd that I would have thought chain engaging these sprockets would be quite smooth. The tensioner has taken some wear and needs replacing. If I remember I will take a photo tomorrow. On initial examination the sprocket teeth look fine on all three wheels. I will look in more detail when I have them off. So far the other two sprockets appear easy to slide off when the nuts are removed.
I have a very simple method to replace the tool to lock the flywheel. After removing the outer clutch there is a series of M6 threaded holes around the circumference. I use the double ended ring spanner from the toolkit and place this over a M6 bolt on the flywheel and one of the gearbox engine studs. The bolts are a little small I admit but they are far from the centre and will have an order of magnitude less stress than that on the end nut I have to undo.
Just got some photos. This is the view of the timing chain and wheels.

Here is the worn tensioner

Rust end of crankshaft after the seal, where the alternator pully attaches.

My very rough method to stop the crank from turning. It works!

This is a view up inside the engine from the bottom showing the crank and the cam above. Notice the machinist wasnt that careful and left a scratch inside from the dipstick hole. Or some other explanation.

Last edited:
John, I tried http://cylinderheadshop.com/k-line-guide-liners/ but they were overwhelmed with work. I found another shop that does k-line guides in Slough http://www.hthoward.co.uk. that will do the four, seat cutting and regrinding for £229. That puts my costs for the engine and clutch at around £800 approx.
Having the factory tool for the flywheel and ring gear does make life easier when you go to put it back together. These guys in the US have a tool at a good price. http://www.mgcycle.com/index.php?main_page=product_info&cPath=80&products_id=332 They also have the clutch plate alignment tool http://www.mgcycle.com/index.php?main_page=product_info&cPath=80&products_id=2618 The clutch tool is on back order so you may want to get these ordered soon for re-assembly.
I think I will make my own tool and save $50. But thank you for the links.
My socket came and I was able to remove the timing chains and sprockets together. Sprocket teeth look fine.
The camshaft is out and everything was easy.
I removed the oil pump and not much to say other than all looks ok.
I will do the mains and crank in the next few days.
I forgot to say I dusted of Guzziology last night. Forgot I had it. Its about two years old so includes the Breva. I read that those oil holes in the conrods are designed to provide extra lub to the cylinder and pistons. They do face one way.
I took some shots of the cam. Strange wavy lines of wear but this could be from the harmonics of the valve springs or not that simple as that would happen over different rev speeds. I looked with that 10x magnifying glass and saw the impression of the tappet with rings on the surface and that is off centre on the third cam from the top. Is the one side of the came higher than the other to induce the tappets to rotate I wonder.
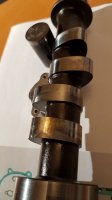
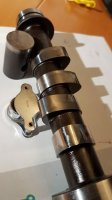
I know the fourth cam is even more wavy.
Does anyone think that the machining is out front to back on the crankcase bearings to cause this? But the first two cams are out the other way so perhaps not.
Edit: Took a shot after rotation 180 degrees. Similar wear pattern.
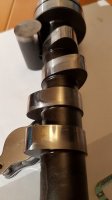
So the tappet holes are likely to be slightly angled or something else.


I know the fourth cam is even more wavy.
Does anyone think that the machining is out front to back on the crankcase bearings to cause this? But the first two cams are out the other way so perhaps not.
Edit: Took a shot after rotation 180 degrees. Similar wear pattern.

So the tappet holes are likely to be slightly angled or something else.
Last edited:
I have had an email to tell me the frame, stand and engine mountings are ready to pick up after powder coating. Going tomorrow and will take a few photos. The first parts to reassemble after the engine is back together.
Bisbonian
Cruisin' Guzzisti
Is the one side of the came higher than the other to induce the tappets to rotate I wonder.
The cam lobes and the bottom of the lifters will be "beveled" rather than flat as you noticed. This promotes spinning of the lifters in the bore.
I've always been told that if I were to install a used camshaft that I should use the lifters that were originally installed with that cam and they should be installed on the same cam lobes they ran on. Normally there was also specific break-in processes for cams.
This is from my old small-block Chevy days with aftermarket cams, things could have changed.
I have the frame and other parts back after powder coating. Nice finish and very tough!
I used a local restoration business to send the frame away. They took the bearings for the steering and swing arm out with the correct tool I did not have. The original bearings have gone back in as they were serviceable.
They also removed the VIN plate and reattached. http://www.rc-mr.com/
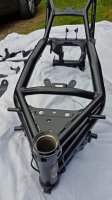
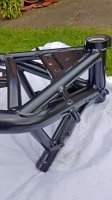
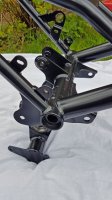
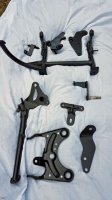
I used a local restoration business to send the frame away. They took the bearings for the steering and swing arm out with the correct tool I did not have. The original bearings have gone back in as they were serviceable.
They also removed the VIN plate and reattached. http://www.rc-mr.com/


Last edited:
You will have to grind a couple places in order to get good engine to frame grounding. Also adding some grounding wires may be a good idea from the engine to frame so all the components have a good ground. Be sure the ECU ground is good on assembly. Not having a good ground can damage the ECU.
Thanks John, I know about earthing from my 850T3 experience. I cant remember but something about blown fuses but might be wrong. A long time ago. I remember adding extra earthing to the front forks and the frame.
I found out today I could have had the cam re-profiled and surface hardened. I have however already purchased a second hand camshaft from RebootGuzziSpares in France at a good price. I wish I had gone for a resurfaced cam when I'm going to be running new cam followers.
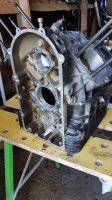
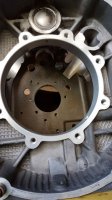
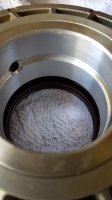
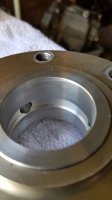
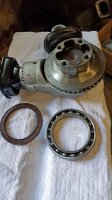
Have separated the CARC. The large main bearing feels as though it has too much play. Subjective I know. I tried to measure the inner race movement and the best I could get is in between 12 and 19 thou. It's a C3 grade. I read about that today and will read some more. I have replaced the seal twice so this might be the cause.

Last edited:
Lol. No one has noticed I use my penknife to remove gaskets! Value is immaterial apart from insurance as I wont be selling it. Thanks for your respect but not hard with the end goal in mind.
I dismantled the front forks and left the oil to drain under cover. Nothing to worry about internally. The ally lowers are quite corroded. I plan to have then shot blasted and then pitting filled in with filler and smoothed ready for powder coating in silver.
My last job to remove all bolts (not stainless) for Nickel Chrome plating was to tackle the foot rests. They are off now. The pins that hold them on came out easily but are quite rust. Might replace them. I'm going to send the box of fasteners off for plating soon as this takes several weeks due to demand and the long waiting list. I have a few of the stainless fasteners that I will replace with close matches or Guzzi originals. Now is the time to get some orders in for a number of parts that may be harder to source. So several weeks I see before I have several parts in that I will need to move on.
I now have the bike completely dismantelled down to the last screw and bolt, I think.
The suspension alloy pieces need work. One needle roller bearing was completely seized. I need to read up on how to remove the needle roller bearings. I will use new bearings and pins all round and that will be expensive. Essential though.
In the short term I now plan to work on the engine to get it ready to place back in the renovated frame. That is my starting point to the rebuilding. I need to paint the crankcase and have the gearbox blasted and repainted by hand. I need engine seals, bearing shells, big end bots and gaskets. Camshaft is coming this week, followers and the new valve guides. Also new clutch plates and reattach the gearbox.
After that Then I will add the renovated front forks and work on from there.
This is my plan but this will take a long time as there is much to do.

