• Ciao Guest - You’ve landed at the ultimate Guzzi site. NEW FORUM REGISTRATIONS REQUIRE EMAIL ACTIVATION - CHECK YOUR SPAM FOLDER - Use the CONTACT above if you need help. New to the forum? For all new members, we require ONE post in the Introductions section at the bottom, in order to post in most of the other sections. ALWAYS TRY A SEARCH BEFORE STARTING A NEW TOPIC - Most questions you may have, have likely been already answered. DON'T BE A DRIVE-BY POSTER: As a common courtesy, check back in and reply within 24 hours, or your post will be deleted. Note there's decades of heavily experienced Guzzi professionals on this site, all whom happily give endless amounts of their VALUABLE time for free; BE COURTEOUS AND RESPECTFUL!
  • There is ZERO tolerance on personal attacks and ANY HYPERLINKS to PRODUCT(S) or other competing website(s), including personal pages, social media or other Forums. This ALSO INCLUDES ECU DIAGnostic software, questions and mapping. We work very hard to offer commercially supported products and to keep info relevant here. First offense is a note, second is a warning, third time will get you banned from the site. We don't have the time to chase repeat (and ignorant) offenders. This is NOT a social media platform; It's an ad-free, privately funded website, in small help with user donations. Be sure to see the GTM STORE link above; ALL product purchases help support the site, or you can upgrade your Forum profile or DONATE via the link above.
  • Be sure to see the GTM STORE link also above for our 700+ product inventory, including OEM parts and many of our 100% Made-in-SoCal-USA GTM products and engine kits. In SoCal? Click the SERVICE tab above for the best in service, tires, tuning and installation of our products or custom work, and don't miss our GT MotoCycles® (not) art on the BUILDS tab above. WE'RE HERE ONLINE ONLY - NO PHONE CALLS MADE OR RECEIVED - DO NOT EMAIL AND ASK QUESTIONS OR ASK TO CALL YOU.
  • Like the new V100, GuzziTech is full throttle into the future! We're now running on an all-new server and we've updated our Forum software. The visual differences are obvious, but hopefully you'll notice the super-fast speed. If you notice any glitches or have any issues, please post on the Site Support section at the bottom. If you haven't yet, please upgrade your account which is covered in the Site Support section or via the DONATE tab above, which gives you full site access including the DOWNLOADS section. We really appreciate every $ and your support to keep this site ad-free. Create an account, sign in, upgrade your account, and enjoy. See you on the road in 2024.

Guzzi 1100 Custom build

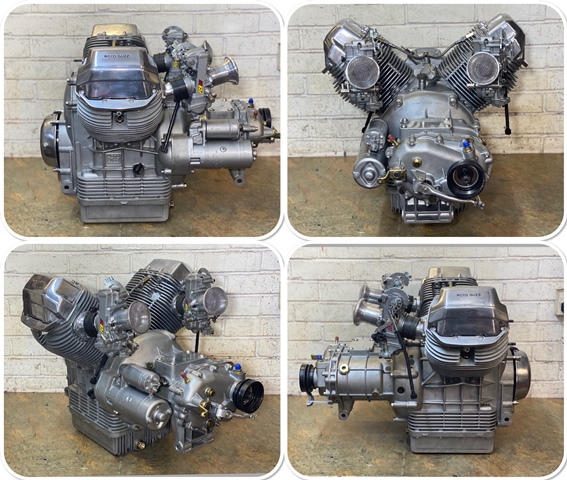
There are many roads to Rome, right?

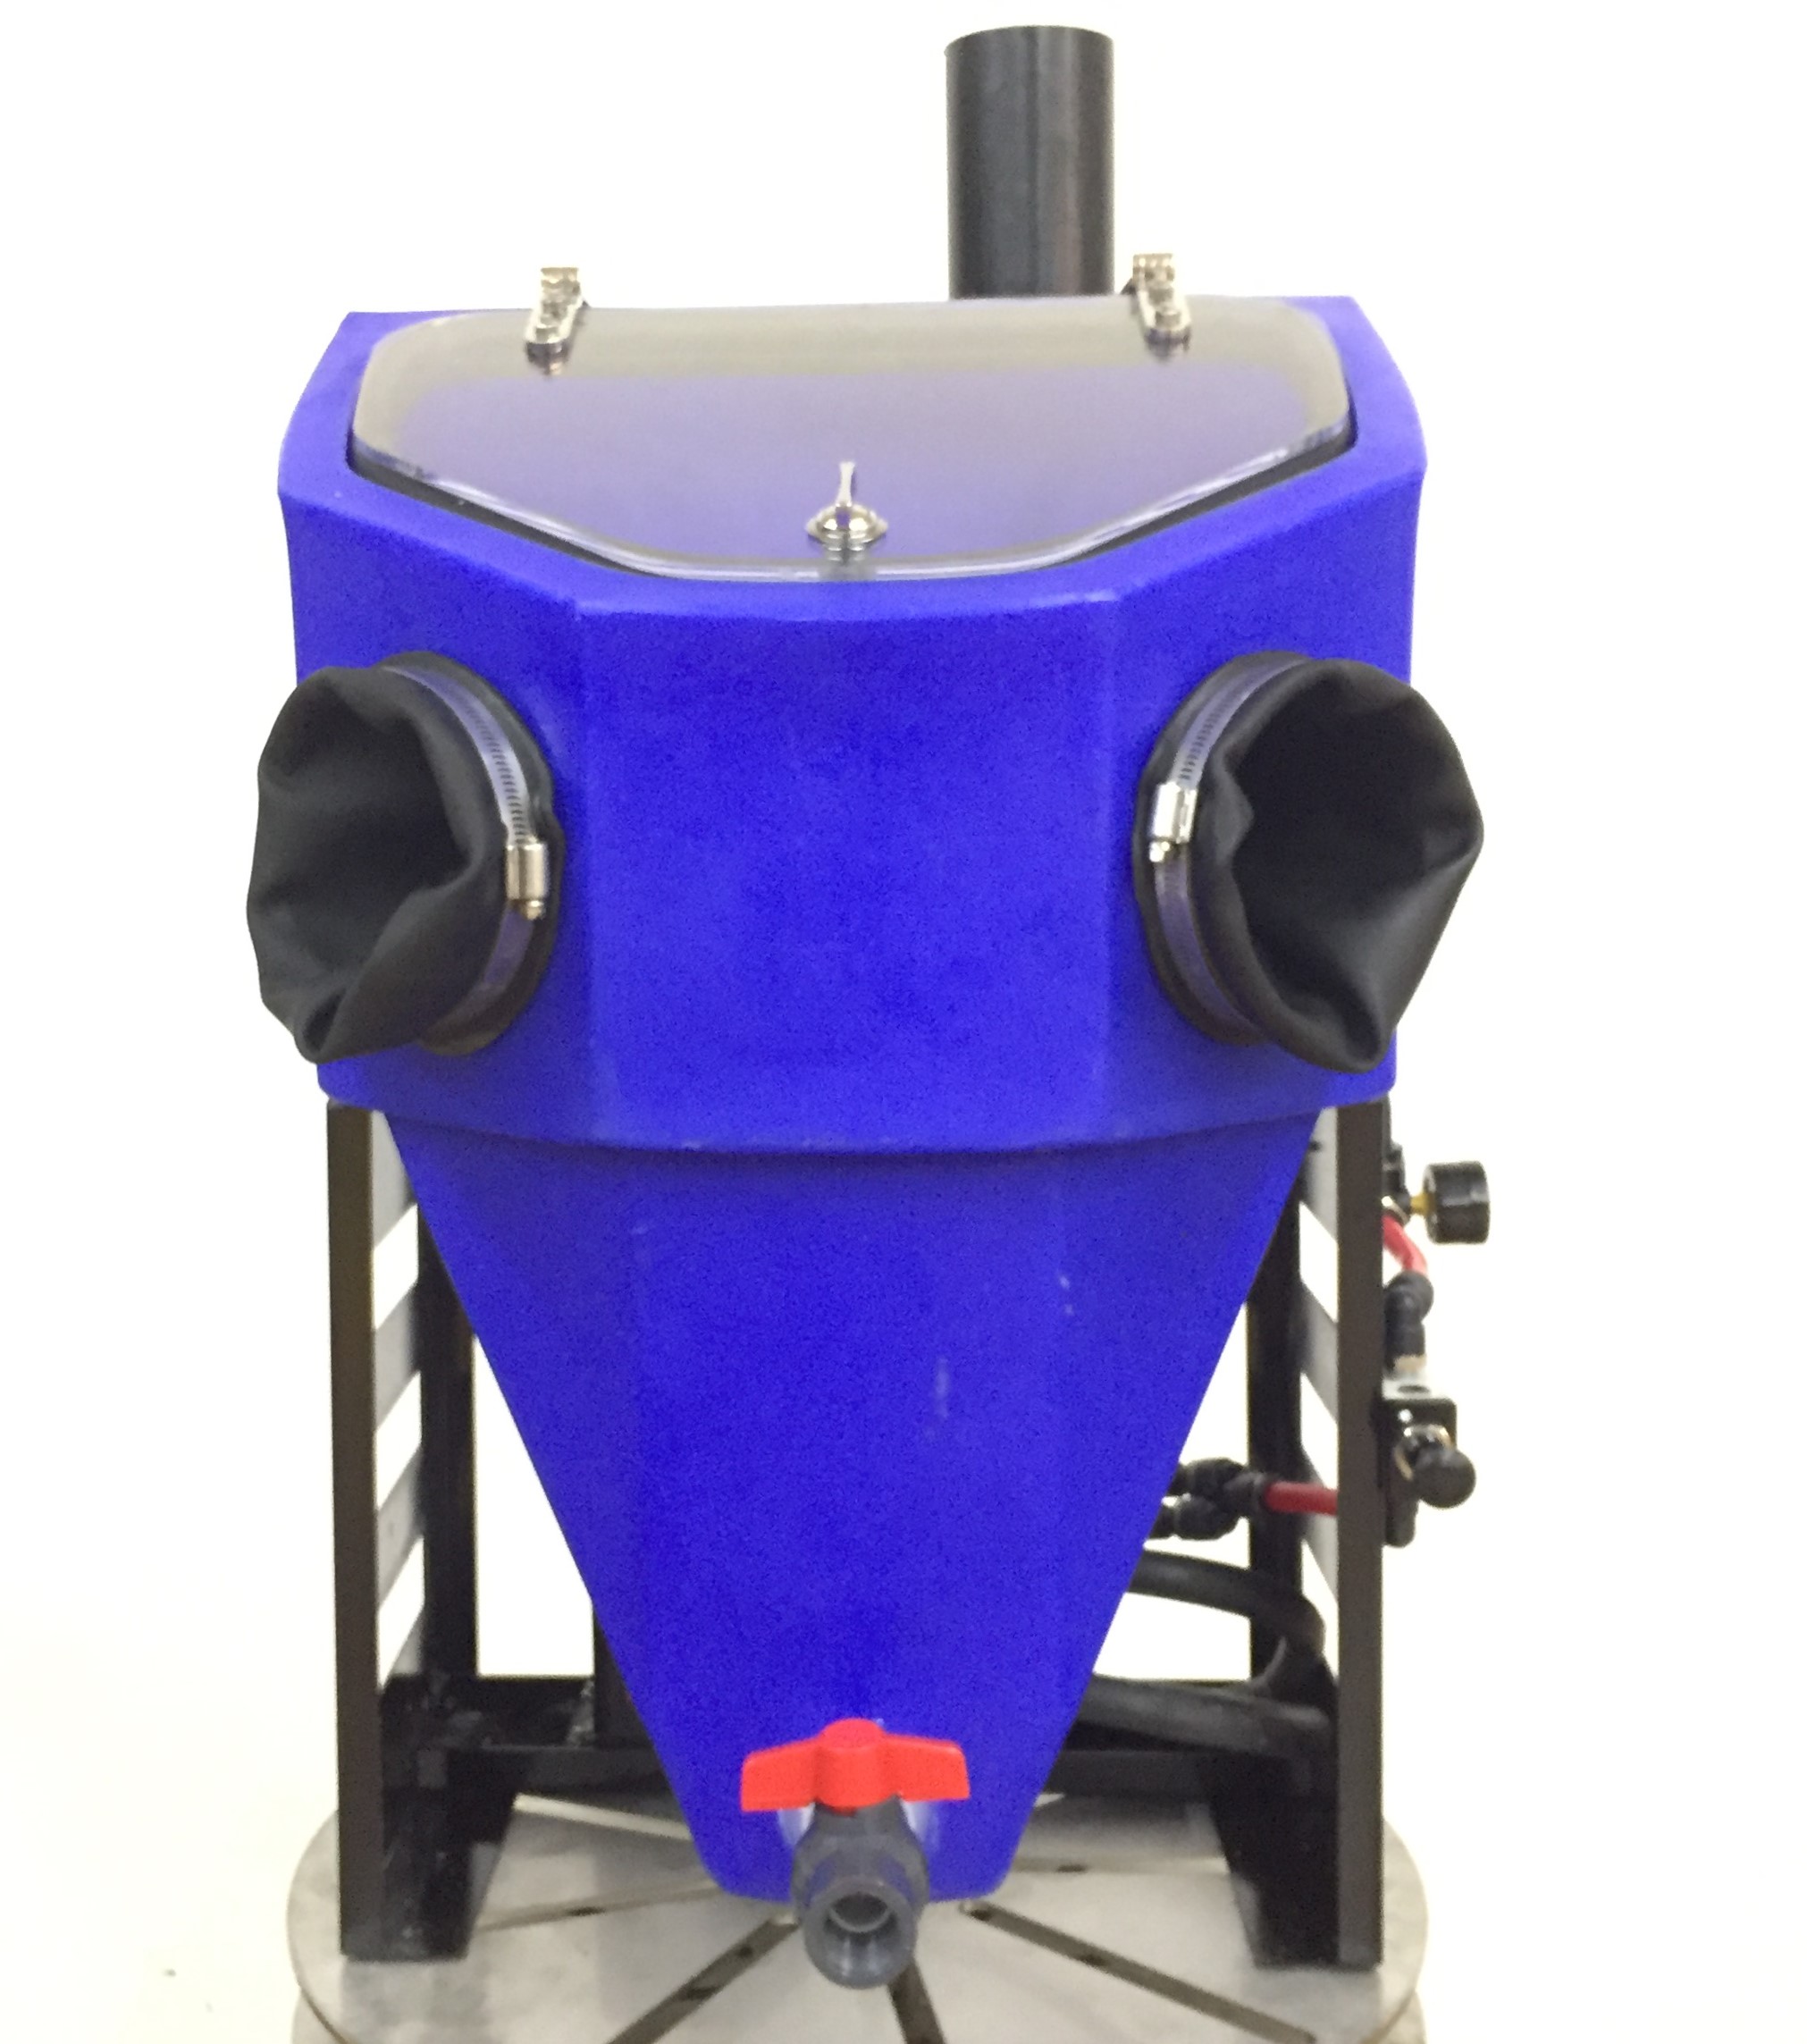
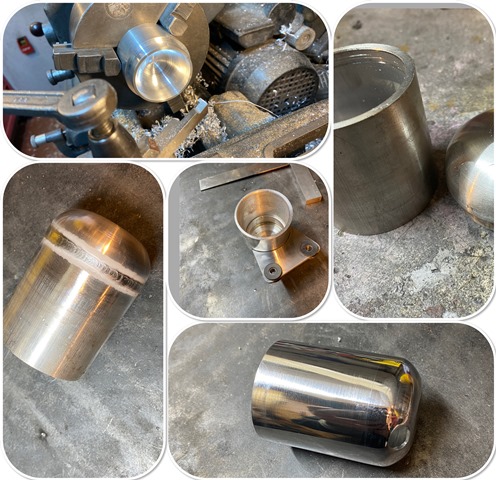
I have 2 cabinets in my workshop. One glass bead as well and the other dry soda.

I really am looking forward to a vapour blasting cabinet next year though.
 
spot on, many roads to Rome! I must try soda in mine...i have some delicate carbs I need to do...

Onto building the engine… of note is the tool to compress the clutch, which is actually the centre splines off the gearbox, and a threaded bar into the crankshaft. this makes the plates perfectly aligned and makes fitting the gearbox easy.

next the cylinder heads… it took three attempts on these to get the bead out of one oilway! note the new tin of grinding paste, the old one has run out of the fine end, but it was 50 years old, I can remember my Dad buying it me as a teenager! Good to see the company is still going and using the same tin! Just to be sure I checked the bores for wear… there is none at all! Got to love Nikasil bores!

here is the engine and gearbox all back together… I decided to add some accurate timing marks on the flywheel for each cylinder so I can use a strobe and see what’s happening in reality. used my new digital DTI gauge… not sure I like it… watching that needle go round is far more satisfying!

and finally its all back together and ready to go into the frame


engine-1-copy.jpg


cylinder-heads-copy.jpg


timing-marks-copy.jpg


guzzi-finished-engine-2-copy.jpg


guzzi-finished-engine-copy.jpg
 
Beautiful workmanship! My compliments Sir.

FWIW: I am probably going to procure my initial vapour blast cabinet from this company. I’ve heard nothing but positive things about them and their guaranteed upgrade program is right up my alley in that initially. I am going to buy the $1,000 table top model strictly for carburetor work. Then I will make the jump to the $4k range for the larger bench top model.

Who knows, if it generates good income for me, I may go up to a commercial size model but $8k-$12k is a lot of money for a piece of equipment.

Baby steps…

 
Last edited:
I am going to buy the $1,000 table top model strictly for carburetor work. Then I will make the jump to the $4k range for the larger bench top model.
Scott, I've owned the Micro for ~4 years. Worth every penny. We have a local guy with the big tank versions for bigger work (who's made a business of just that), but the Micro handles 75% of everything we need done.
 
Awesome to hear Todd! Thank You Very Much.

I’ve been impressed with this company and I’m definitely going to pull the trigger on it now.

Thanks so much my brother!
 
I didn't want to use the frame as a breather as it can rot them out, and rust partials can drop down so I am told... so I decided to make a new breather the vent the crank case and also the heads. Here is is... will it work? Who knows, we will see!!

breather-copy.jpg
 
Two jobs today... first was to make a paddock stand. I hate the universal ones as they are very difficult to get a bike on one on your own..., and often not that secure. this one positively locks onto the wheel spindle, and when its on the lift I can clamp it to the top so its nice and secure.


The second was to make some bushes out of bronze to take the play put of the clutch lever as the hole had worn oval. I drilled it out and made some over size top hat bushes. Finally, here it is on its wheels!


side-on-wheels-3.jpg
 
I pondered for a long time on the throttle arrangement for this bike… I wanted to keep the pull to open, pull to close for a couple of reasons… First, its safer… manufactures didn’t go to this arrangement for no reason as bikes evolved. Second, it means you can have much lighter return springs, which in turn males the throttle much lighter, particularly if you are going for a quick action. . A light fast action action throttle feels like you have 20 BHP more!

I couldn’t find a 4 cable throttle anywhere, so I ended up making one from scratch…

throttle-1-copy.jpg


throttle-2-copy.jpg
 
I needed to make some brackets out of alloy tube, but of you squash the ends in the vice it looks crap… so I made this little die that profiles the ends round which also make them stronger.

stays.jpg


stays-1.jpg
 
I wanted to add some custom detail onto the bike, in particular on the valve covers... So I tried the technique of etching alloy... have to say it worked rather well! Oh, and although those indicators are small, they are amazingly bright!


rear-end.jpg
 
I love watching this thread and I am amazed at the skills that you and Todd and others show in caring for their bikes. But you need to understand sometimes the state of misery that you let hacks like myself fall into, as we read and view such wonderful skillsets.
Thanks so much and pass the Ativan!
 
I often think that I will engage in this type of stuff when I retire. As if I will ever have time to do stuff like this... Maybe, but I'm not holding my breath about it! :D

Without a doubt, my FAVORITE part of this motorcycle is the "Construito, non Acquistato". That is simply PRICELESS and the best thing I have ever seen on a motorcycle, ever. :h::h::h: If I had a custom motorcycle building company like Todd and GTM, then that would be my company slogan! It's just awesome.

Kudos on that amazing detail!
 
Thanks guys!

Onto for me what is the most enjoyable part of a build... the wiring. I have a process for this I stick to. First I draw out the wiring diagram in Microsoft Visio, and colour code the wires. Then I order the wire in, which is quite cheap and any connectors I need. So often the standard of the electrics is what make a bike trouble free in the future. I then build the loom actually on the bike, circuit by circuit, wire by wire, which I hold temporarily in place with some Velcro cable ties. When its all in place I use that braided sheathing and close the ends with heat shrink tubing. it make a neat job. Rather than connect the main battery leads up, I use a fly lead with a 10 amp fuse just in case I make a mistake. I crimp, and if needed solder every joint. I have rubber mounted the coils and put them on an alloy heat sink. I also like to make my own HT leads out of solid copper lead, so I can get them to fit perfectly...

I have also used up the last of the Tygon fuel tube I had in stock... Its 8mm ID and I am unable to source any more without buying a large quantity, which is really annoying.

wire-2.jpg


wire-1.jpg
 
Back
Top